Sentry Integration
Sentry offers code-level application monitoring from error tracking to performance monitoring. With Sentry, you can catch errors, manage the health of your releases, and resolve latency issues for your site.
Use the Sentry Integration with Netlify to add Sentry error monitoring to Netlify Functions, Scheduled Functions, and Background Functions. With the Sentry Integration, you can monitor your functions with errors consolidated in one place, and use Sentry Cron Monitoring on Scheduled Functions with minimal configuration.
Function monitoring vs. release management plugin
This beta feature, Sentry Integration for function monitoring, is different from the Sentry release management build plugin. You don’t need to enable the build plugin to use the function monitoring integration. If you’re already using the build plugin, any settings already configured will continue to work as expected.
# Before you begin
To get started with the Sentry Integration on Netlify, make sure you have the following prerequisites:
# Create a function that uses error monitoring
With the Sentry Integration, you can add error monitoring to your Netlify Functions. To get started and enable the integration, install the necessary dependencies to your project:
npm install @netlify/sentry @netlify/integrations
Sentry automatically assigns a Data Source Name (DSN) when you create a project to start monitoring events in your app or site. Use this DSN to set an environment variable for your Netlify site:
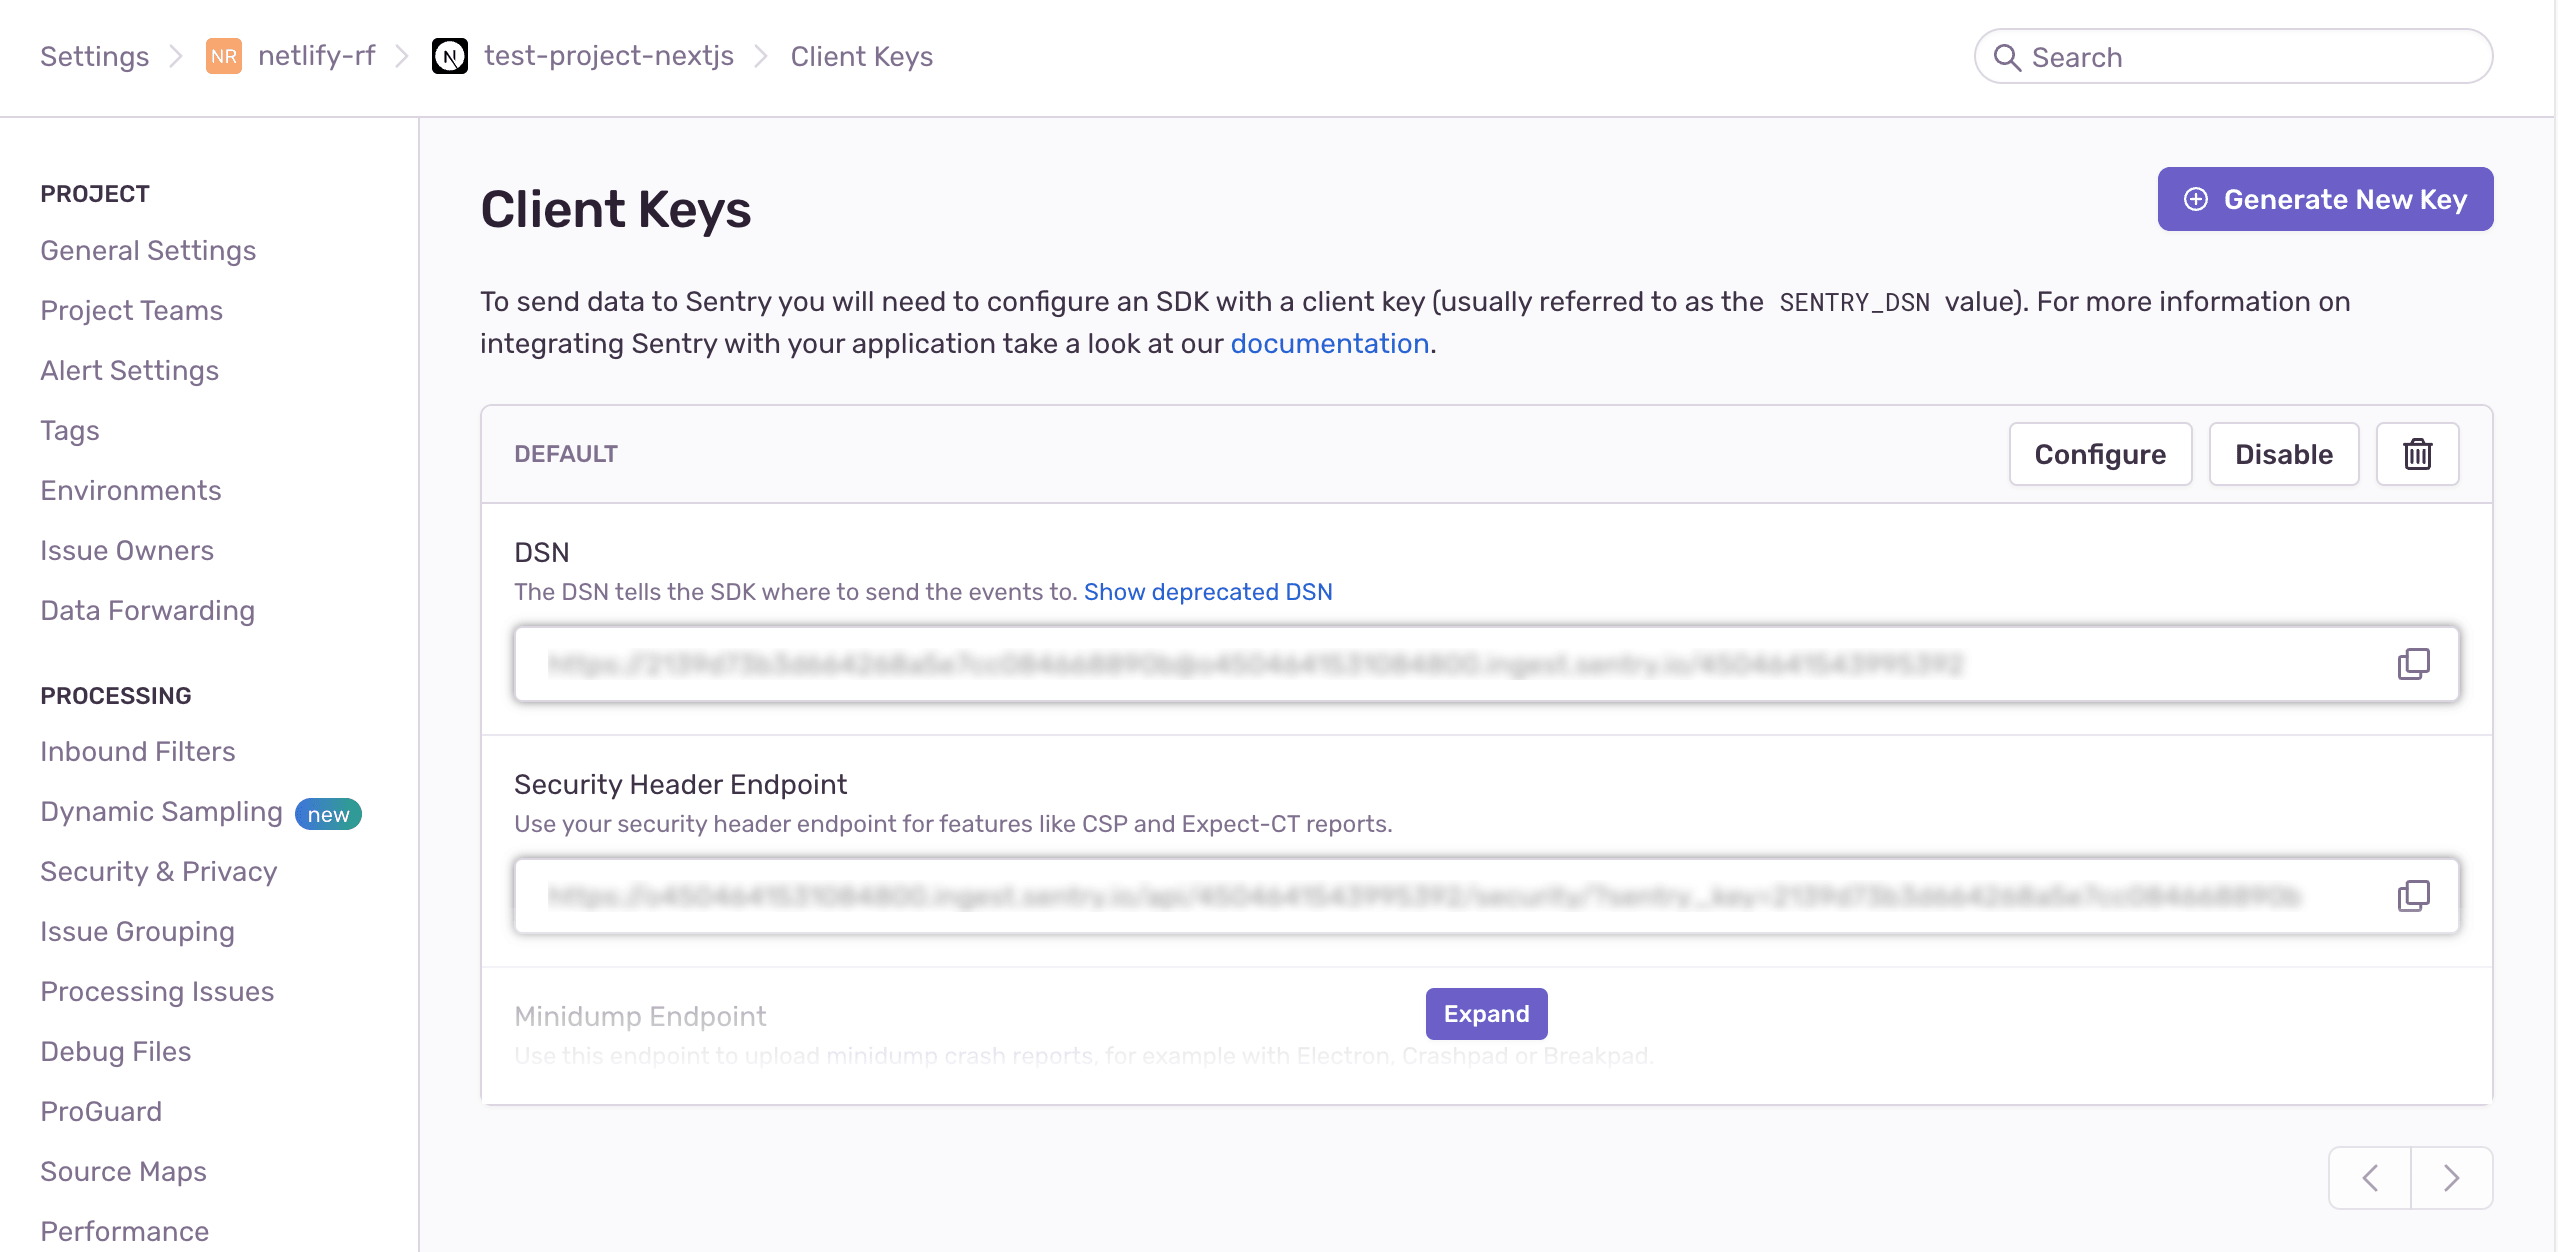
In your Sentry account, select Settings > Projects, then the project you want to associate with your Netlify site.
Under SDK Setup, select Client Keys (DSN) to access your DSN.
Copy the DSN value from the list of client keys.
Return to the Netlify UI to enable the Sentry Integration:
- Select your site, then select Integrations > Monitoring > Sentry > Enable.
- Under Function monitoring > Function monitoring configuration, select Edit settings.
- Paste the DSN from Sentry into the value field.
- Select Save.
Saving the DSN value here creates a SENTRY_DSN environment variable for your site. After enabling the Sentry Integration and configuring your Sentry DSN, you can create a function with a handler method. Add the Sentry wrapper around the function like in the following example:
import { wrap } from "@netlify/integrations";
import type { HandlerEvent, HandlerContext } from "@netlify/functions";
import { type SentryContext, withSentry } from "@netlify/sentry";

const withIntegrations = wrap(withSentry);

const handler = withIntegrations(
  async (event: HandlerEvent, context: HandlerContext & SentryContext) => {
    // Add handler function content here
  }
);

export { handler };
Here are additional examples to test your functions, scheduled functions, and background functions.
# Modify your settings
You can modify the Sentry SDK settings by passing the configuration in as part of a config object to the withIntegrations method:
const withIntegrations = wrap(withSentry);

const config = {
  sentry: {
    sampleRate: 0.5,
    cronMonitoring: {
      enable: true,
      monitorId: "your-monitor-id-goes-here"
    }
  }
};

const handlerWithIntegrations = withIntegrations(myHandler, config) as Handler;
In the example above, the sampleRate is set to 0.5, instead of the default value 1.0. This means that 50% of error events will be sent to Sentry.
Similarly, you can configure the tracesSampleRate option to use tracing and monitor performance using the config object. The default is 1.0, which represents 100%. This option controls the percentage chance a given transaction will be sent to Sentry.
Setting lower rate limits can be useful in your production environment, especially if you invoke functions frequently. You can learn more about sampling in the Sentry docs.
# Create a function that uses cron monitoring
To add cron monitoring to your scheduled functions, use the config object in the call to withIntegrations. You’ll need to include your monitorId, which you can find in your Sentry project.
From your Sentry project, select Crons to access the list of monitor names. Select the monitor name for the cron monitor details.
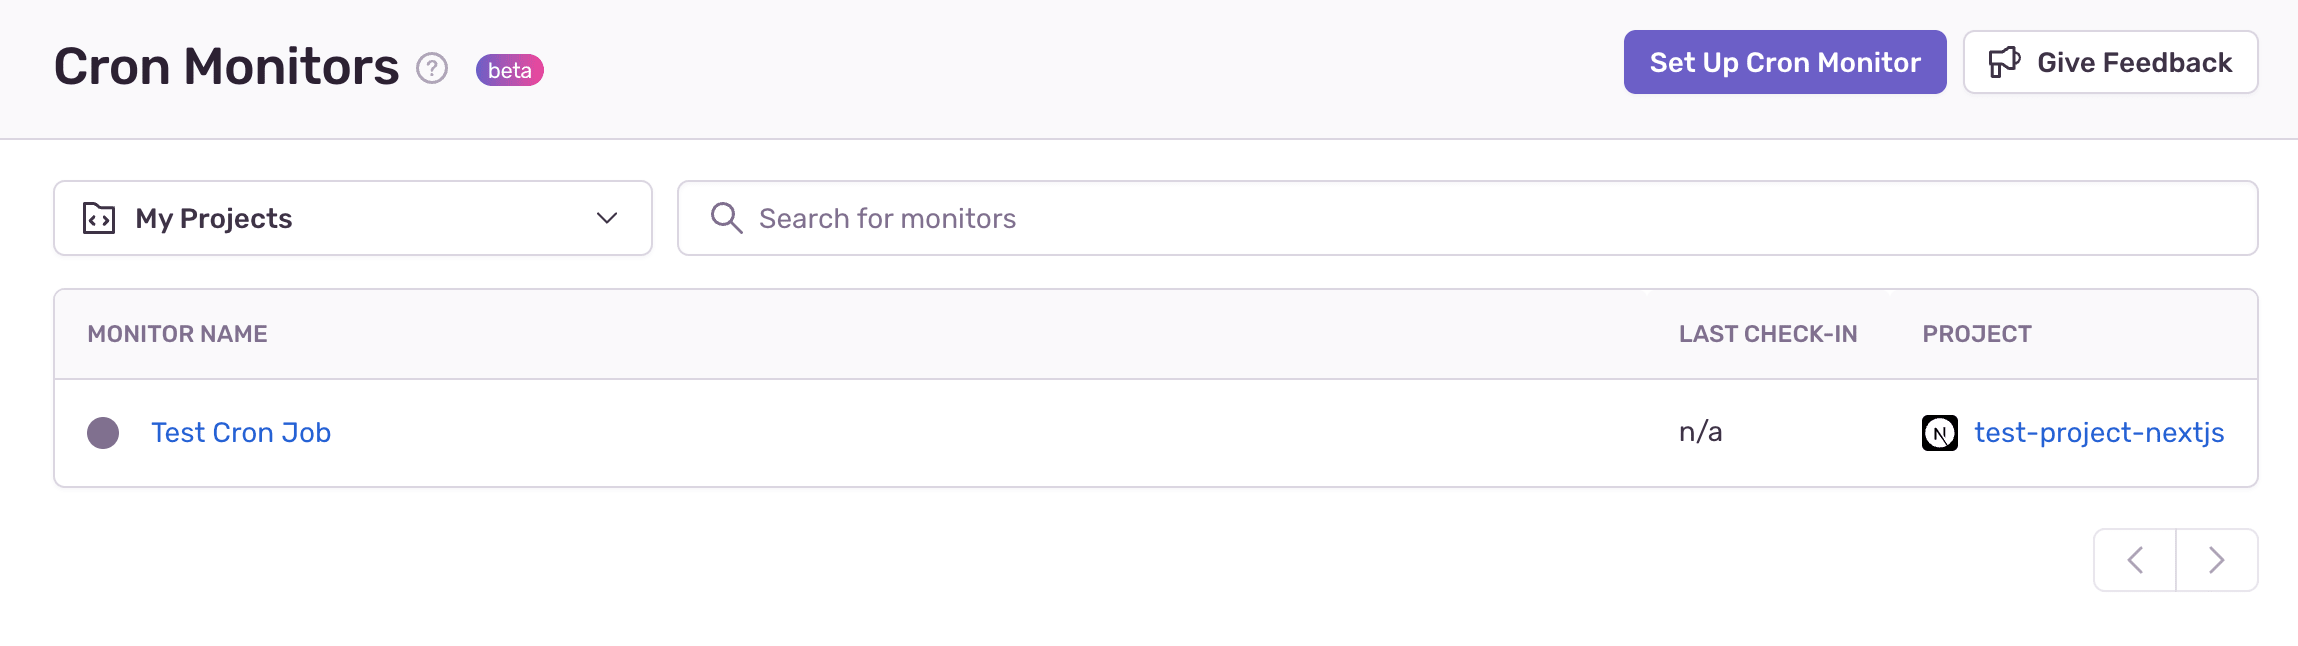
The monitorId is listed under the monitor name:

Assign this value to the monitorId property of the config object. Below is an example of how you can set up your config object:
const config = {
  sentry: {
    cronMonitoring: {
      enable: true,
      monitorId: "your-monitor-id-goes-here"
    }
  }
};

const handlerWithIntegrations = withIntegrations(myHandler, config) as Handler;
# Test locally
To test your integration, ensure you have the following:
- Your Sentry account and project.
- The
SENTRY_DSNenvironment variable set in the Netlify UI. - The
@netlify/sentryand@netlify/integrationspackages installed in your project.
# Basic errors
In the netlify/functions folder, define a function using the following code sample:
import { wrap } from "@netlify/integrations";
import type { HandlerEvent, HandlerContext } from "@netlify/functions";
import { type SentryContext, withSentry } from "@netlify/sentry";

const withIntegrations = wrap(withSentry);

const handler = withIntegrations(
  async (event: HandlerEvent, context: HandlerContext & SentryContext) => {
    throw Error("yet another error");
  }
);

export { handler };
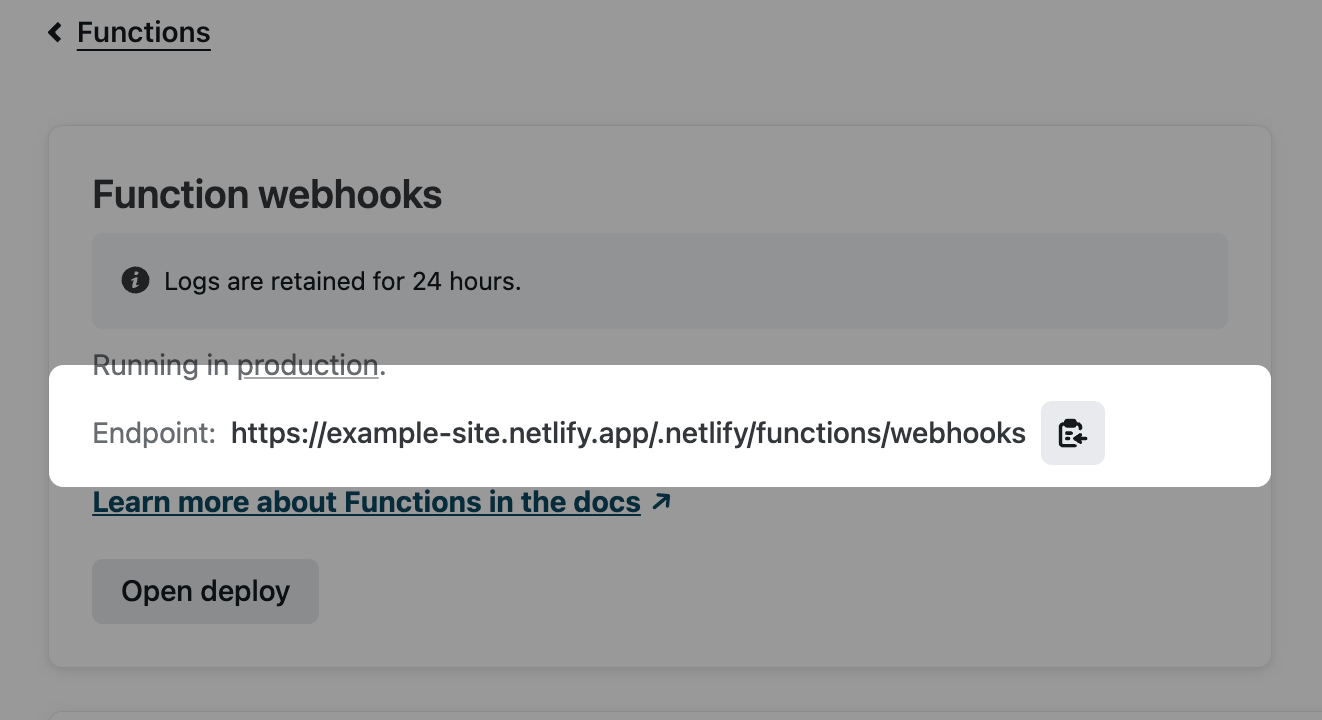
Deploy your site. After deploying, select your site in the Netlify UI. Select Functions and select the function that you created above. Copy the endpoint for the function and paste it in your browser to visit the endpoint and throw an error.
In your Sentry project, select Issues to access the Issues dashboard. If your integration is configured correctly, you’ll find the error listed here. You can select the error to open details about the function that threw the error and review the event.
# Scheduled function errors
You can test scheduled functions with Sentry Cron Monitoring. To do this, you’ll need your monitorId. Below is an example scheduled function to test your integration:
import { wrap } from "@netlify/integrations";
import { type SentryContext, withSentry } from "@netlify/sentry";
import type { Handler, HandlerEvent, HandlerContext } from "@netlify/functions";
import { schedule } from "@netlify/functions";

const myHandler = async (
  event: HandlerEvent,
  context: HandlerContext & SentryContext
) => {
  throw Error("error thrown by failed scheduled function");
};

const withIntegrations = wrap(withSentry);

const config = {
  sentry: {
    cronMonitoring: {
      enable: true,
      monitorId: "your-monitor-id-goes-here",
    },
  },
};

const handlerWithIntegrations = withIntegrations(myHandler, config) as Handler;

const handler = schedule("@hourly", handlerWithIntegrations);

export { handler };
The lowest time frame that you can have in a scheduled function is one hour. Therefore, testing that your setup is correct can be more time consuming than with basic errors.
# Background function errors
Background functions behave similarly to a standard Netlify Function, although with a longer time frame available. Reuse the code for basic errors above, then visit the endpoint for the function that you create to test your background functions.
# More resources
- Sentry documentation
- Netlify Blog: New Netlify-Sentry Integration for Improved Error Monitoring for Functions
# Feedback
We welcome your feedback on the Sentry Integration. Fill out our survey to share your thoughts or ideas.
Did you find this doc useful?
Your feedback helps us improve our docs.