Registration and login
By default, Identity user registration is Open, meaning any visitor can sign up using a form you add to your site. You can also set your registration to Invite only, which means that people must be invited to sign up for the site.
# Set registration preferences
To switch between Open and Invite only Identity user registration, select
, then select Configure.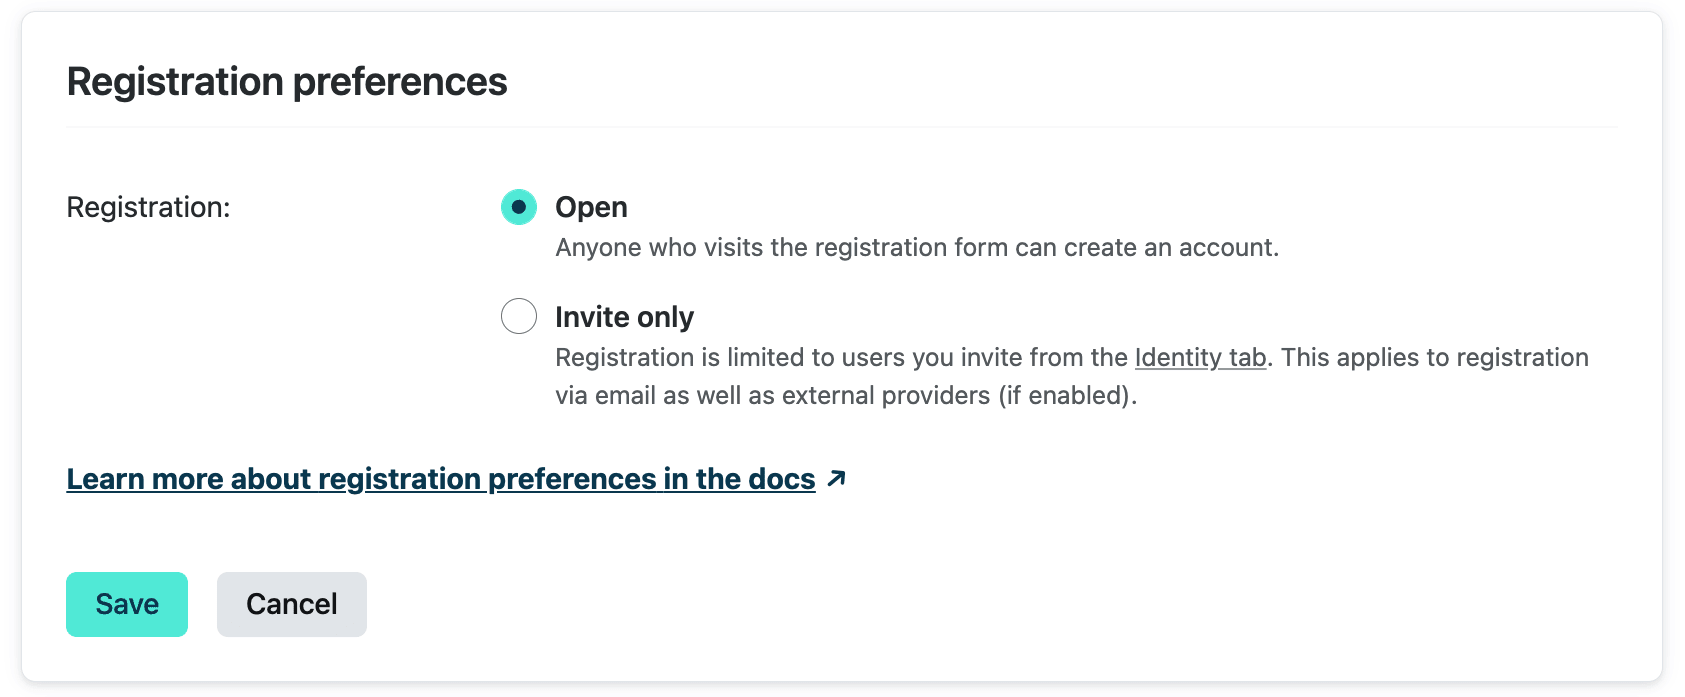
When Invite only is selected, all new Identity users, including those logging in with external providers, will need to be invited before they can register for your site.
Note
Identity usage is metered differently depending on your registration preference.
# Add Identity users
You can use the tools below to add new Identity users to your site.
# Registration forms
You can allow users to register for your site by using the Netlify Identity widget, or by building your own registration form using gotrue-js. Note that if your registration preferences are set to Invite only, users must be invited before they can register.
When an Identity user registers for your site, the registration will trigger an email requesting that the user confirm their address (using the template described in the Identity-generated emails doc). If you would like to skip this confirmation step, go to
, then select Configure. Check the box to allow Identity users to sign up without verifying their email address.# Invitations
Whether your registration preference is set to Open or Invite only, you can always invite new Identity users to your site by selecting Integrations > Identity > View. Inviting new users will send email invitations (using the template described in the Identity-generated emails doc) to the addresses you enter.
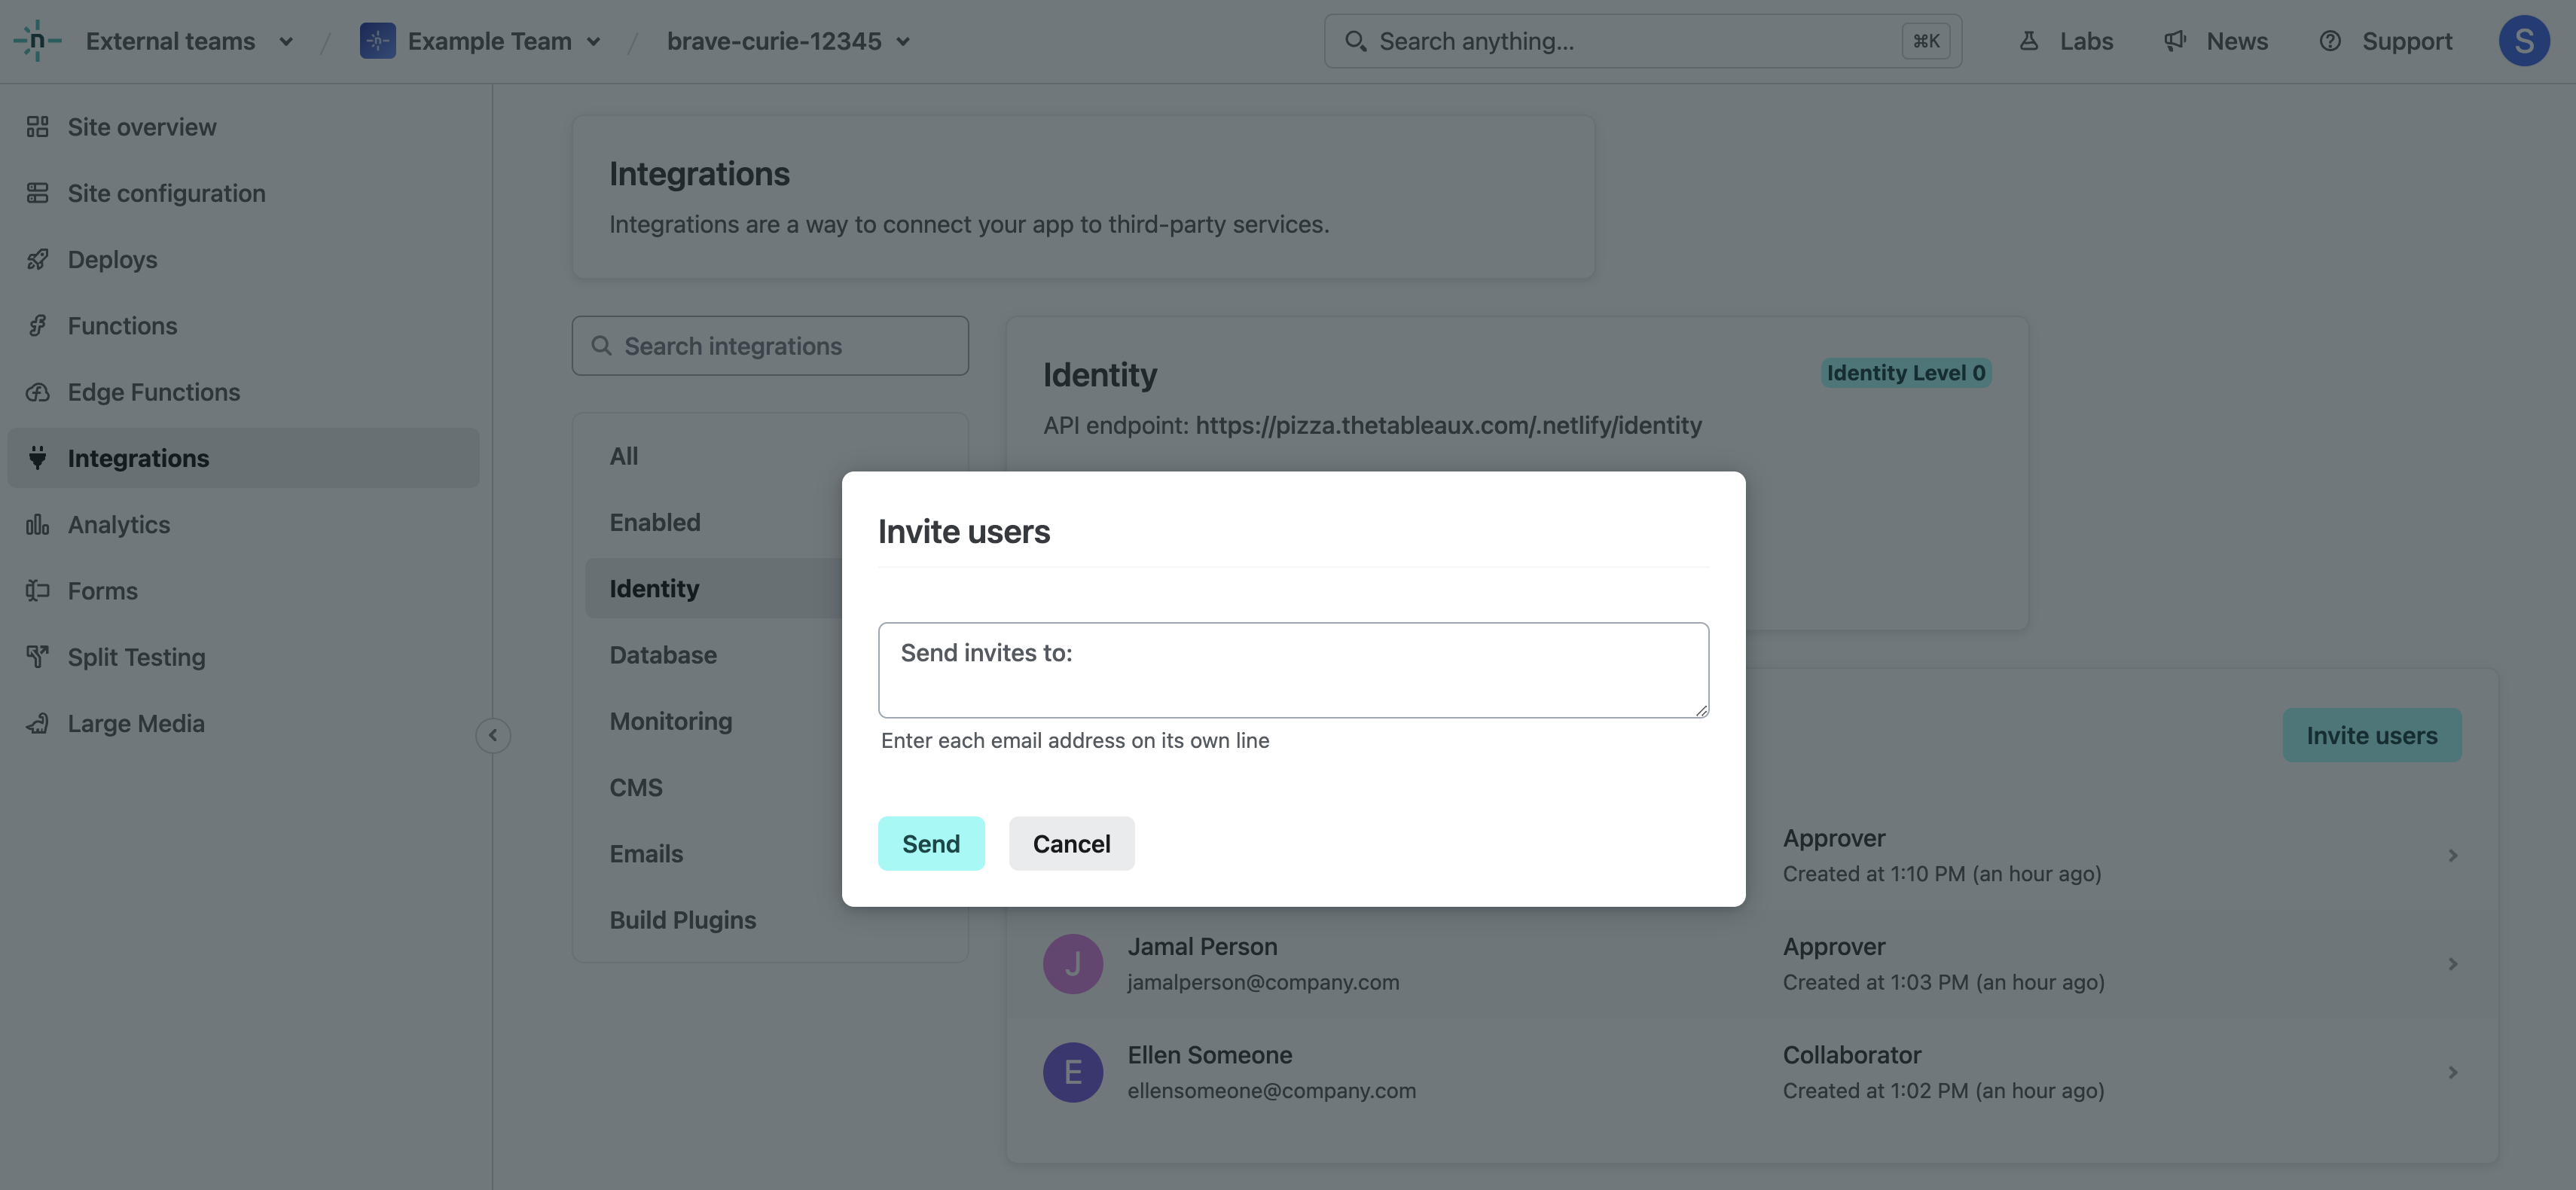
The confirmation link in the email will direct to your site, with an invite_token appended. If you use the Netlify Identity widget in your site, it will handle this address automatically, prompting the user for a name and password. Alternatively, you can handle it with your own code using the gotrue-js library.
# External provider authentication
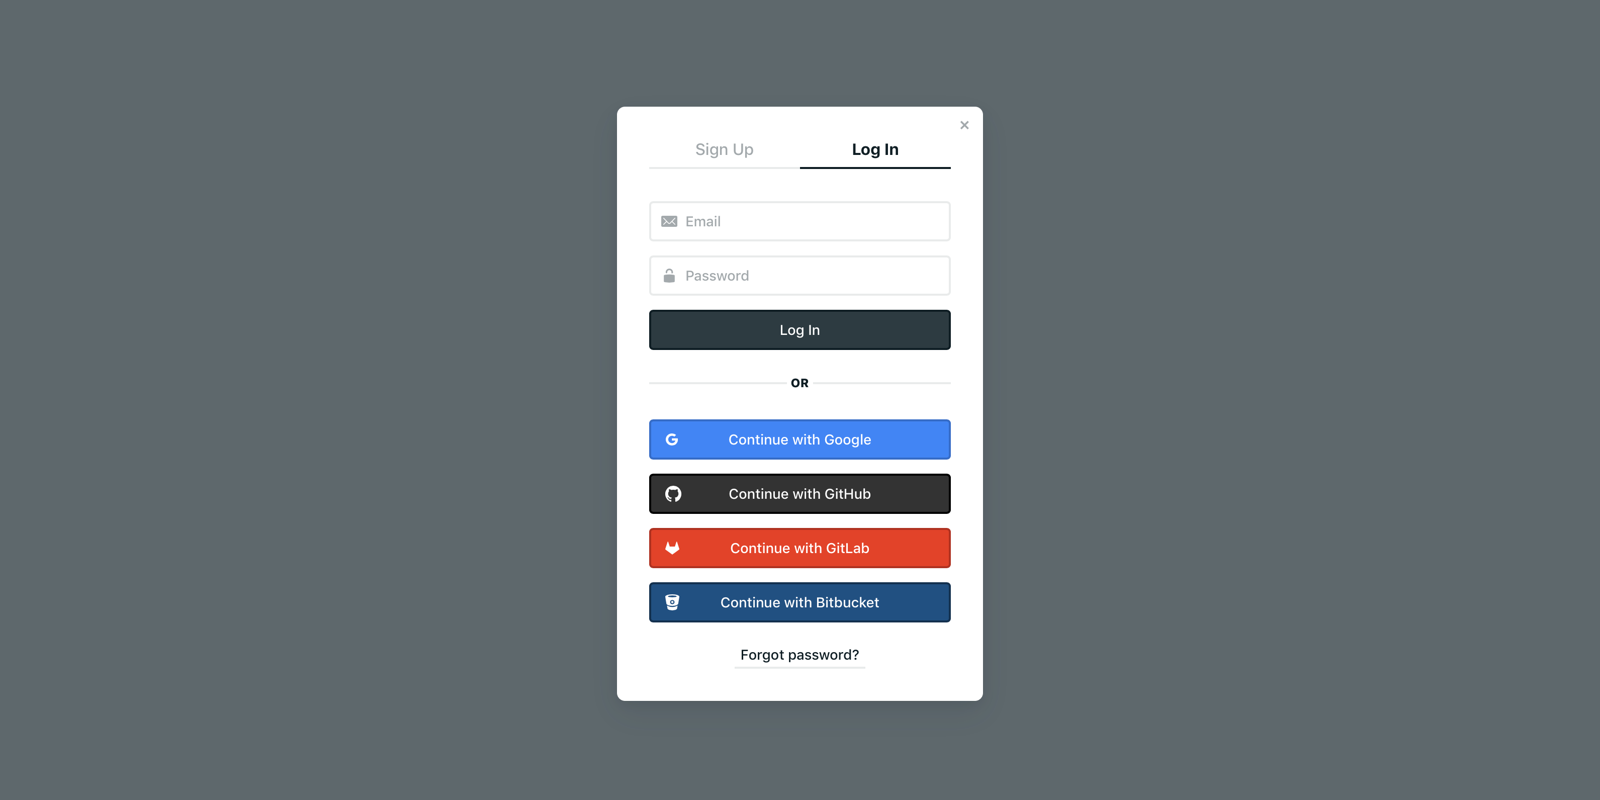
You can allow your Identity users to register and log in to your site using an account with another service provider, like Google, GitHub, GitLab, or Bitbucket. Go to
, then select Add provider.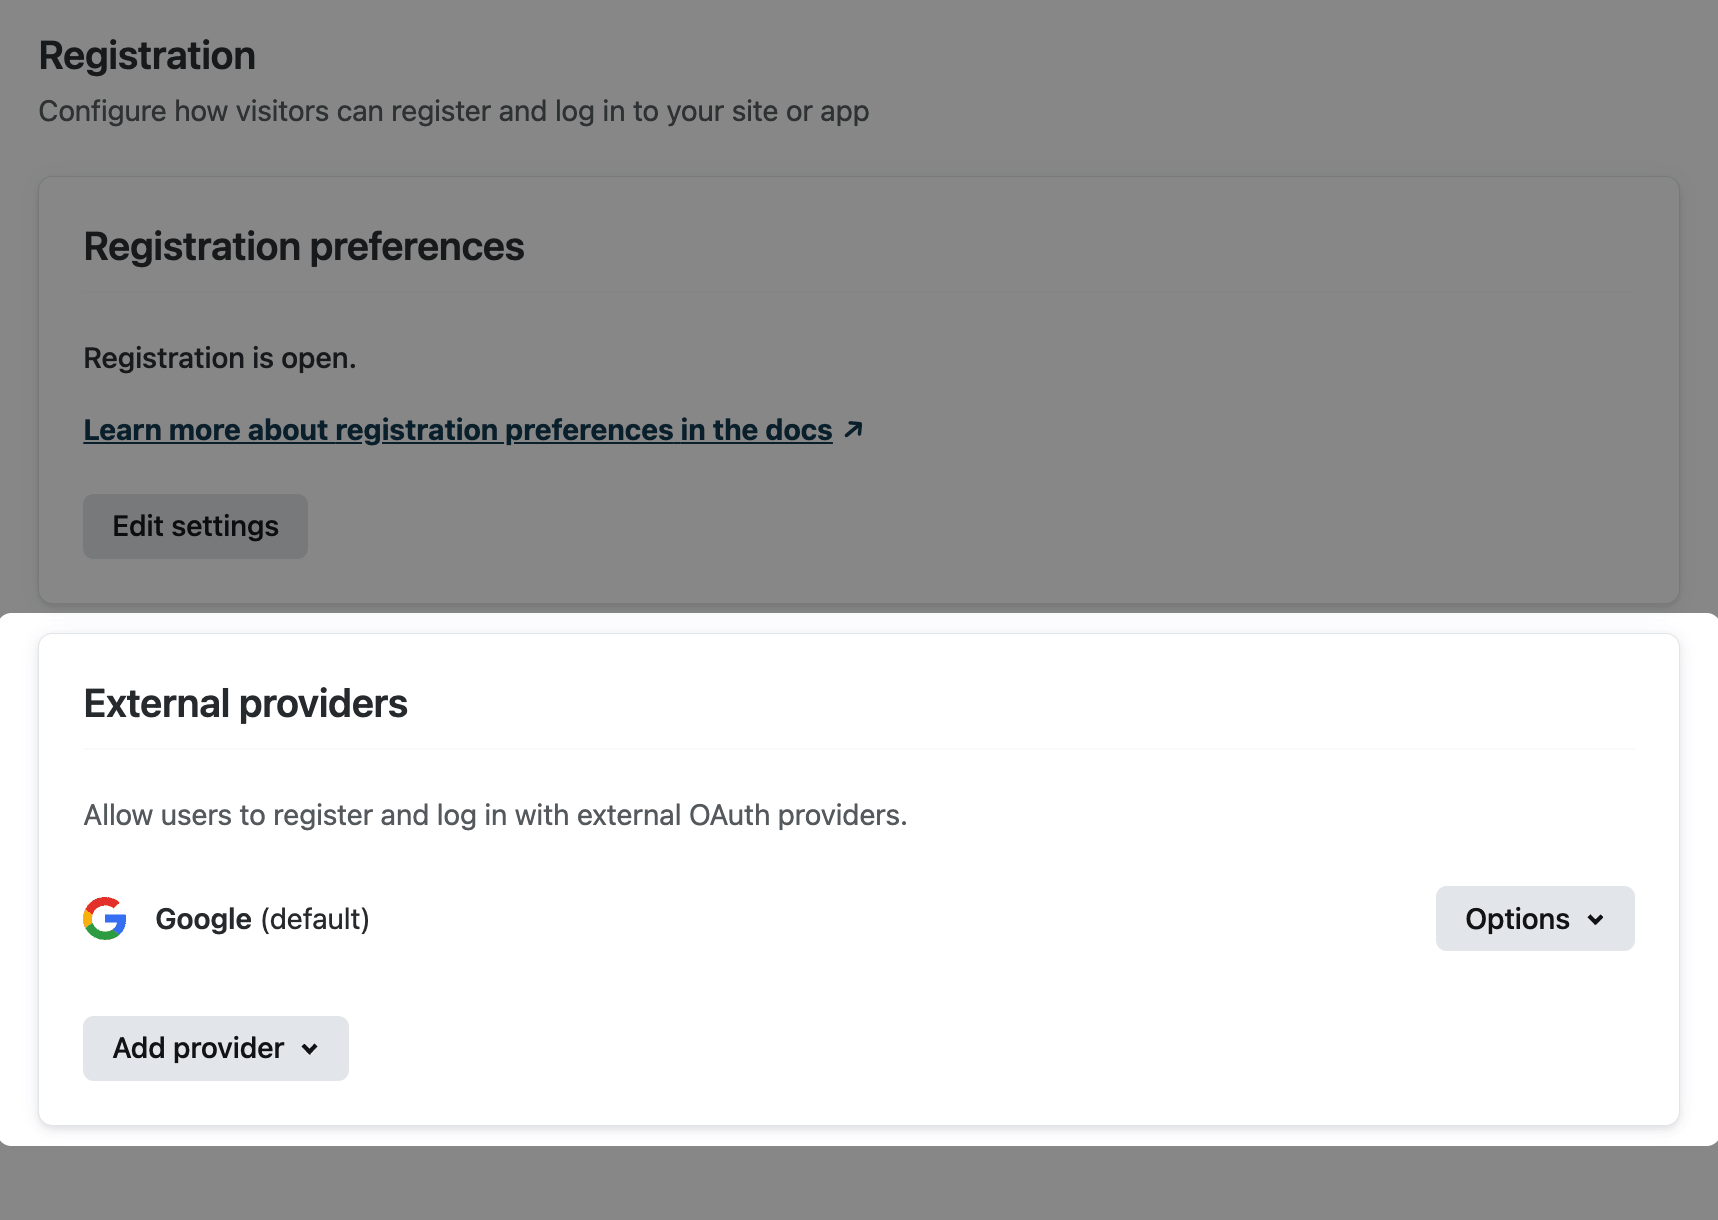
If you use the Netlify Identity widget in your site, it will automatically include login/registration buttons for all providers you’ve enabled. When an Identity user registers using an external provider, no email confirmation is required. However, if you’ve set your registration preference to Invite only, you will need to invite them before they can register.
# Branded external OAuth integration
By default, we use our own Netlify Identity app to request authorization from external OAuth providers. This means that when your site visitors use their external account to log in, they find Netlify Identity as the app requesting authorization.
Alternatively, you can set up your own authentication credentials so that your app name will show as the app requesting authorization. To do this, you’ll need to register your app with the external service and get a client ID and client secret to enter into your settings on Netlify.
Instructions for registering your app can be found in the documentation for the external providers we currently support:
# Trigger functions on Identity events
You can trigger serverless function calls when certain Identity events happen, like when a user signs up. The following events are currently available:
identity-validate: function that’s triggered when an Identity user tries to sign up with Identity.identity-signup: function that’s triggered when an Identity user signs up with Netlify Identity and confirms their email address. Note that this fires for email+password signups only, not for signups using external providers such as Google or GitHub.identity-login: function that’s triggered when an Identity user logs in with Netlify Identity.
For more information, visit the Netlify Functions docs.
Did you find this doc useful?
Your feedback helps us improve our docs.