Manage cross-references in Netlify Connect
After you create and configure a data layer, you can add cross-references to create links between fields across data sources.
When you request data, Netlify automatically resolves the cross-references so that you can get all of the related information at once and through a single query. This makes for a better developer experience and a faster user experience because you avoid having to do a series of queries, waiting for each one to resolve before making the next, and then manually combining the data yourself.
Cross-references resolve for queries made in the GraphQL sandbox and through the GraphQL API.
Team Owners and Developers can add and update cross-references. Netlify records all activities related to adding, editing, and deleting cross-references in the team audit log.
How cross-references work
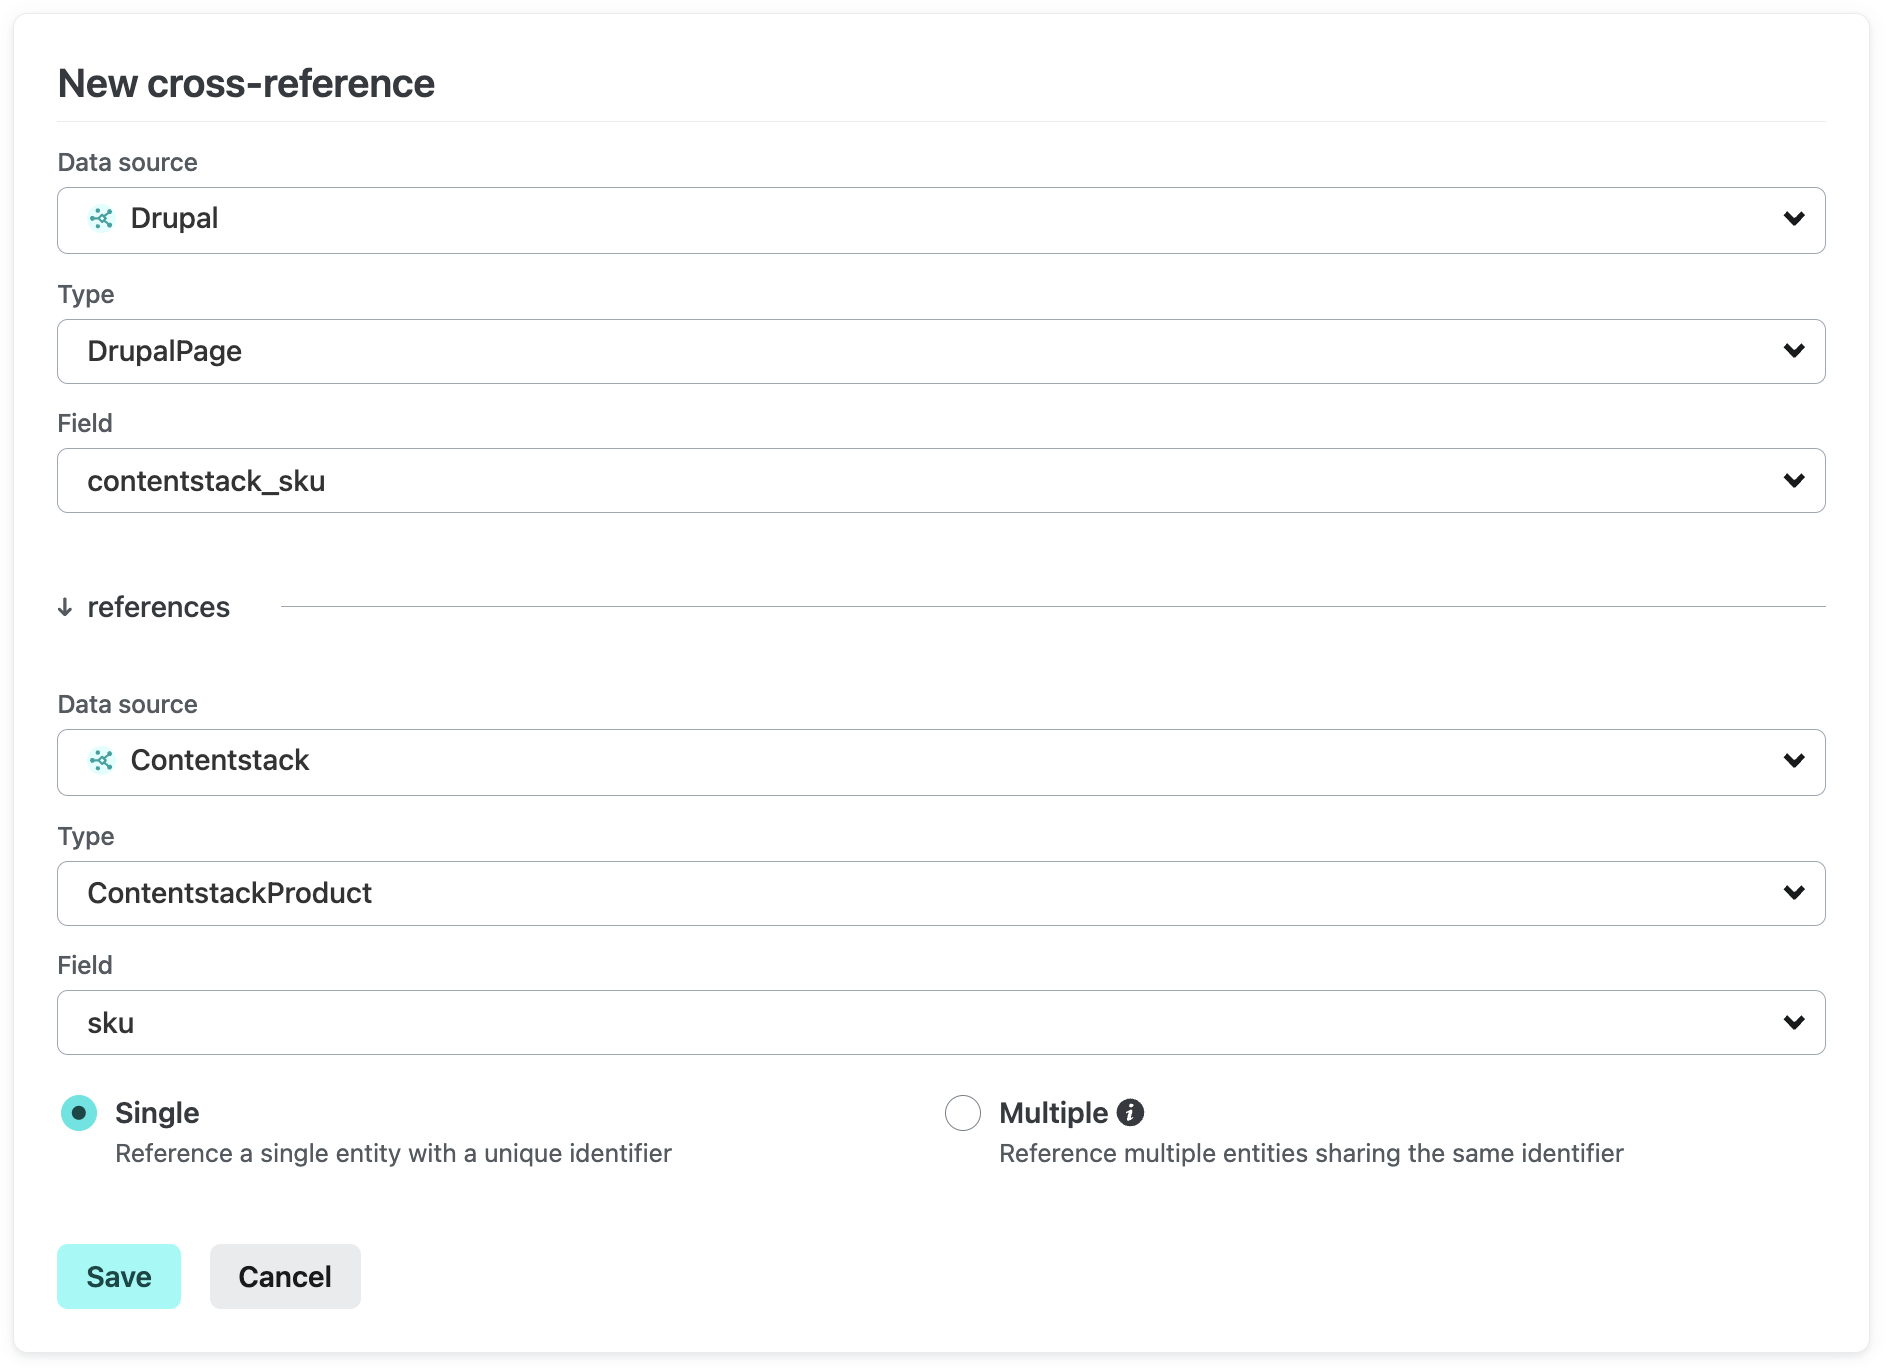
Section titled “How cross-references work”To understand how cross-references work, consider an example where you use Drupal for your site copy and Contentstack for your product information.
Each DrupalPage represents a page in your site and contains a contentstack_sku field that identifies a product from Contentstack to display on that page. Similarly, each ContentstackProduct represents a product and contains a unique identifier in the sku field.
Without cross-references, you would query for all the DrupalPage entities first and then do a second query using the contentstack_sku field to get the related ContentstackProduct entity for each DrupalPage.
Instead of making a series of queries, you can add a cross-reference to create a link between the contentstack_sku field on DrupalPage and the sku field on ContentstackProduct first.
Then, whenever you query for DrupalPage entities, Netlify resolves the cross-reference and automatically returns the ContentstackProduct entity for the contentstack_sku field on each DrupalPage.
Essentially, the type of contentstack_sku becomes ContentstackProduct, so you can access all of the fields on the product directly in the query for the DrupalPage:
query drupalToContentstack { drupalPage(title: { eq: "Store"}) { id title field_description body { value } contentstack_sku { refId reference { id title price image { url } } } }}Add a cross-reference
Section titled “Add a cross-reference”Connect supports cross-references for string and number field types. You can configure cross-references to one level deep but you can query the resolved links to any depth required.
To add a cross-reference to your data layer:
- Navigate to the Connect page for your team in the Netlify UI.
- Select the data layer from the Data layers list, and then select Data layer settings.
- On the data layer settings page, select Cross-references.
- Select Add a cross-reference.
- Select a Data source, a Type on that data source, and then a Field on that type.
- Next, define the other half of the cross-reference relationship. Select a Data source, a Type on that data source, and then a Field on that type. Then, specify whether this field references a Single entity with a unique identifier, or if there are Multiple entities that share the same identifier.
- Select Save.
When you add a cross-reference, Netlify automatically starts a data sync to generate a new data revision that reflects the updated schema.
Existing data revisions represent the schema at a specific point in time and will not include the new cross-reference.
Edit a cross-reference
Section titled “Edit a cross-reference”To edit a cross-reference on your data layer:
- Navigate to the Connect page for your team in the Netlify UI.
- Select the data layer from the Data layers list, and then select Data layer settings.
- On the data layer settings page, select Cross-references.
- Find the cross-reference you want to edit and select .
- Update the cross-reference as needed and then select Save.
When you edit a cross-reference, Netlify automatically starts a data sync to generate a new data revision that reflects the updated schema.
Existing data revisions represent the schema at a specific point in time and will not include the updated cross-reference.
Delete a cross-reference
Section titled “Delete a cross-reference”When you delete a cross-reference, the change applies to new data revisions generated after the update. Existing data revisions represent the schema at a specific point in time and will still include the deleted cross-reference.
Unless you pin the current data revision or update your site to use the GraphQL API for that revision, any queries for cross-referenced data will break once the deletion takes effect. Make sure to update the queries in your site or pin the data revision before deleting the cross-reference.
Because this action cannot be reversed, only Team Owners can delete a cross-reference.
To delete a cross-reference from your data layer:
- Navigate to the Connect page for your team in the Netlify UI.
- Select the data layer from the Data layers list, and then select Data layer settings.
- On the data layer settings page, select Cross-references.
- Find the cross-reference you want to delete and select .
- Review the confirmation prompt and then select Delete cross-reference.
When you delete a cross-reference, Netlify automatically starts a data sync to generate a new data revision that reflects the updated schema.
Did you find this doc useful?
Your feedback helps us improve our docs.