Get started with Netlify Connect
To get started with Netlify Connect, create and configure your first data layer.
A data layer allows you to sync and combine data from multiple sources into a single real-time graph database that you can query against with a GraphQL API. When you set up a data layer, you add data sources to sync data from. You also connect sites and add webhooks to notify whenever data updates.

This document outlines some key terms, the four steps to create and configure a data layer, and what to do next.
Definitions
Section titled “Definitions”Here are some key terms that are useful to understand as you get started with Connect:
- Data layer: contains connections to one or more data sources, a real-time graph database containing all data synced from those sources, and a GraphQL API to access that data. It also supports connecting to sites to trigger builds when your data changes, and setting up notifications to notify external services.
- Data revisions: every successful sync to a data layer generates a new data revision that represents the GraphQL schema and data at that point in time. By default, a data layer’s GraphQL API uses the latest data revision, but you can also pin a different revision instead. You can query a specific data revision using the revision’s GraphQL sandbox or its unique API URL.
- Data source: an external system or service that contains your data, such as a content management system (CMS). Connect has built-in support for a number of data source types and you can add support for your own custom data source with the Netlify SDK.
- Data integration: an extension built using the Netlify SDK that allows you to sync data from a custom data source to Connect. Data integrations use Connectors.
- Type prefix: required when you want to add multiple data sources of the same type to a data layer, such as two Contentful CMS instances. When Netlify generates the GraphQL schema for your data layer, it will add the prefix to all GraphQL types from that data source.
- Cross-reference: a link that you can create between fields across data sources. Netlify automatically resolves cross-references when you query, so you can retrieve combined data through one query instead of a series of queries.
- GraphQL API: allows web clients to query and receive data from a data layer on Connect. A data layer’s GraphQL API defaults to use the latest data revision unless you pin a different data revision. Each data revision has a specific GraphQL schema based on your data sources, and you use this schema to construct queries and API requests.
- GraphQL sandbox: an isolated environment in the Netlify UI that you can use to build and test queries against a data layer’s GraphQL API. Netlify creates a unique sandbox for each data layer that you create and for each data revision that results from a successful sync.
- Connected sites: sites in your Netlify team that will automatically build and deploy when data changes. We use build hooks to trigger these builds.
- Notifications: outgoing webhooks that will notify other services when there is a new sync for your data layer.
- Webhooks: used to trigger a data layer sync from an external system. For example, your data source may send a POST request to a webhook URL to start a new sync.
- Sync events: activities that occur in Connect when you add a data source and when data changes. These events include
Sync from all data sourcesandSync from {data source type}.
Prerequisite: Enable Connect
Section titled “Prerequisite: Enable Connect”To enable Connect, contact our sales team to request a demo.
Once enabled, the Connect page will be unlocked in the Netlify UI for your team.
Create and configure a data layer
Section titled “Create and configure a data layer”Team Owners and Developers can set up data layers for your team. This includes creating the data layer, adding data sources, connecting Netlify sites, and adding notifications — activities that Netlify automatically logs to the team audit log.
You can create more than one data layer to fit your needs. For example:
- One data layer for production data and sites to use, and another for staging data and sites to use
- Different data layers for different departments or products across your organization
Once you create a data layer, you can add one or more data sources to sync data from. You can select from the data sources Netlify officially supports as well as custom data sources supported through integrations built with the Netlify SDK.
The Netlify UI includes a guided flow to help you create and configure a new data layer. To get started, add a data layer.
1. Add a data layer
Section titled “1. Add a data layer”To start the guided flow to add and configure a new data layer:
-
Navigate to the Connect page for your team in the Netlify UI.
-
Select Add new data layer.
-
Enter a Name for this data layer.
-
(Optional) Enter a Description.
-
Select Add data layer.
At this point, Netlify will create an empty data layer for your team with the provided name and description. The next step is to add data sources.
2. Add data sources
Section titled “2. Add data sources”The second step in the data layer configuration flow is to add one or more data sources to your data layer. We recommend that you add at least one data source now, but you will have the option to add more after you complete this flow.
Each supported data source type has different credentials, options, and set up instructions.
Commercetools
Section titled “Commercetools”To use commercetools, complete the following steps:
- Set up an API client in Account Manager.
- Add your commercetools instance and API information to your data layer.
Set up an API client in your commercetools project
To enable syncing data from commercetools, you need to create an API Client with the correct scopes in the commercetools Merchant Center:
- In the Merchant Center for your commercetools project, navigate to .
- Select Create New API Client.
- Enter a name for the client.
- Under Scopes, select the
Admin clienttemplate. - Select Create API client to finish.
Copy and save the client_id, secret, and scope values in a safe place because you will need them to set up the data source connection.
Add your commercetools instance
Once you have set up an API client, take the following steps in the Netlify UI to add it to your data layer:
-
Select Add a data source.
-
Select
commercetoolsas the Data source type.If you haven’t already installed the extension for this data source, follow the install extension prompt to open the commercetools extension details page in a new tab. As a Team Owner, select Install to install and make the extension available to all data layers on your team.
After you install the extension, close the tab and return to the Add a data source flow in Connect to continue with the next steps.
-
Enter a Name for this data source.
-
Enter a Type prefix for this data source. The prefix must start with an uppercase letter, and can only consist of alphanumeric characters and underscores.
When you query data, the data types synced from this data source should be nested under this prefix in the GraphQL schema. For example, if your prefix is
StoreCA, your query fororderswould be formatted as:query {StoreCA {orders {...}}} -
Enter the Secret for the API client you created in commercetools Merchant Center.
-
Enter the Client ID for the API client. The Merchant Center displays this value as the
client_id. -
Enter the Region for your project. For example,
us-east-2.aws. -
Enter the Scope for the API client.
-
Enter the Project key for your project.
-
Select Save to add this data source.
When you add a new data source, Netlify automatically connects to it and starts syncing data to your data layer.
Contentful
Section titled “Contentful”To use Contentful with Netlify Connect, complete the following steps:
- Prepare your Contentful instance.
- Add your Contentful instance to your data layer.
Prepare your Contentful instance
Take the following steps on your Contentful space before you add it to your data layer:
-
In the Contentful web app, navigate to , and select Add API key to create an API key and generate access tokens for the space you want to sync. Netlify will need one of these tokens to access your data.
-
In the Contentful web app, navigate to , and select Create personal access token to generate a Content Management API access token. Copy this token and store it in a safe place. Netlify will need this token to automatically set up a webhook in your Contentful space that will notify Connect whenever data changes in your CMS.
-
To enable automatic syncing to Netlify, add your data layer webhook to your Contentful instance:
-
In your Contentful account, navigate to , and select Add webhook.
-
Add the following webhook to the URL field. Make sure to replace the placeholder with your data layer ID.
https://webhook.netlify-connect.com/hooks/data_layer/data_source/publish/YOUR-DATA-LAYER-IDNote that you also have the ability to create a custom authenticated webhook and use that instead of the default webhook. Learn more about managing webhooks.
-
Under Triggers, select the content types that you wish to sync and the events that should trigger a sync. For more information on how to configure webhooks, refer to the Contentful docs.
-
Select Save to finish.
If you decide to configure the webhook using the Contentful API instead, add a
x-connect-data-sourceheader to the request withcontentfulas the header’s value. This ensures that the webhook only triggers a sync for this specific data source, instead of all data sources on your data layer. -
Add your Contentful instance
Once you have prepared your Contentful instance, take the following steps in the Netlify UI to add it to your data layer:
-
Select Add a data source.
-
Select
Contentfulas the Data source type.If you haven’t already installed the extension for this data source, follow the install extension prompt to open the Contentful extension details page in a new tab. As a Team Owner, select Install to install and make the extension available to all data layers on your team.
After you install the extension, close the tab and return to the Add a data source flow in Connect to continue with the next steps.
-
Enter a Name for this data source.
-
Enter a Prefix for this data source. The prefix must start with an uppercase letter, and can only consist of alphanumeric characters and underscores.
The prefix will be added to all data types synced from this data source in the GraphQL schema and you will use it when you query the GraphQL API. For example,
ContentfulPostwith the prefixMarketingbecomesMarketingContentfulPostin the schema. -
(Optional) Enter a unique Instance ID value to use for this data source. Netlify uses this value to support cross-references and linking between data sources.
-
Enter the Access token for your Contentful instance. To sync published content, enter the
Content Delivery API access token. To sync preview content instead, enter theContent Preview API access token. -
Enter the Space ID for your Contentful instance.
-
Enter the Content Management API access token for your Contentful instance. Netlify will use this token to automatically set up a webhook in your Contentful space that will notify Connect whenever data changes in your CMS.
-
(Optional) Select the Host URL for your Contentful instance. The default is
cdn.contentful.com. To use the Contentful Preview API, selectpreview.contentful.com. -
(Optional) Enter the Contentful Environment to sync data from. The default is
master. -
(Optional) Enter a Page limit to specify the number of entries to fetch per page when syncing data from Contentful. The default is
100. -
(Optional) Select Enable Contentful Tags if your Contentful instance uses the Contentful Tags feature. Note that if you enable this option, you cannot use the content type name
tagsat this time. -
(Optional) Fill in the Locales field to limit the locales Netlify will sync. By default, Netlify will sync all locales. Make sure these locales are enabled on Contentful. Netlify will use the default locale set in Contentful as the default locale for your source.
-
Select Save to add this data source.
When you add a new data source, Netlify automatically connects to it and starts syncing data to your data layer.
Contentstack
Section titled “Contentstack”To use Contentstack with Connect, complete the following steps:
- Prepare your Contentstack instance.
- Add your Contentstack instance to your data layer.
Prepare your Contentstack instance
Take the following steps on your Contentstack instance before you add it to your data layer:
-
In your Contentstack account, navigate to for your stack, and generate a delivery token for the environment you want to sync. You’ll need to enter this token when you set up your Contentstack data source in the Netlify UI, and Netlify will use this token to access your data.
-
To enable automatic syncing to Netlify, add your data layer webhook to your Contentstack instance:
-
In your Contentstack account, navigate to for your stack, and select New Webhook.
-
Add the following webhook to the URL To Notify field. Make sure to replace the placeholder with your data layer ID.
https://webhook.netlify-connect.com/hooks/data_layer/data_source/publish/YOUR-DATA-LAYER-IDNote that you also have the ability to create a custom authenticated webhook and use that instead of the default webhook. Learn more about managing webhooks.
-
Under Trigger Conditions, add a Condition for each content type and event that you wish to sync. At minimum, you should configure the webhook to trigger when the
Entrytype isCreated,Updated, andDeleted. For more information on how to configure webhook conditions, refer to the Contentstack docs. -
Select Save to finish.
-
Add your Contentstack instance
Once you have prepared your Contentstack instance, take the following steps in the Netlify UI to add it to your data layer:
-
Select Add a data source.
-
Select
Contentstackas the Data source type.If you haven’t already installed the extension for this data source, follow the install extension prompt to open the Contentstack extension details page in a new tab. As a Team Owner, select Install to install and make the extension available to all data layers on your team.
After you install the extension, close the tab and return to the Add a data source flow in Connect to continue with the next steps.
-
Enter a Name for this data source.
-
Enter a Type prefix for this data source. The prefix must start with an uppercase letter, and can only consist of alphanumeric characters and underscores.
The prefix will be added to all data types synced from this data source in the GraphQL schema and you will use it when you query the GraphQL API. For example,
ContentstackPostwith the prefixMarketingbecomesMarketingContentstackPostin the schema. -
(Optional) Enter a unique Instance ID value to use for this data source. Netlify uses this value to support cross-references and linking between data sources.
-
Enter the API key for your stack.
-
Enter the read-only Delivery token for your stack environment.
-
Enter the stack Environment to sync data from. For example, the
productionenvironment. -
(Optional) Enter the Region to sync data from. Valid options are
na-aws,eu-aws,na-azure, andeu-azure. The default isna-aws. -
(Optional) Specify the Locales to sync entries from. For example,
en-us, fr-ch. -
(Optional) When entries aren’t available for the specified locale, you can sync them in the fallback language instead. Select Include Fallback Locale to enable this. The default is
false. -
(Optional) Enter a Limit to specify the number of entries or assets to sync per page. The default is
50. -
(Optional) Enter the Content Types to sync from Contentstack. For example,
author, book. -
(Optional) Enter the Content Types to exclude from Contentstack syncs.
-
Select Save to add this data source.
When you add a new data source, Netlify automatically connects to it and starts syncing data to your data layer.
Drupal
Section titled “Drupal”Connect supports Drupal versions 9 and 10.
To use Drupal with Connect, complete the following steps:
- Prepare your Drupal instance.
- Add your Drupal instance to your data layer.
Prepare your Drupal instance
Take the following steps on your Drupal instance before you add it to your data layer:
-
Install Gatsby Integration module version 2. During the installation flow, follow the prompts to enable the JSON:API Extras module.
-
In the JSON:API Extras module, enable
Include count in collection queries. This setting helps improve performance during data syncs. -
Navigate to and enable:
GatsbyGatsby JSON:API Extras
-
Install JSON:API Schema module.
-
To enable automatic syncing to Netlify, add your data layer webhook to the Gatsby Integration module.
-
Navigate to .
-
Add the following webhook to the Build Webhook URLs field. Make sure to replace the placeholder with your data layer ID.
https://webhook.netlify-connect.com/hooks/data_layer/data_source/publish/YOUR-DATA-LAYER-IDNote that you also have the ability to create a custom authenticated webhook and use that instead of the default webhook. Learn more about managing webhooks.
-
Under Entity types to send to Gatsby Preview and Build Server, select the types you wish to sync. At minimum, you should select the
Contenttype. -
Select Save configuration to finish.
-
-
Navigate to to add the following permissions for data syncing:
- Add
Sync Gatsby Fastbuild log entitiespermissions. If your Drupal instance does not use authentication, then selectAnonymous user. Otherwise, select the appropriate Drupal role. - Add
View Gatsby log entity entitiespermissions. If your Drupal instance does not use authentication, then selectAnonymous user. Otherwise, select the appropriate Drupal role.
- Add
Add your Drupal instance
Once you have prepared your Drupal instance, take the following steps in the Netlify UI to add it to your data layer:
-
Select Add a data source.
-
Select
Drupalas the Data source type.If you haven’t already installed the extension for this data source, follow the install extension prompt to open the Drupal extension details page in a new tab. As a Team Owner, select Install to install and make the extension available to all data layers on your team.
After you install the extension, close the tab and return to the Add a data source flow in Connect to continue with the next steps.
-
Enter a Name for this data source.
-
Add a Type prefix for this data source. The prefix must start with an uppercase letter, and can only consist of alphanumeric characters and underscores.
The prefix will be added to all data types synced from this data source in the GraphQL schema and you will use it when you query the GraphQL API. For example,
DrupalPostwith the prefixMarketingbecomesMarketingDrupalPostin the schema. -
(Optional) Enter a unique Instance ID value to use for this data source. Netlify uses this value to support cross-references and linking between data sources.
-
Enter the Site URL for your Drupal site, including the trailing slash.
-
(Optional) Enter the JSON API Path Prefix to use as the relative path to the
JSON:APIroot. The default isjsonapi. -
(Optional) If your Drupal instance has basic authentication enabled, enter the HTTP Basic Auth username and HTTP Basic Auth password.
-
(Optional) Enter any Disabled types that you would like to exclude from the GraphQL API.
-
(Optional) Enter the number of Concurrent API requests a user can make to the Drupal API. The default is
20. -
(Optional) Enter a Request timeout value. This is the time in milliseconds before requests to Drupal will time out. The default is
30000. -
(Optional) Enter the Default language of your Drupal site. This will determine what language content to sync from Drupal. The default is to sync the English language content.
-
(Optional) Enter the Enabled languages for your Drupal site. This will allow you to sync different translations from Drupal, depending on what languages your site has enabled.
-
(Optional) Select Filter by language to filter the data you sync from Drupal based on the current language.
-
(Optional) Enter the Translatable entities to specify what entities to sync translations for. For example,
node--page, node--article. -
(Optional) Enter the Non-translatable entities from your Drupal site. These entities will use the default language of your site. For example,
taxonomy_term--tags, taxonomy_term--categories. -
(Optional) Enter the Request Headers used for Drupal API to apply specific headers for the API.
-
(Optional) Enter the Filters used for Drupal API to specify what content to sync. This will allow you to control the data you receive from Drupal. For example,
{"recipe": "filter[tags.name][value]=British"}. -
Select Save to add this data source.
When you add a new data source, Netlify automatically connects to it and starts syncing data to your data layer.
Salesforce Commerce Cloud
Section titled “Salesforce Commerce Cloud”To use Salesforce Commerce Cloud (SFCC), complete the following steps:
- Set up an API Client in Account Manager.
- Add your SFCC instance and API information to your data layer.
Set up an API Client in Account Manager
Netlify Connect utilizes the Salesforce Admin API to sync product data. To enable this, you need to set up an API Client with the correct scopes in Account Manager on Salesforce.
Create an API Client in Account Manager by following the instructions provided by Salesforce. While you set up the API client, note the following:
- Take note of the password you set for the API Client. This will be used as the Client Secret later.
- The API Client will require the following scopes:
sfcc.productsandsfcc.catalogs. - When you finish creating the client, find it in the table of API clients and take note of the value in the API Client ID column of the table, as described in Salesforce’s instructions. For example,
1d763261-6522-4913-9d52-5d947d3b94c4.
Add your SFCC instance
Once you have set up an API client, take the following steps in the Netlify UI to add it to your data layer:
-
Select Add a data source.
-
Select
Salesforce Commerce Cloudas the Data source type.If you haven’t already installed the extension for this data source, follow the install extension prompt to open the Salesforce Commerce Cloud extension details page in a new tab. As a Team Owner, select Install to install and make the extension available to all data layers on your team.
After you install the extension, close the tab and return to the Add a data source flow in Connect to continue with the next steps.
-
Enter a Name for this data source.
-
(Optional) Enter a unique Instance ID value to use for this data source. Netlify uses this value to support cross-references and linking between data sources.
-
Enter a Type prefix for this data source. The prefix must start with an uppercase letter, and can only consist of alphanumeric characters and underscores.
The prefix will be added to all data types synced from this data source in the GraphQL schema and you will use it when you query the GraphQL API. For example,
SfccProductwith the prefixMarketingbecomesMarketingSfccProductin the schema. -
Enter the Client ID for the API Client you created in Account Manager.
-
Enter the password for the API Client as the Client Secret.
-
Enter the Organization ID for your B2C Commerce instance. For example,
f_ecom_zzte_053. -
Enter the Short Code that is assigned to your realm. The short code applies to your entire realm, across all instances. For example,
kv7kzm78. -
Enter the Site ID for the site that you want to access data for (sometimes called a “channel”). For example,
RefArchorSiteGenesis. -
Enter a comma-separated list of Locales to sync data for. For example,
default, en-US, fr-FR, zh-CN, ja-JP, it-IT, en-GB. -
Enter the Request Concurrency to set the maximum number of concurrent requests to make to the B2C Commerce API.
-
Select Save to add this data source.
When you add a new data source, Netlify automatically connects to it and starts syncing data to your data layer.
Shopify
Section titled “Shopify”To use Shopify with Connect, complete the following steps:
- Prepare your Shopify store.
- Add your Shopify store to your data layer.
Prepare your Shopify store
To add a Shopify store to your data layer in Netlify Connect, first you need to set up a custom Shopify app that we can use to access Shopify’s Admin API and sync data. You will need the Admin API access token to set up your Shopify data source in Netlify Connect.
-
Log in to your Shopify store as the store owner and search for
Apps and sales channels. -
Enable custom app development. To do this, select Develop apps, then Allow custom app development. After reading the warning and information provided, select Allow custom app development.
-
Create a custom app. From the
App developmentsection, select Create an app. Enter an app name and developer, then select Create app. -
Set admin API scopes for the app. On the custom app page, select Configure Admin API scopes. Enable the
read_products,read_product_listings, andread_filesscopes, and then select Save.You can use this data integration to proxy directly to the Shopify GraphQL API as well. To allow additional CRUD operations through the proxy, enable the admin API scopes for these operations, such as
write_products.
-
Install the app and get the API access token. Select the API credentials tab and select Install app under Access tokens. Follow the prompts to install the app on your Shopify store.
Next, under the Admin API access token section, select Reveal token once to access the token. Store the token in a safe place as you will need it to set up the data source connection.

To enable automatic syncing to Netlify, you also need to add your data layer webhook to Shopify. This ensures that Shopify will notify Netlify when data updates.
-
In Shopify, navigate to , and under Webhooks, select Create webhook.
-
Select each Event that should trigger a sync to Netlify.
-
Select
JSONas the format. -
Add the following webhook to the URL field. Make sure to replace the placeholder with your data layer ID.
https://webhook.netlify-connect.com/hooks/data_layer/data_source/publish/YOUR-DATA-LAYER-IDNote that you also have the ability to create a custom authenticated webhook and use that instead of the default webhook. Learn more about managing webhooks.
-
Select Add webhook to finish.
Add your Shopify store
Once you have created a custom Shopify app, take the following steps in the Netlify UI to add your Shopify store to your data layer:
-
Select Add a data source.
-
Select
Shopifyas the Data source type.If you haven’t already installed the extension for this data source, follow the install extension prompt to open the Shopify extension details page in a new tab. As a Team Owner, select Install to install and make the extension available to all data layers on your team.
After you install the extension, close the tab and return to the Add a data source flow in Connect to continue with the next steps.
-
Enter a Name for this data source.
-
Add a Type prefix for this data source. The prefix must start with an uppercase letter, and can only consist of alphanumeric characters and underscores.
The prefix will be added to all data types synced from this data source in the GraphQL schema and you will use it when you query the GraphQL API. For example,
ShopifyProductwith the prefixMarketingbecomesMarketingShopifyProductin the schema. -
(Optional) Enter a unique Instance ID value to use for this data source. Netlify uses this value to support cross-references and linking between data sources.
-
Enter the Admin API access token. This is the access token for the custom Shopify app you created in the prepare your store step. The token starts with
shpat_. -
Enter the Store Name for your Shopify store. You can find store name in the Shopify URL. For example,
STORENAME.myshopify.com. -
Select Save to add this data source.
When you add a new data source, Netlify automatically connects to it and starts syncing data to your data layer.
WordPress
Section titled “WordPress”To use WordPress with Netlify Connect, complete the following steps:
- Prepare your WordPress instance.
- Add your WordPress instance to your data layer.
Prepare your WordPress instance
Take the following steps on your WordPress instance before you add it to your data layer:
-
Install and activate the
Netlify ConnectWordPress plugin:- Download the
Netlify ConnectWordPress plugin. - In your WordPress admin dashboard, navigate to Plugins and then select Add New Plugin.
- Select Upload Plugin and follow the prompts to upload the
netlify-connect-wp-plugin.zipfile that you downloaded in step 1. - Select Install now.
- Download the
-
In your WordPress admin dashboard, navigate to and create an application password. You’ll need to enter this as your token when you set up your WordPress data source in the Netlify UI, and Netlify will use this token to access your data.
-
To enable automatic syncing to Netlify, add your data layer Webhook URL in your WordPress plugin settings for Connect:
-
In your WordPress admin dashboard, navigate to .
-
Add the following webhook to the Data layer Webhook URL field. Make sure to replace the placeholder
YOUR-DATA-LAYER-IDwith your data layer ID.https://webhook.netlify-connect.com/hooks/data_layer/data_source/publish/YOUR-DATA-LAYER-IDNote that you also have the ability to create a custom authenticated webhook and use that instead of the default webhook. Learn more about managing webhooks.
-
Select Save Changes to finish.
-
Add your WordPress instance
Once you have prepared your WordPress instance, take the following steps in the Netlify UI to add it to your data layer:
-
Select Add a data source.
-
Select
WordPressas the Data source type.If you haven’t already installed the extension for this data source, follow the install extension prompt to open the WordPress extension details page in a new tab. As a Team Owner, select Install to install and make the extension available to all data layers on your team.
After you install the extension, close the tab and return to the Add a data source flow in Connect to continue with the next steps.
-
Enter a Name for this data source.
-
Add a Type prefix for this data source. The prefix must start with an uppercase letter and can only consist of alphanumeric characters and underscores.
Connect will add the prefix to all data types synced from this data source in the GraphQL schema, which you will use when you query the GraphQL API. For example,
Postwith the prefixMarketingbecomesMarketingPostin the schema. -
Enter the User (the username for which you created the application password).
-
Enter the Token (the application password you created in WordPress).
-
Enter the full API Host URL for your WordPress instance (for example,
https://example.comwithout a trailing slash). -
Select Save to add this data source.
When you add a new data source, Netlify automatically connects to it and starts syncing data to your data layer.
Optional configuration
If you need to customize your setup further, you can configure the following optional settings during the setup process:
- Instance ID unique value to use for this data source. Netlify uses this value to support cross-references and linking between data sources.
- Per page: specify the number of nodes to fetch per page when syncing data from WordPress. The default is
100. - Request concurrency: set the number of concurrent requests to make during node sourcing. You can lower this if your WordPress server experiences issues during data sourcing. The default is
15. - Types to exclude globally: specify the slugs of post types, taxonomies, or other content types to exclude from sourcing, listed as comma-separated values.
Custom data source
Section titled “Custom data source”To use a custom data source with Netlify Connect, complete the following steps:
- Install the data integration.
- Prepare your data source instance.
- Add your custom data source to your data layer.
Install the data integration
Before you can add a custom data source to your data layer, you must install the data integration for that type of source on your team.
- As a Team Owner, navigate to the Extensions page for your team in the Netlify UI.
- Find the data integration for the custom data source type that you wish to use and select it in the search results.
- If it’s not already installed, on the details page, select Install.
If you can’t find the data integration, speak with the integration developer to ensure they have followed all of the steps to publish an extension.
Prepare your data source instance
To enable automatic syncing to Netlify, you need to manually add a webhook to your custom data source instance. The exact instructions vary for each system but you need to do the following:
-
Log in to your data source and navigate to the webhook settings.
-
Follow the prompts to create a new webhook and add the following to the URL field. Make sure to replace the placeholder with your data layer ID.
https://webhook.netlify-connect.com/hooks/data_layer/data_source/publish/YOUR-DATA-LAYER-IDNote that you also have the ability to create a custom authenticated webhook and use that instead of the default webhook. Learn more about managing webhooks.
-
If the options are available, select the data types and events that should trigger the webhook. We suggest including any create, edit, and delete events for all content types that you wish to store in your data layer.
If you have the option to add a header to the webhook, add a
x-connect-data-sourceheader to the request with the data integration’s slug as the header’s value. This ensures that the webhook only triggers a sync for this specific data source, instead of all data sources on your data layer. -
Save and enable the webhook.
You may need to complete other configuration steps on your data source instance. Please refer to the documentation provided by the integration developer.
Add your custom data source
Once you have installed the data integration for your team and prepared your data source instance, take the following steps in the Netlify UI to add the custom data source to your data layer:
-
If you are not already on the data layer settings page, on your team’s Connect page, select the data layer from the Data layers list, and then select Data layer settings.
-
On the data layer settings page, select Data sources.
-
Select Add a data source.
-
Select the data integration that you installed as the Data source type.
-
Enter a Name for this data source.
-
Add a Type prefix for this data source. The prefix must start with an uppercase letter, and can only consist of alphanumeric characters and underscores.
The prefix will be added to all data types synced from this data source in the GraphQL schema and you will use it when you query the GraphQL API. For example,
Postwith the prefixMarketingbecomesMarketingPostin the schema. -
(Optional) Enter a unique Instance ID value to use for this data source. Netlify uses this value to support cross-references and linking between data sources.
-
Fill in the remaining configuration fields with the values for your data source instance. For example, you may need to provide the API key for your CMS instance.
-
Select Save to add this data source.
When you add a new data source, Netlify automatically connects to it and starts syncing data to your data layer.
In the meantime, you can add another source or select Continue to move to the next step in the data layer configuration flow.
If you want to add cross-references between your data sources, you can configure them after you complete the data layer configuration flow.
3. Connect sites
Section titled “3. Connect sites”The third step in the data layer configuration flow is to set up connections to sites on Netlify that should automatically build and deploy when data changes in this data layer.
We recommend that you connect any sites that use static site generation (SSG) to ensure they always have access to the latest data. All other site types should skip this step. Learn more about when to connect your site.
For Netlify to automatically build and deploy your site when data changes, your site must be linked to a Git repository to enable continuous deployment, and it must have active builds.
To connect a site to this data layer:
- Select Search by site name or domain and start entering the name or domain of the site you want to connect.
- When the site appears in the results list, select the site. The connected site will appear in the Connected sites list.
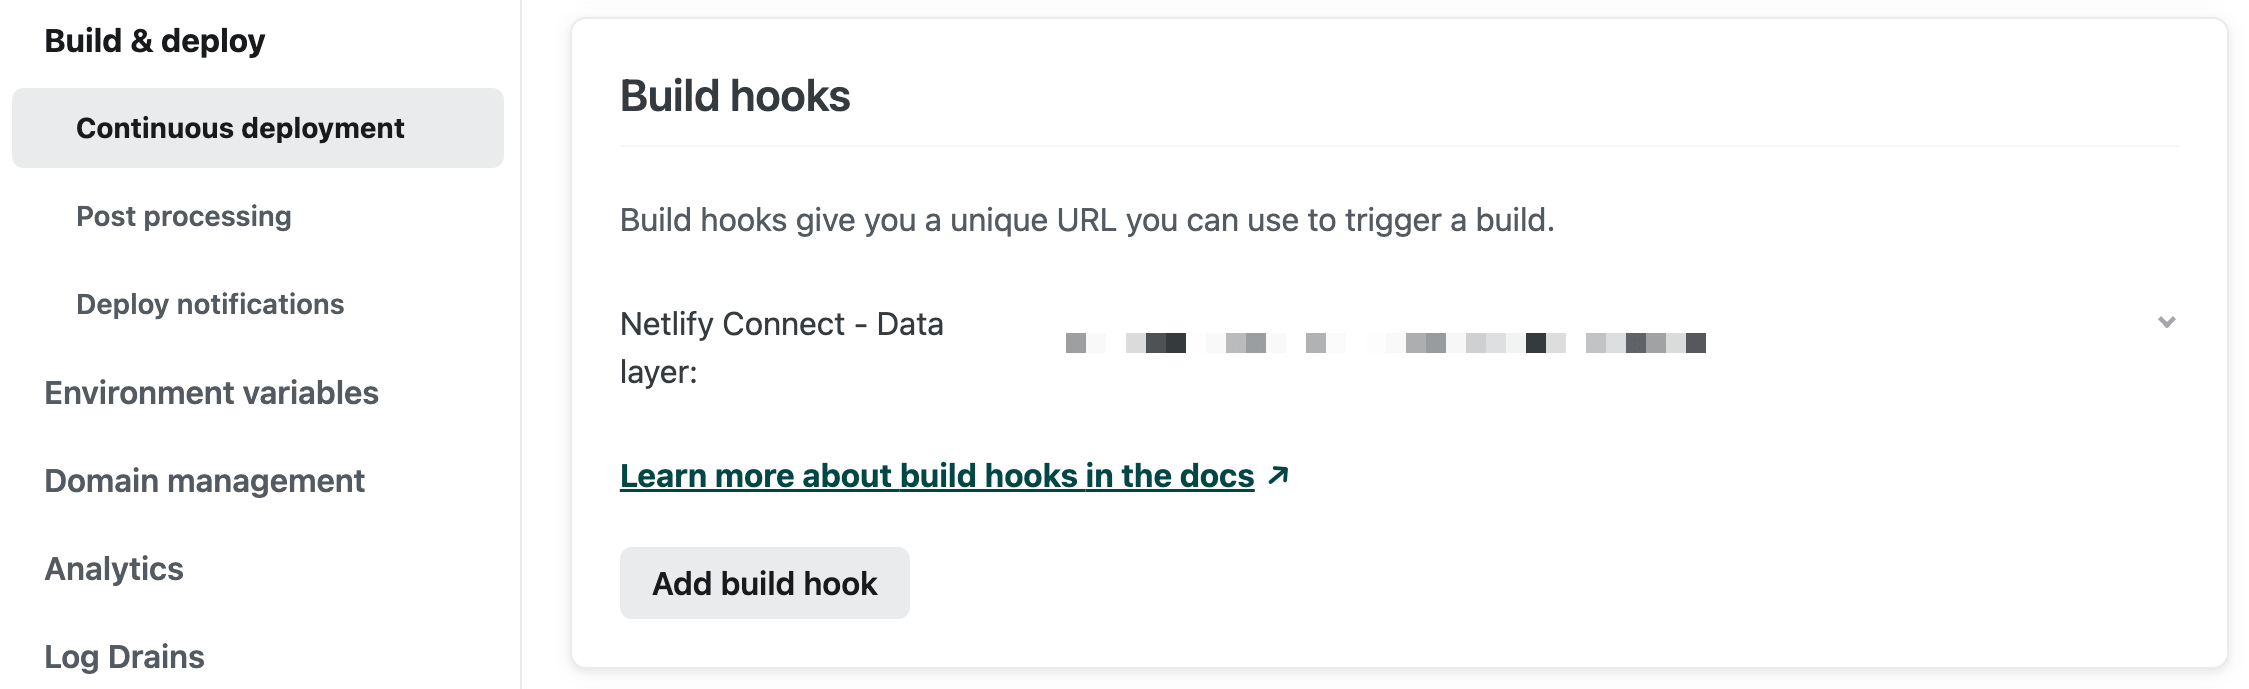
Once you connect a site, the build hooks for the site will include a Netlify Connect - Data layer build hook with the data layer ID as the value. This provides a convenient way on the site level to check whether a site is connected to a data layer.
Repeat the above steps to connect as many sites as needed. Once you’re done, select Continue to move to the last step.
4. Add notifications
Section titled “4. Add notifications”The final step in the flow allows you to add notifications to notify external services whenever data changes in your data layer. For example, you may want to add a notification to notify a Slack channel when your data layer updates.
To add a notification:
- Select Add a notification.
- Enter a Name and URL for the notification.
- Select Create notification.
Repeat these steps to add as many notifications as needed.
Once you’re done, select Finish data layer configuration to complete the set up process.
What next?
Section titled “What next?”Once you finish the configuration flow for a new data layer, you can review sync events while Netlify completes the initial data sync from your data sources.
After the sync events are successful, you need to generate an API token for the GraphQL API. Once you do that, you can access the data with the GraphQL sandbox or through the GraphQL API in your app.
If the sync events are not successful, review our troubleshooting tips for support.
If you need to, you can now pin a data revision so that your data layer’s API always uses that specific data revision.
You can also review and modify the data layer to add or update configured data sources, sites, and webhooks. After you configure more than one data source on the data layer, you can add cross-references to create links between fields across data sources and retrieve the combined data through a single query.
You may also want to restrict access to certain data using API scopes and generate new API tokens to access that data.
Did you find this doc useful?
Your feedback helps us improve our docs.