For the complete Netlify documentation index, see llms.txt. Markdown versions of this page are available by appending .md to the URL. You can connect your Netlify team to your instance of GitHub Enterprise Server, GitLab self-managed, or Bitbucket Data Center and Server to make linking sites to repositories easier.
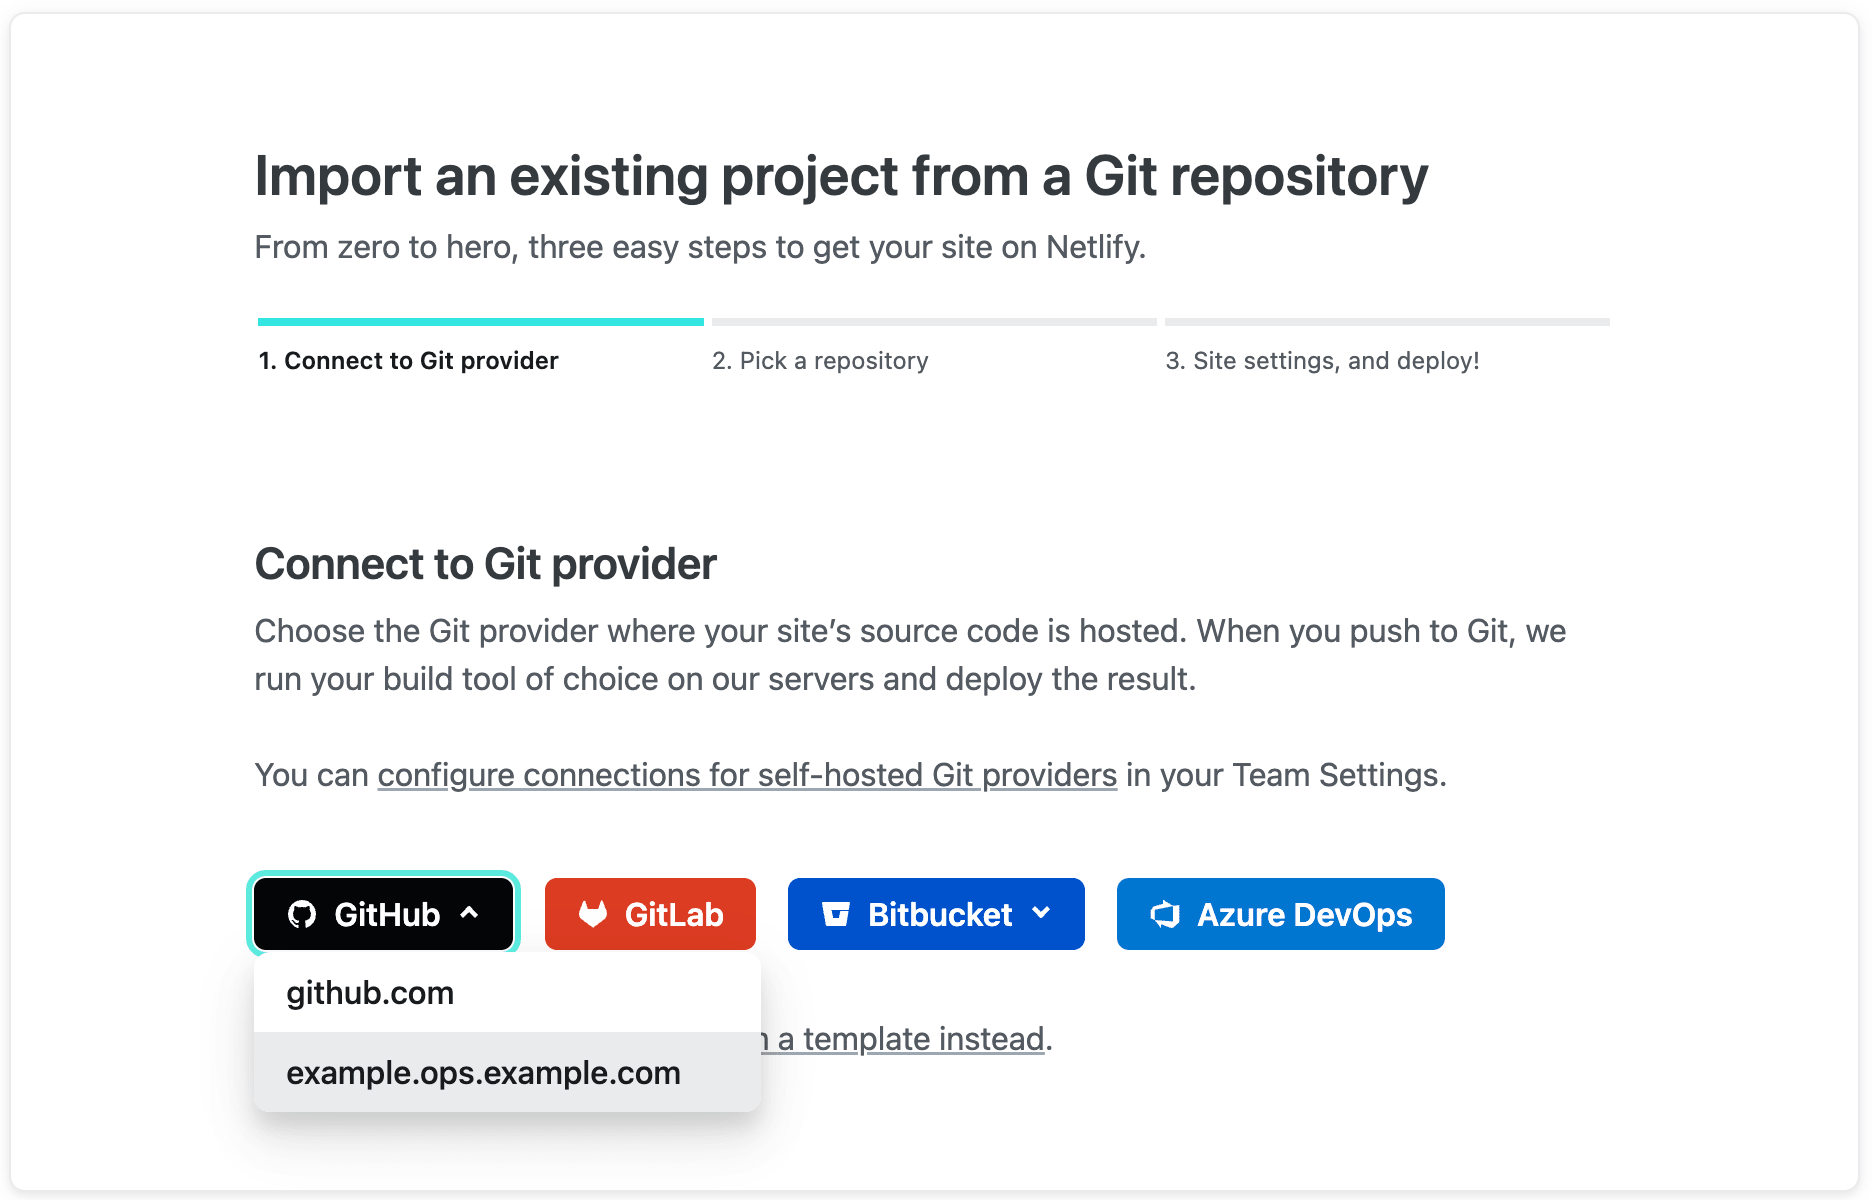
You can connect repositories from your Git provider instance to the Netlify UI in the following ways:
Beyond simplifying the initial configuration of continuous deployment, Netlify’s self-hosted Git feature offers several long-term advantages over manual setup using Netlify CLI, including:
- branch deploy controls (which support branch subdomains and Split Testing
- Deploy Preview controls
- monorepo support
Connect a Netlify team to your Git provider instance
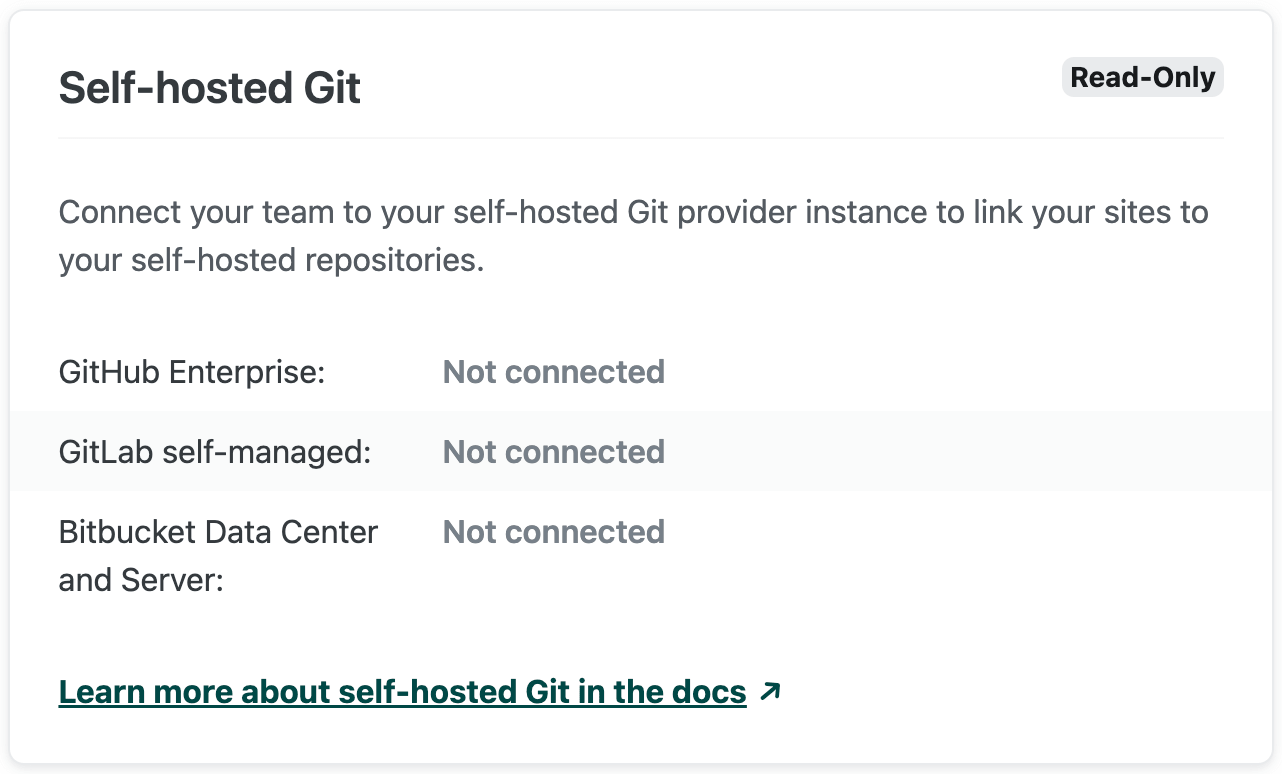
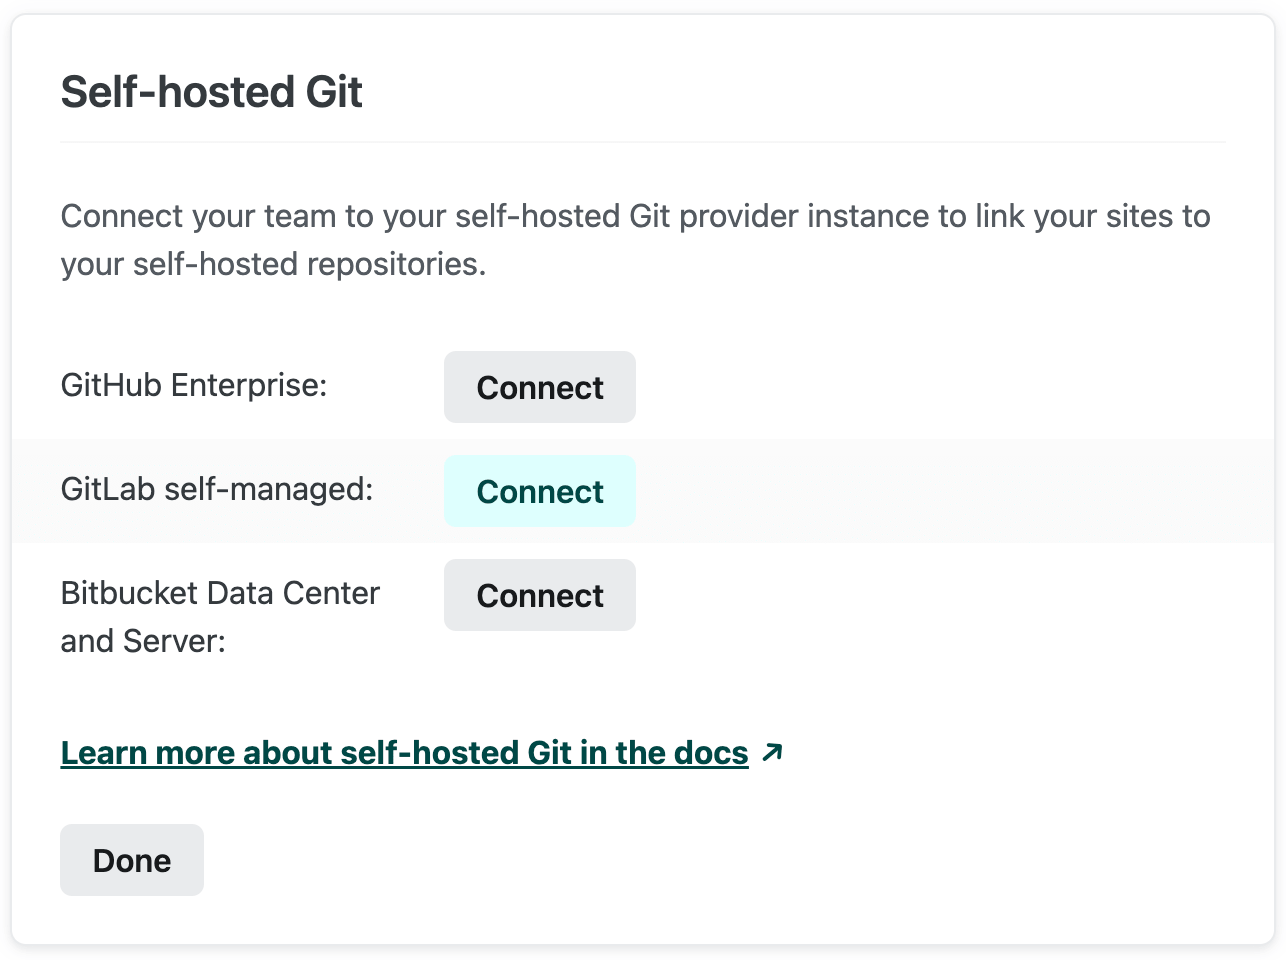
Section titled “Connect a Netlify team to your Git provider instance”Self-hosted Git information and settings are found under Team settings General Self-hosted Git.
Connecting your Netlify team to your self-hosted GitHub, GitLab, or Bitbucket instance requires setup on both Netlify and your self-hosted Git instance. The configuration steps vary by Git provider. Read the general requirements and limitations below before you get started with the provider-specific sections.
Requirements
Section titled “Requirements”- Instance availability. Our build process must be able to contact your self-hosted Git instance. If your self-hosted Git instance is behind a VPN/firewall, enable Private Connectivity and allowlist the private network IP address.
- Team member roles. You must be a Team Owner to connect your Netlify team to your self-hosted Git instance. After an Owner sets up the connection, any Team Owner or Developer can select the self-hosted instance when choosing the Git provider where a site’s source code is hosted.
- Site repository available at a public URL. Netlify sites can only connect to GitHub Enterprise Server or GitLab self-managed repositories that are available at a public URL. This is not a requirement for Bitbucket Data Center and Server. On your Git provider instance, you can configure a single organization or project to allow public repositories.
- For GitHub Enterprise Server, check out GitHub’s Enterprise policy docs.
- For GitLab self-managed, check out GitLab’s project visibility docs.
Limitations
Section titled “Limitations”- Site transfer. Because sites linked to self-hosted repositories rely on a team-level connection to the self-hosted Git instance, you cannot transfer a site between teams if the site is linked to a self-hosted repo. You can contact Support for assistance with transferring sites linked to self-hosted repos.
- Number of connections. You can connect your Netlify team to instances of GitHub Enterprise Server, GitLab self-managed, and Bitbucket Data Center and Server, but you cannot connect your team to multiple self-hosted instances of the same Git provider. A GitHub Enterprise Server instance can be connected to only one Netlify team.
- Sensitive variable policy. Because self-hosted instances enable a higher degree of access control, we treat all self-hosted repositories as private. This means you won’t be able to set a sensitive variable policy for a site linked to a self-hosted repo.
- Deploy to Netlify button. You cannot create a Deploy to Netlify button for a self-hosted repo.
- Git Gateway. Self-hosted repositories on an instance of GitHub Enterprise Server, GitLab self-managed, or Bitbucket Data Center and Server are not supported with Git Gateway. You must have a repository available on GitHub.com, GitLab.com, or Bitbucket.org.
- Private repositories for GitHub or GitLab. Netlify sites can only connect to GitHub Enterprise Server and GitLab self-managed repositories that are available at a public URL. This is not a requirement for Bitbucket Data Center and Server. On your Git provider instance, you can configure a single project or organization to allow public repositories.
Provider-specific setup instructions
Section titled “Provider-specific setup instructions”GitHub Enterprise Server
Section titled “GitHub Enterprise Server”Make sure you’ve read the general requirements and limitations above before you proceed with this GitHub-specific section.
Requirements
Section titled “Requirements”- Self-hosted GitHub instance. You can host your GitHub Enterprise Server instance either on premises or in the cloud.
- Ability to work with GitHub Apps. You’ll need to create a custom GitHub App as part of the setup. This means you need GitHub Enterprise Server version 2.13 or above. The required GitHub permissions depend on where you want to create and install the app. Visit GitHub’s docs about apps for more information.
- Hostname configured. You must set a hostname for your appliance, we cannot connect based on a hard-coded IP address.
- Enterprise policy enabled that allows public repositories. Learn more about GitHub Enterprise Server’s organization policies.
To connect your Netlify team to GitHub Enterprise Server, you will need to create a custom GitHub App on your self-hosted instance and then provide us details about your instance and app.
Get started
Section titled “Get started”Most of the GitHub App settings take universal values that are provided in this documentation. Some require team-specific values that you can find in the Netlify UI.
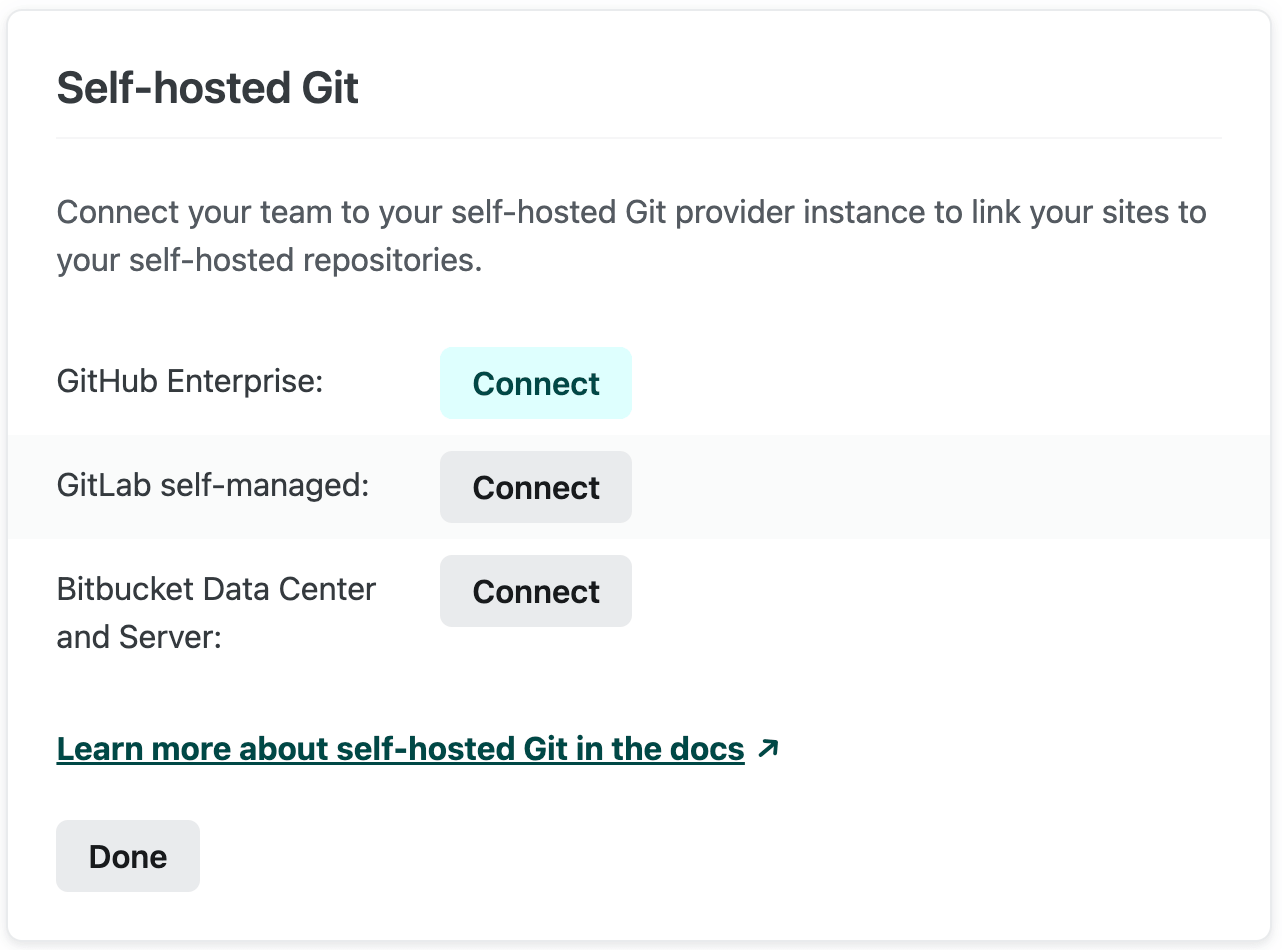
To get started, go to Team settings General Self-hosted Git, select Edit settings, then select Connect for GitHub Enterprise Server.
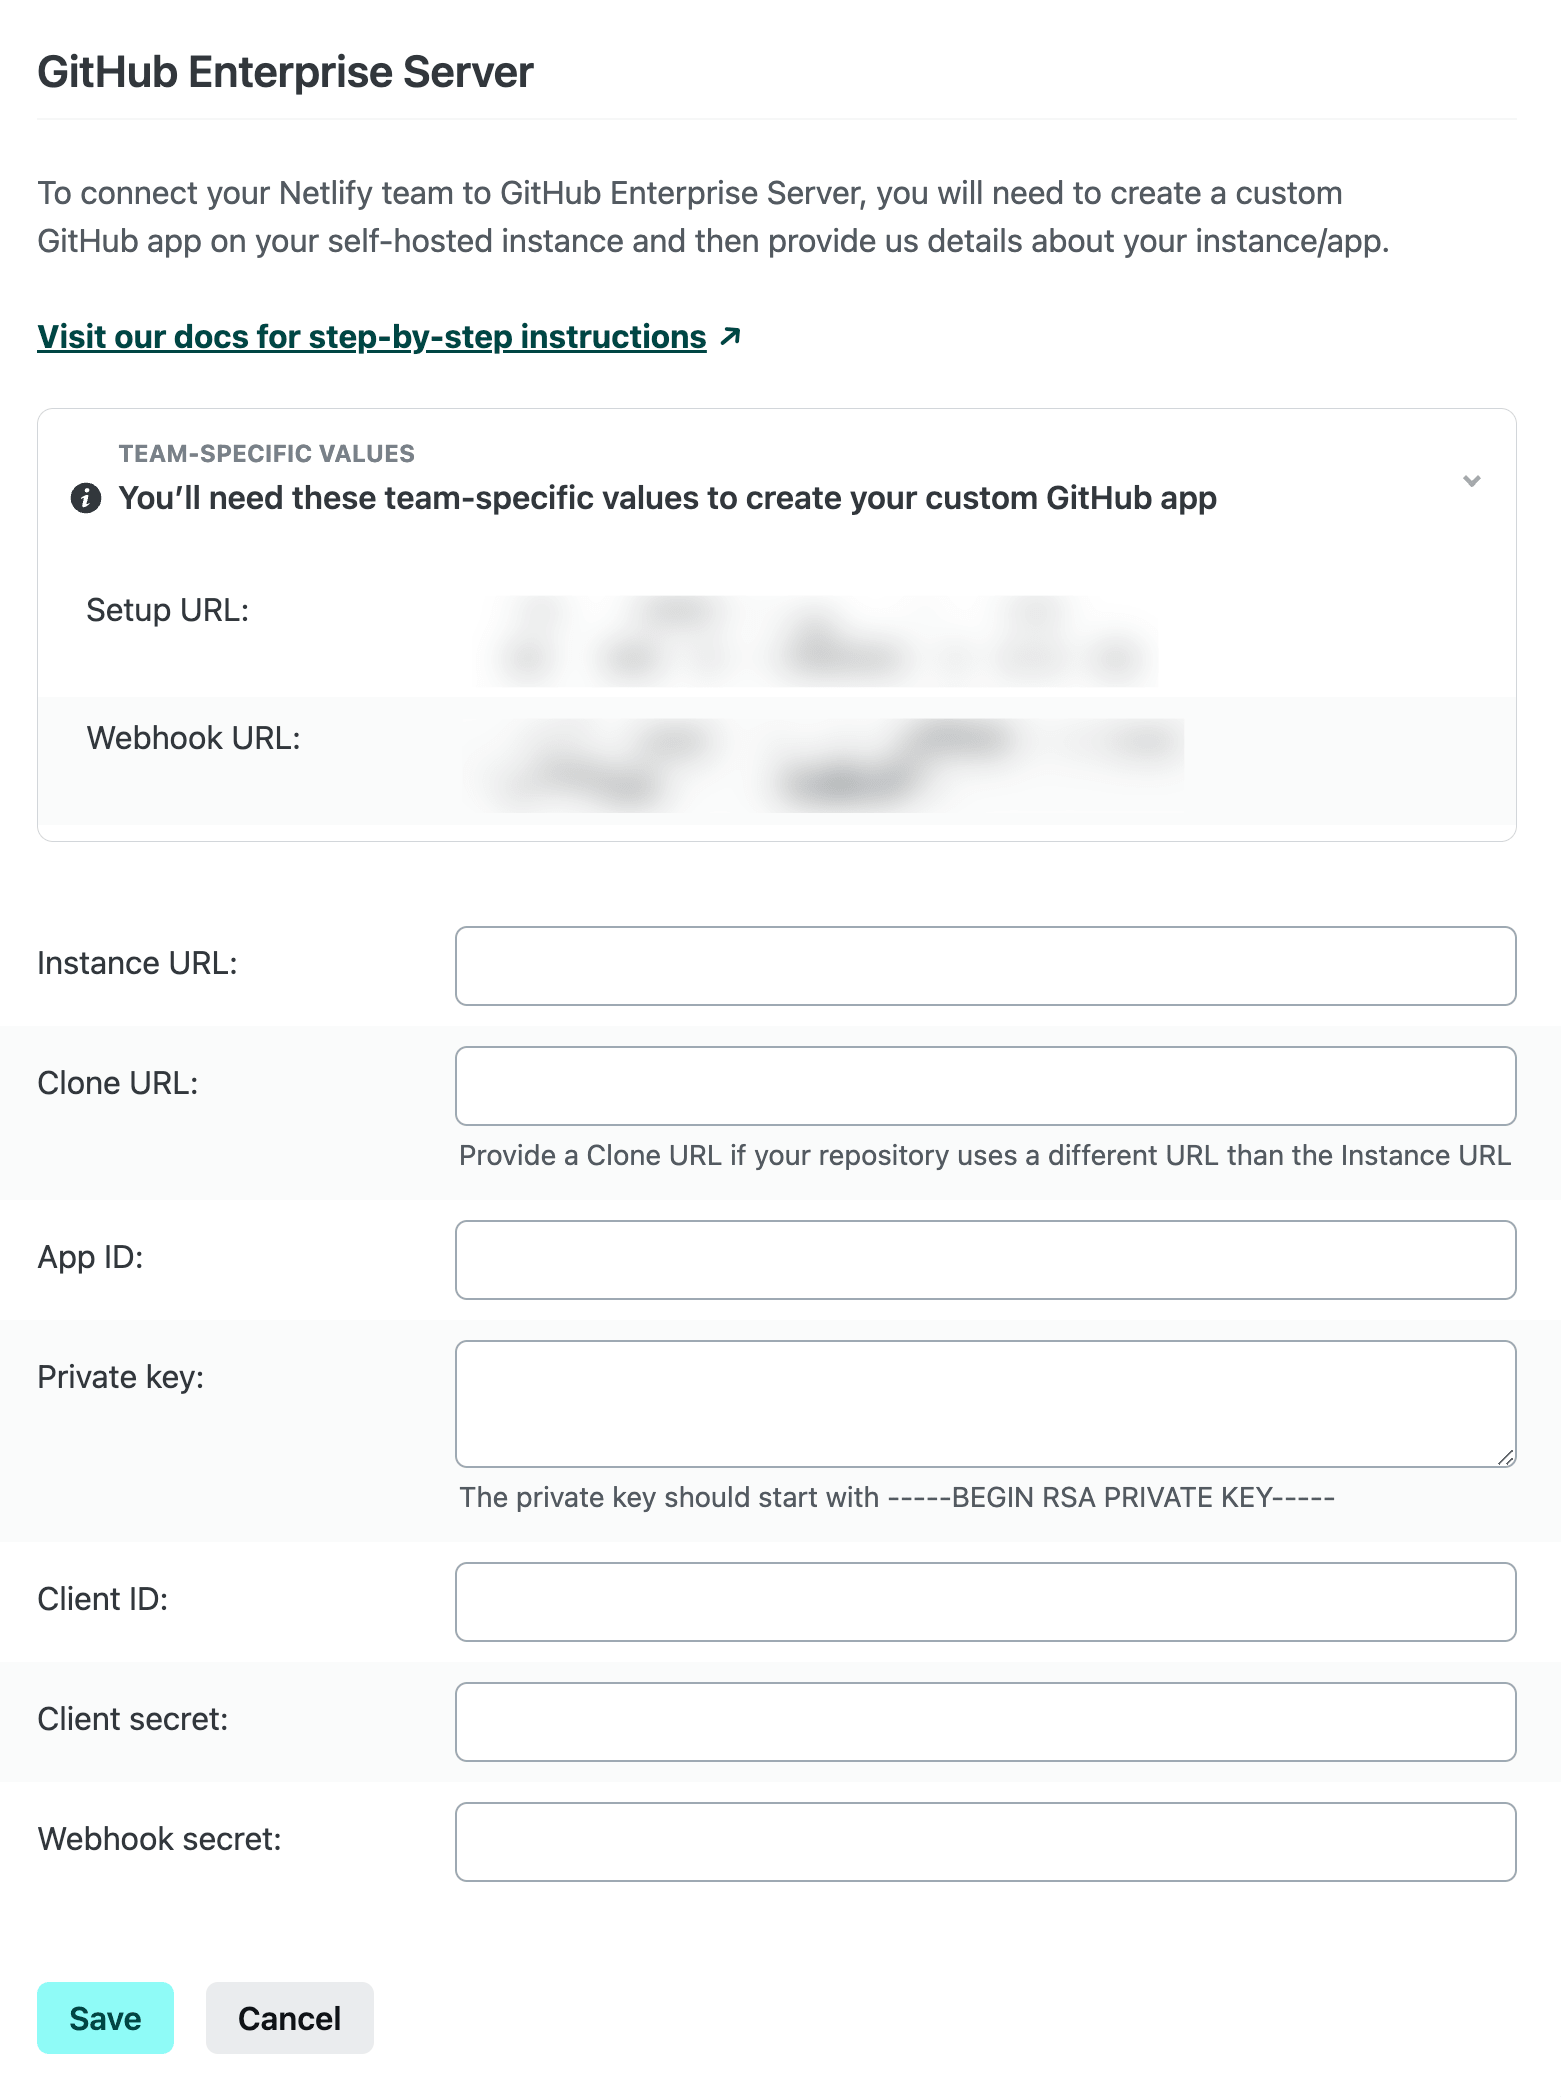
This will open a configuration modal that contains the team-specific values you’ll need to create your GitHub App, followed by a form to provide us the necessary details about your instance and app.
Generate webhook secret
Section titled “Generate webhook secret”You will need to create a unique webhook secret and provide it to both your GitHub App and Netlify. This will be used to verify that webhooks received by Netlify are from your self-hosted GitHub instance.
Visit GitHub’s docs on securing your webhooks to learn how to generate a random string with high entropy to use for your webhook secret. Keep this somewhere secure that you can access later so that you can provide your webhook secret to both your GitHub App and Netlify.
Create GitHub App
Section titled “Create GitHub App”You can visit GitHub’s docs on creating a GitHub App for more information about GitHub App settings and options. You can create your GitHub App under your personal account or an organization. We recommend creating it under an organization where other Organization Owners will have access to manage the settings.
- In your GitHub Enterprise Server instance, select your avatar (labeled “View profile and more” for screen readers) and then select Settings.
- Under Organization settings, select the organization where you’d like to create the app. You can install the app on additional organizations after you create it.
- Navigate to GitHub Apps and select New GitHub App.
- Fill in the Register new GitHub App settings as follows:
- GitHub App name:
Netlify - Homepage URL:
https://app.netlify.com - User authorization callback URL:
https://api.netlify.com/auth/done - Setup URL: enter your team-specific value which takes the form of
https://api.netlify.com/github/enterprise/{account_id}/app-installedand can be found in the Netlify UI as described above - Redirect on update: true
- Webhook URL: enter your team-specific value which takes the form of
https://api.netlify.com/hooks/github_enterprise/{account_id}and can be found in the Netlify UI as described above - Webhook secret: enter the random string with high entropy that you generated as described above
- GitHub App name:
- Set Repository permissions as follows:
- Checks: Read & write
- Contents: Read-only
- Issues: Read & write
- Metadata: Read-only
- Pull requests: Read & write
- Commit statuses: Read & write
- Set User permissions as follows:
- Email addresses: Read-only
- Under Subscribe to events select the following events:
- Create
- Delete
- Issue comment
- Pull request
- Pull request review
- Pull request review comment
- Push
- Make a selection for Where can this GitHub App be installed?
- You can choose either option based on how your Netlify team will use organizations to collaborate in your self-hosted GitHub instance.
- Select Create GitHub App.
Generate private key
Section titled “Generate private key”After you create your GitHub App, you’ll be able to generate a private key. You’ll provide the private key to Netlify along with other details about your instance and app. This will be used to authenticate requests made by Netlify to your self-hosted GitHub instance.
- Under the General settings for your GitHub App, select Generate a private key. This will create a private key in PEM file format which will automatically download to your computer.
- Keep the PEM file somewhere secure that you can access later so that you can provide your private key to Netlify. GitHub will store only the public portion of the key.
Provide GitHub instance and app details to Netlify
Section titled “Provide GitHub instance and app details to Netlify”After you create your GitHub App and generate a private key, you can finish your Self-hosted Git configuration on Netlify in the GitHub Enterprise Server modal that you opened as described above.
- Provide the following details about your GitHub instance and app:
- Instance URL: URL where your self-hosted GitHub instance can be accessed.
- Clone URL: URL where your self-hosted GitHub instance repositories can be cloned (if different than your Instance URL).
- App ID, Client ID, and Client secret: values that are assigned to your GitHub App by GitHub and can be found in the app’s settings under General > About.
- Private key: text contained inside the PEM file that you downloaded as described above. The private key begins with
-----BEGIN RSA PRIVATE KEY-----and ends with-----END RSA PRIVATE KEY-----. You can open the PEM file in a text editor to copy the contents. - Webhook secret: the random string with high entropy that you generated as described above. This should match the webhook secret that you entered when creating your GitHub App.
- Select Save.
Link your sites
Section titled “Link your sites”After you complete the setup for GitHub Enterprise Server, your team will be able to select your self-hosted instance when importing a new project or when changing the linked repository for an existing site. The first time you select your self-hosted instance, you will be prompted to install your GitHub App as described in our docs about repository permissions and linking.
Troubleshooting
Section titled “Troubleshooting”Here are steps to address issues that you may encounter using GitHub Enterprise Server with Netlify.
If you’re having trouble saving your GitHub Enterprise Server settings in Netlify
Section titled “If you’re having trouble saving your GitHub Enterprise Server settings in Netlify”- Verify that your self-hosted GitHub instance is accessible outside of your VPN/firewall or that you’ve updated your VPN/firewall allowlists for Private Connectivity.
- Verify that the App ID, Client ID, and Client secret match the values assigned by GitHub to your GitHub App. These can be found in the app’s settings under General > About.
- Verify that your Private key is entered correctly. It should begin with
-----BEGIN RSA PRIVATE KEY-----and end with-----END RSA PRIVATE KEY-----. You can generate a new private key for your GitHub App if necessary.
If you need to change your GitHub Enterprise Server settings on Netlify
Section titled “If you need to change your GitHub Enterprise Server settings on Netlify”- You’ll have to delete the old connection and create a new one. This is to protect the sensitive values in the settings.
- To delete the old connection, go to Team settings General Self-hosted Git, select Edit settings, and then use the
xbutton next to your self-hosted GitHub instance.
If you’re having trouble linking your sites to your self-hosted repositories
Section titled “If you’re having trouble linking your sites to your self-hosted repositories”- Your GitHub Enterprise Server instance may have become inaccessible. Verify that your self-hosted GitHub instance is accessible outside of your VPN/firewall or that you’ve updated your VPN/firewall allowlists for Private Connectivity.
- Your GitHub App may have been deleted. Verify that your GitHub App still exists in your GitHub Enterprise Server instance.
- Your GitHub App may have been changed. You won’t be able to compare your GitHub Enterprise Server settings on Netlify to your app’s current state since you can’t edit the Netlify Self-hosted Git settings once saved. You can delete the old connection as described above and create a new one to make sure you’re matching the current state of your GitHub App.
If you get errors when triggering a build using webhooks
Section titled “If you get errors when triggering a build using webhooks”- Refresh your webhook secret in both your GitHub App and Netlify.
GitLab self-managed
Section titled “GitLab self-managed”Make sure you’ve read the general requirements and limitations above before you proceed with this GitLab-specific section.
Requirements
Section titled “Requirements”- Self-hosted GitLab instance. You can use the Community Edition or the Enterprise Edition hosted either on premises or in the cloud.
- GitLab API v4. This means you need GitLab version 8.17 or above.
- Repository available at public URL. Your GitLab instance must allow public repositories. Learn more at GitLab’s project visibility docs.
To connect your Netlify team to GitLab self-managed, you will need to create a GitLab OAuth application on your self-hosted instance and then provide us details about your instance and app.
Create OAuth application
Section titled “Create OAuth application”You can visit GitLab’s docs on OAuth applications for more information about OAuth application settings and options. You can create your OAuth application through your user profile or in your instance’s admin area. We recommend creating it in the admin area where other admin users will have access to manage the settings.
- In your GitLab self-managed instance, go to the Admin Area (represented by a wrench icon), navigate to Applications, and then select New application.
- Fill in the New application settings as follows:
- Name:
Netlify - Redirect URI:
https://api.netlify.com/auth/done - Scopes: api
- Name:
- Select Submit.
After you create your application, GitLab will provide you an Application ID and Secret. You’ll need to give these to Netlify in the next part of the setup.
Connect to GitLab self-managed from Netlify
Section titled “Connect to GitLab self-managed from Netlify”- Go to Team settings General Self-hosted Git, select Edit settings, then select Connect for GitLab self-managed.
 This will open a configuration modal that contains a form to provide us the necessary details about your instance and app.
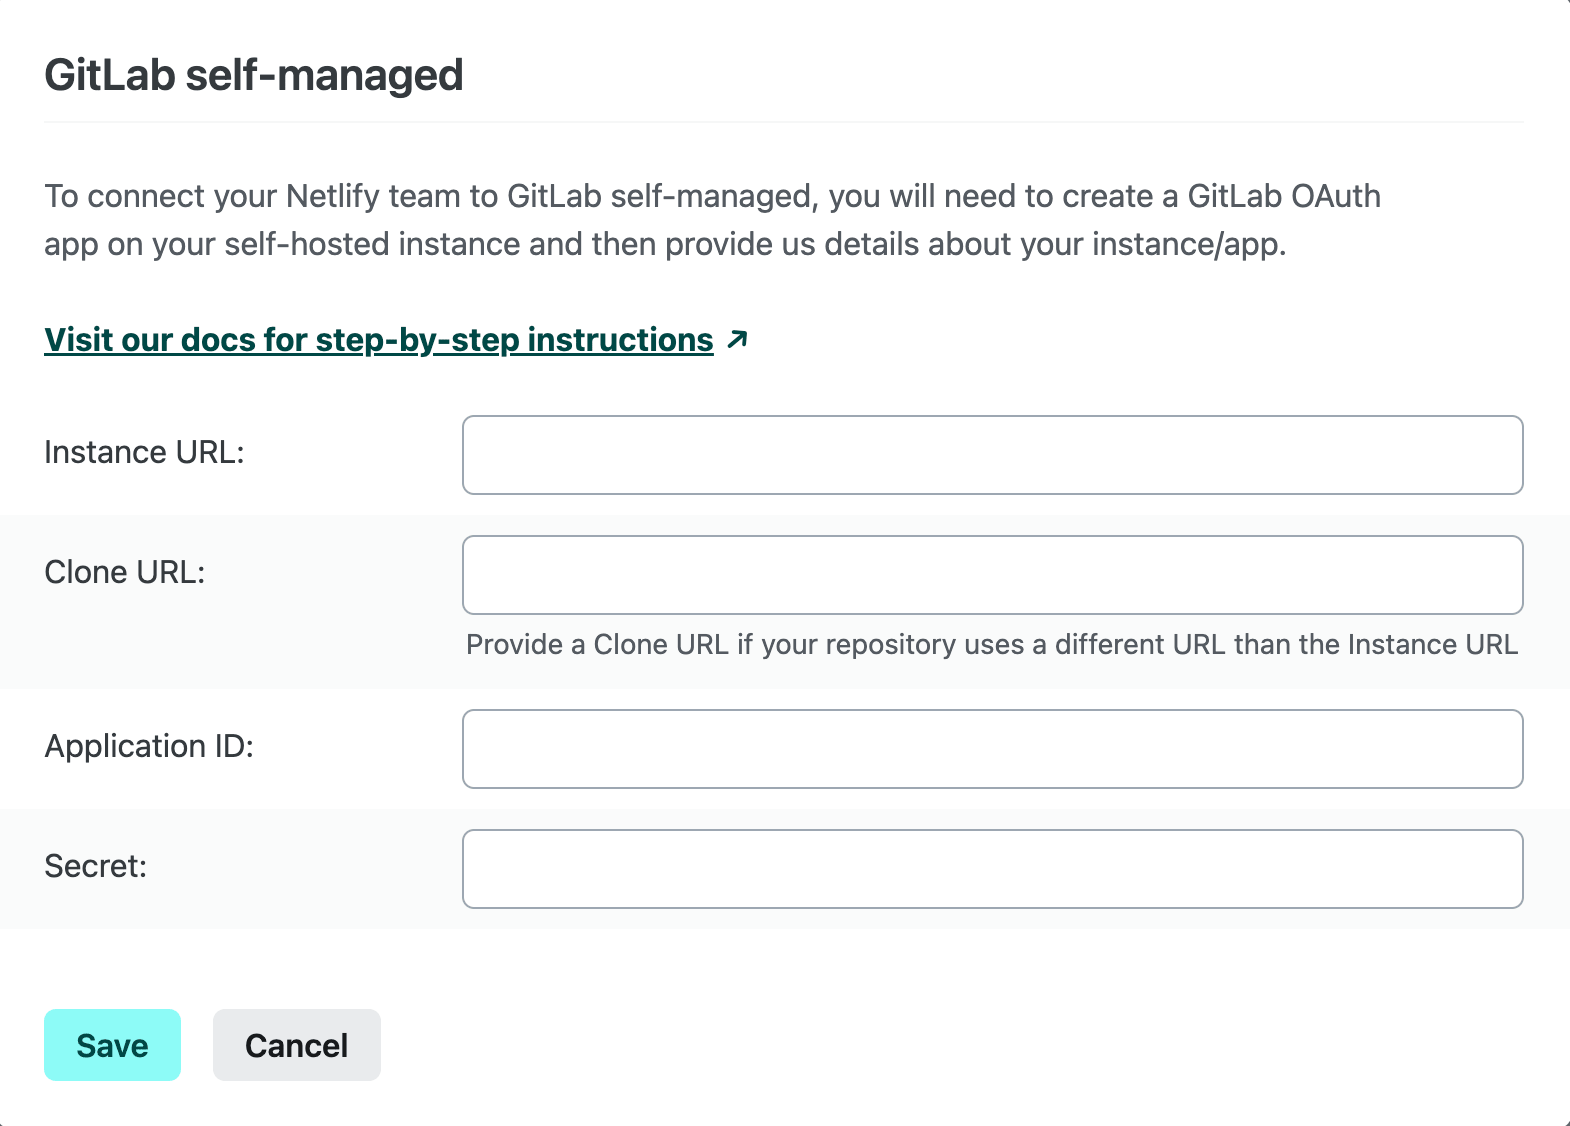
- Provide the following details about your GitLab instance and OAuth application:
- Instance URL: URL where your self-hosted GitLab instance can be accessed.
- Clone URL: URL where your self-hosted GitLab instance repositories can be cloned (if different than your Instance URL).
- Application ID and Secret: values that are assigned to your OAuth application by GitLab and can be found in your application’s details. These will be used to authenticate requests made by Netlify to your self-hosted GitLab instance.
- Select Save.
Link your sites
Section titled “Link your sites”After you complete the setup for GitLab self-managed, your team will be able to select your self-hosted instance when importing an existing project or when changing the linked repository on an existing site.
Troubleshooting
Section titled “Troubleshooting”Here are steps to address issues that you may encounter using GitLab self-managed with Netlify.
If you’re having trouble saving your GitLab self-managed settings in Netlify
Section titled “If you’re having trouble saving your GitLab self-managed settings in Netlify”- Verify that your self-hosted GitLab instance is accessible outside of your VPN/firewall or that you’ve updated your VPN/firewall allowlists for Private Connectivity.
- Verify that the Application ID and Secret match the values assigned by GitLab to your OAuth application. These can be found in your application’s details.
If you need to change your GitLab self-managed settings on Netlify
Section titled “If you need to change your GitLab self-managed settings on Netlify”-
You’ll have to delete the old connection and create a new one. This is to protect the sensitive values in the settings.
-
To delete the old connection, go to Team settings General Self-hosted Git, select Edit settings, and then use the
xbutton next to your self-hosted GitLab instance.
If GitLab serves an authorization error saying The redirect URI included is not valid
Section titled “If GitLab serves an authorization error saying The redirect URI included is not valid”- Verify that your GitLab OAuth application has Redirect URI set to
https://api.netlify.com/auth/done.
If Netlify serves an authorization error saying No Auth Provider Found
Section titled “If Netlify serves an authorization error saying No Auth Provider Found”- Your GitLab OAuth application may have been changed. You won’t be able to compare your GitLab self-managed settings on Netlify to your OAuth application’s current state since you can’t edit the Netlify Self-hosted Git settings once saved. You can delete the old connection as described above and create a new one to make sure you’re matching the current state of your GitLab OAuth application.
If you’re having trouble linking your sites to your self-hosted repositories
Section titled “If you’re having trouble linking your sites to your self-hosted repositories”- Your GitLab self-managed instance may have become inaccessible. Verify that your self-hosted GitLab instance is accessible outside of your VPN/firewall or that you’ve updated your VPN/firewall allowlists for Private Connectivity.
Bitbucket Data Center and Server
Section titled “Bitbucket Data Center and Server”Make sure you’ve read the general requirements and limitations above before you proceed with this Bitbucket-specific section.
Requirements
Section titled “Requirements”- Self-hosted Bitbucket instance. You can use Bitbucket Data Center or Bitbucket Server hosted either on premises or in the cloud.
To connect your Netlify team to Bitbucket Data Center and Server, you will need to create a Bitbucket OAuth application on your self-hosted instance and then provide us details about your instance and app.
Create OAuth application
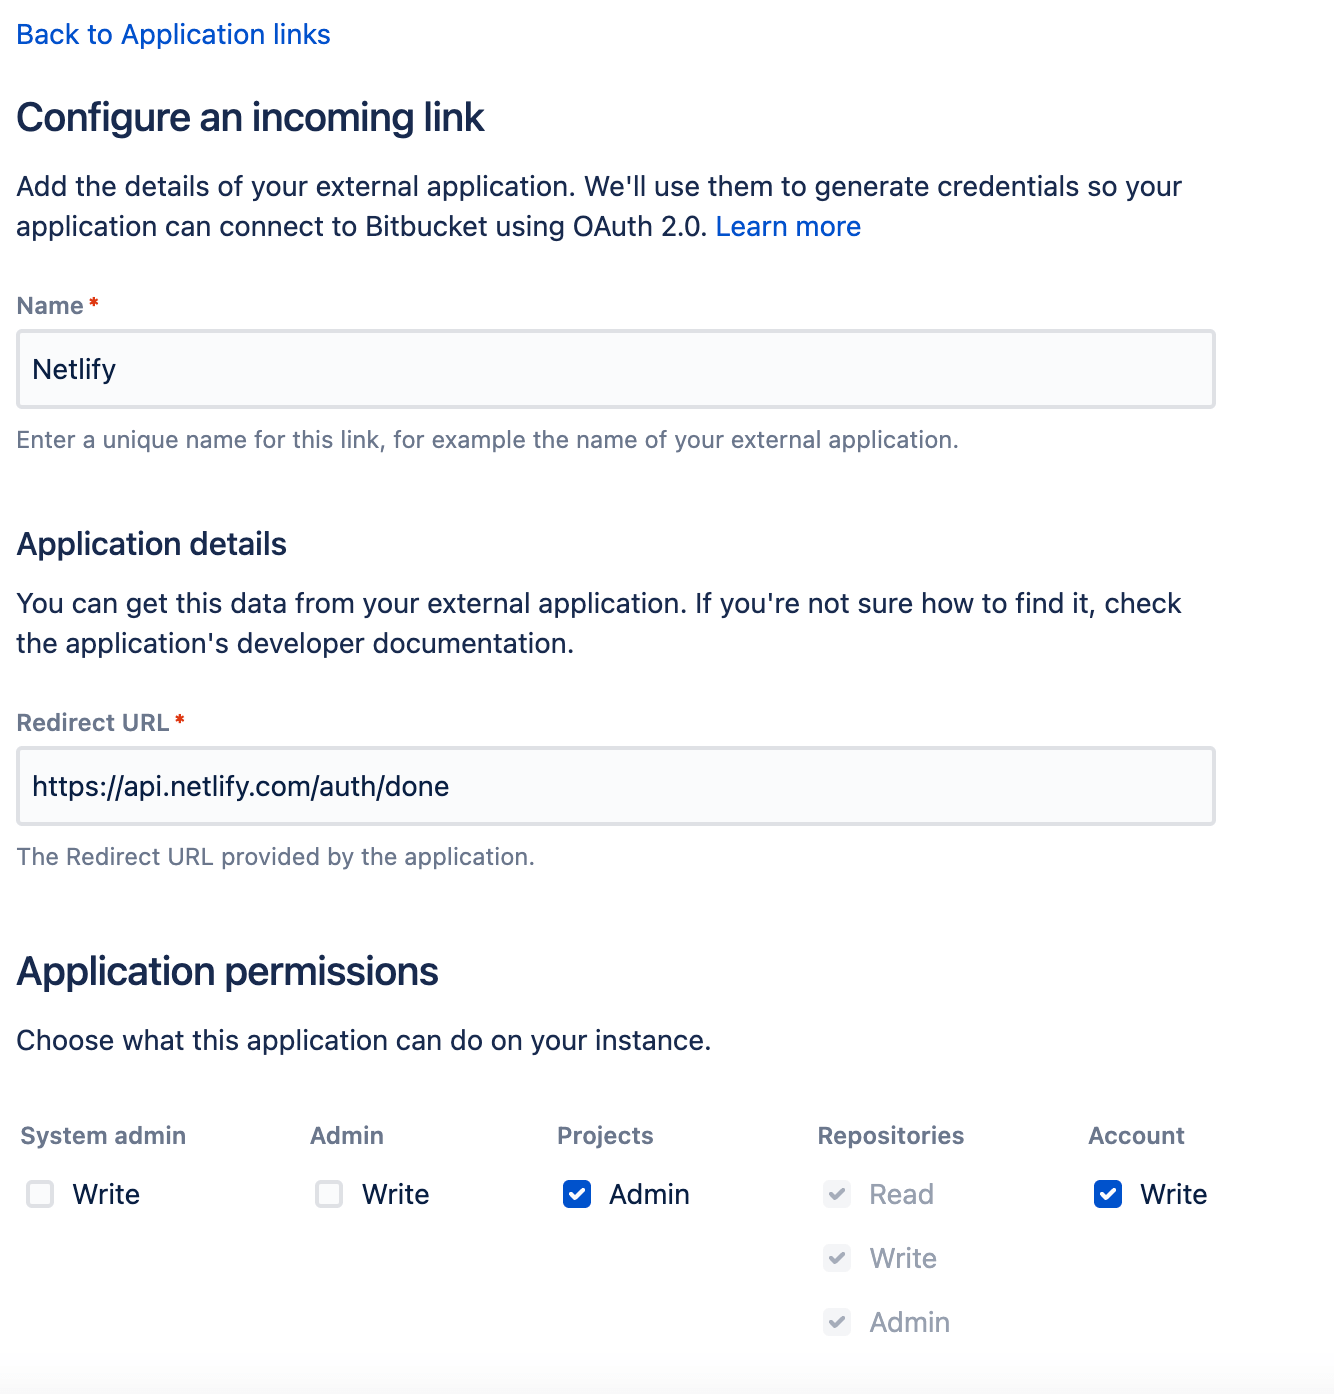
Section titled “Create OAuth application”Follow the instructions to create an incoming application link to your Bitbucket instance.
Use the following values for configuration:
-
Name:
Netlify -
Redirect URL:
https://api.netlify.com/auth/done -
Application Permissions:
-
Projects:
Admin -
Repositories:
Read,Write,Admin -
Account:
Write
-
After you create your incoming application link, Bitbucket will provide you with a Client ID and Client secret. You’ll need to give these to Netlify in the next part of the setup.
Connect to Bitbucket Data Center and Server from Netlify
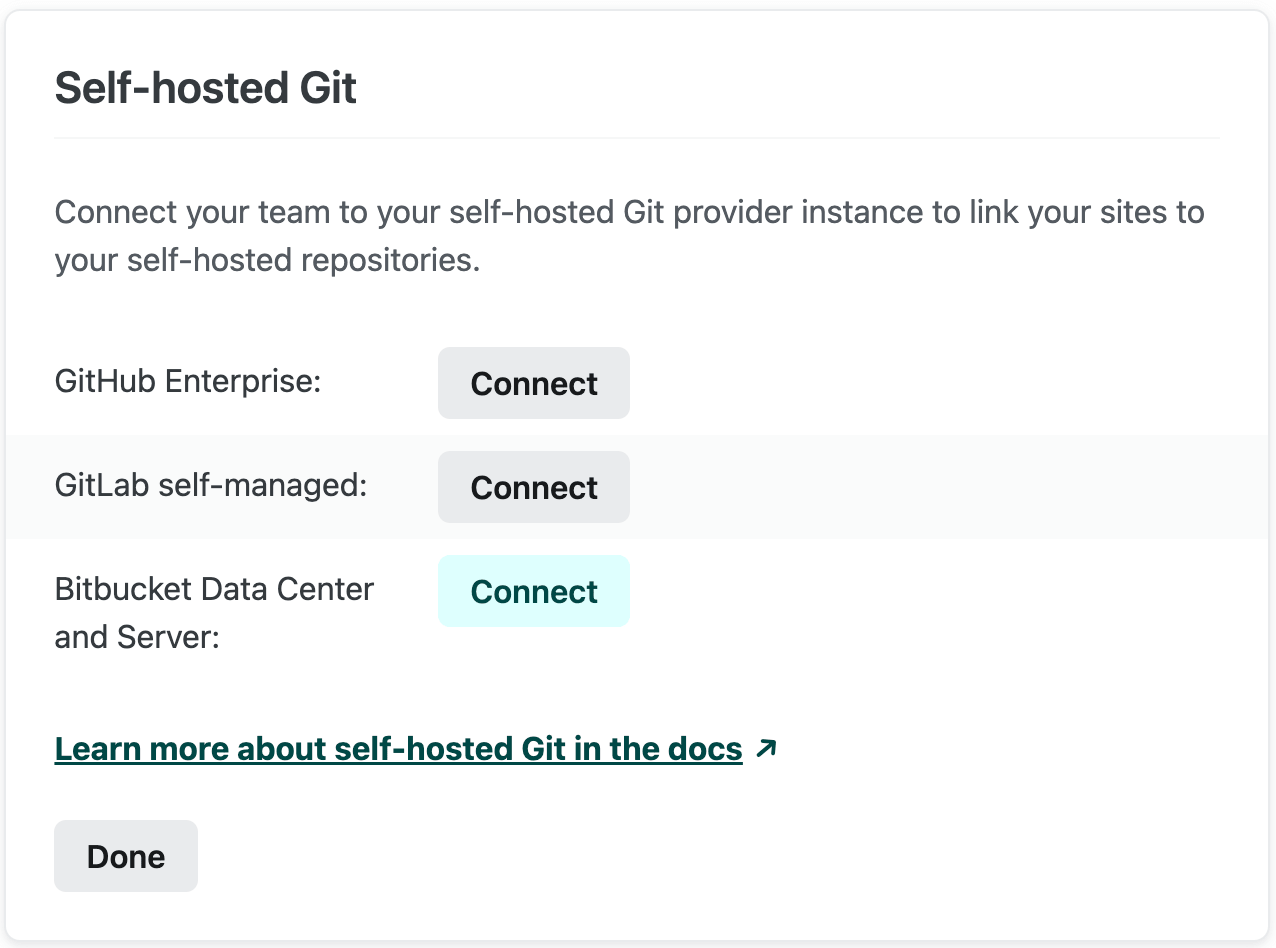
Section titled “Connect to Bitbucket Data Center and Server from Netlify”- Go to Team settings General Self-hosted Git, select Edit settings, then select Connect for Bitbucket Data Center and Server.
 This will open a configuration modal that contains a form to provide us the necessary details about your instance and app.
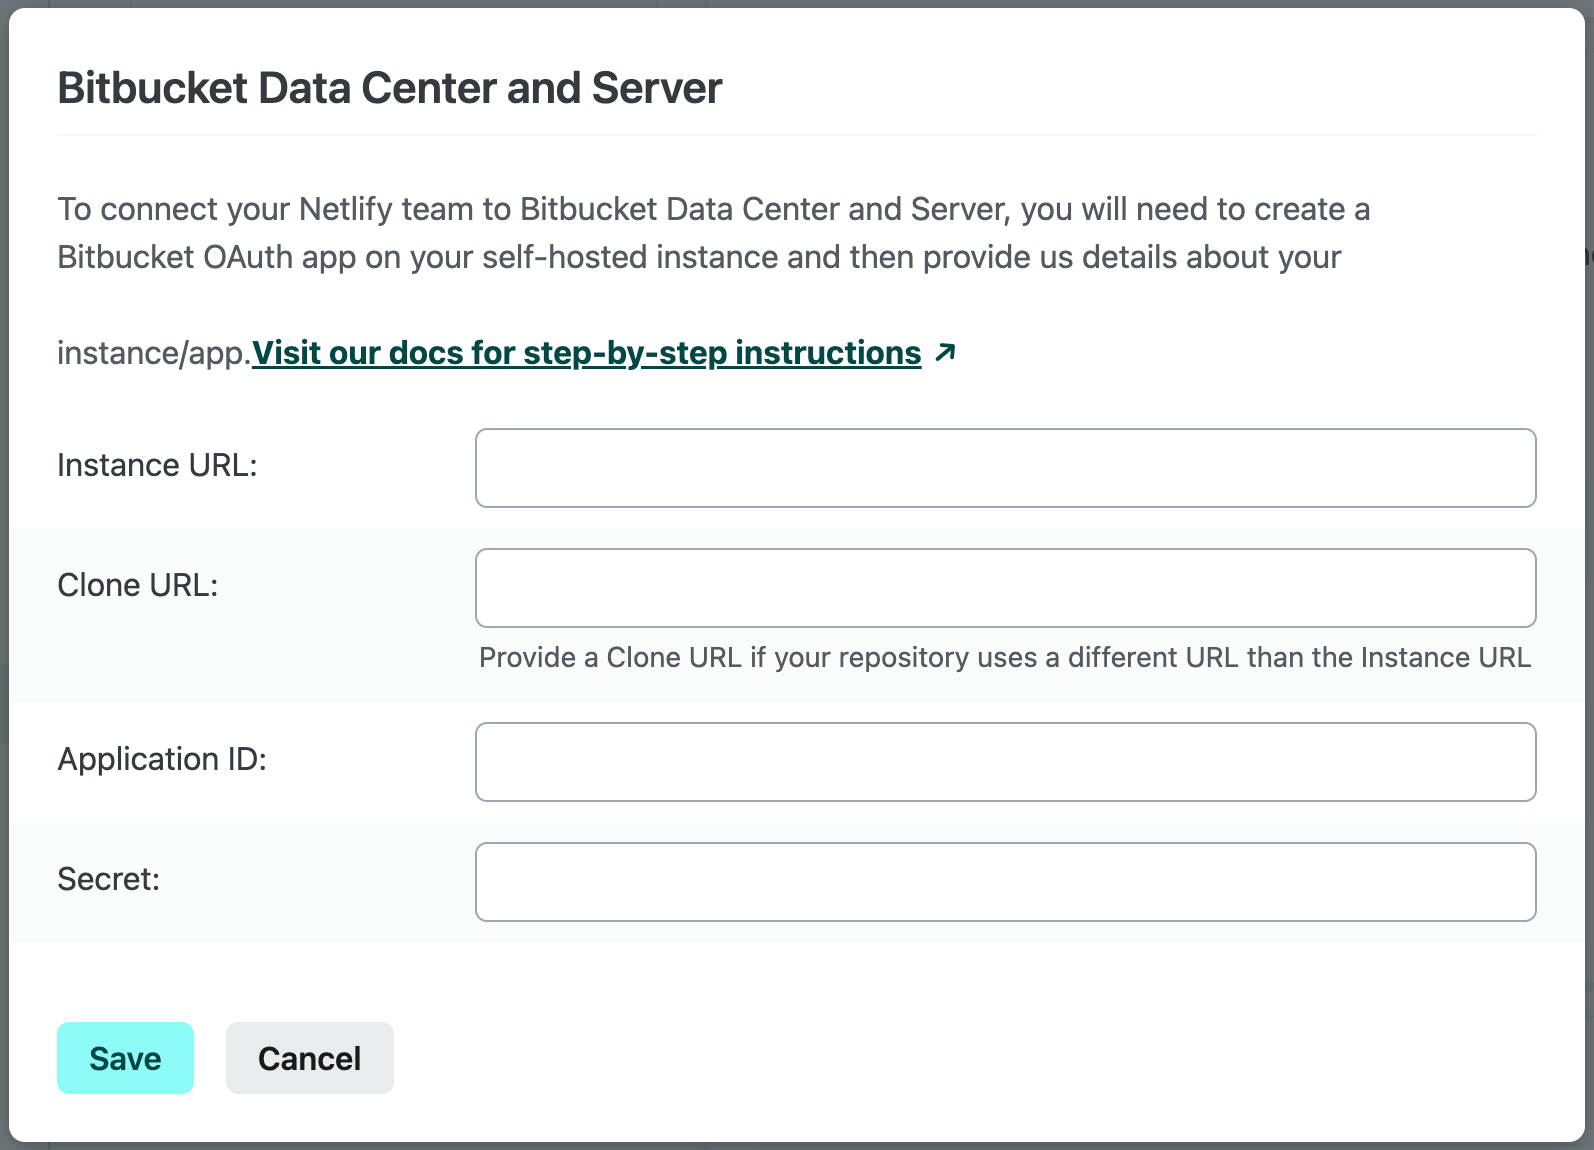
- Provide the following details about your Bitbucket instance and OAuth application:
- Instance URL: URL where your self-hosted Bitbucket instance can be accessed.
- Clone URL: URL where your self-hosted Bitbucket instance repositories can be cloned (if different than your Instance URL).
- Application ID and Secret: values that are assigned to your OAuth application by Bitbucket and can be found in your application link‘s OAuth credentials under Client ID and Client secret. These will be used to authenticate requests made by Netlify to your self-hosted Bitbucket instance.
- Select Save.
Link your sites
Section titled “Link your sites”After you complete the setup for Bitbucket Data Center and Server, your Netlify team will be able to select your self-hosted instance when importing an existing project or when changing the linked repository on an existing site.
Troubleshooting
Section titled “Troubleshooting”Here are steps to address issues that you may encounter using Bitbucket Data Center and Server with Netlify.
If you’re having trouble saving your Bitbucket Data Center and Server settings in Netlify
Section titled “If you’re having trouble saving your Bitbucket Data Center and Server settings in Netlify”- Verify that your self-hosted Bitbucket instance is accessible outside of your VPN/firewall or that you’ve updated your VPN/firewall allowlists for Private Connectivity.
- Verify that the Application ID and Secret match the Client ID and Client secret values assigned by Bitbucket to your OAuth application. These can be found in your application link’s credentials details.
If you need to change your Bitbucket Data Center and Server settings on Netlify
Section titled “If you need to change your Bitbucket Data Center and Server settings on Netlify”-
You’ll have to delete the old connection and create a new one. This is to protect the sensitive values in the settings.
-
To delete the old connection, go to Team settings General Self-hosted Git, select Edit settings, and then use the
xbutton next to your self-hosted Bitbucket instance.
If Bitbucket serves an authorization error saying The redirect URI included is not valid
Section titled “If Bitbucket serves an authorization error saying The redirect URI included is not valid”- Verify that your Bitbucket OAuth application has Redirect URI set to
https://api.netlify.com/auth/done.
If Netlify serves an authorization error saying No Auth Provider Found
Section titled “If Netlify serves an authorization error saying No Auth Provider Found”- Your Bitbucket OAuth application link may have been changed. You won’t be able to compare your Bitbucket Data Center and Server settings on Netlify to your OAuth application’s current state since you can’t edit the Netlify Self-hosted Git settings once saved. You can delete the old connection as described above and create a new one to make sure you’re matching the current state of your Bitbucket OAuth application link.
If you’re having trouble linking your sites to your self-hosted repositories
Section titled “If you’re having trouble linking your sites to your self-hosted repositories”- Your Bitbucket Data Center and Server instance may have become inaccessible. Verify that your instance is accessible outside of your VPN/firewall or that you’ve updated your VPN/firewall allowlists for Private Connectivity.
Did you find this doc useful?
Your feedback helps us improve our docs.