For the complete Netlify documentation index, see llms.txt. Markdown versions of this page are available by appending .md to the URL. Netlify versions all deploys. From the Deploys tab for your site in the Netlify UI, you can browse any deploy you’ve ever made and preview it from a unique URL.
Find a deploy
Section titled “Find a deploy”As a Developer or Team Owner, you can find deploys using the search or filter options available on the Deploys tab.
Use the search field above the deploy list to search by deploy ID or branch name.
You can also filter deploys for your site based on these options:
- Time frame
- Filter deploys triggered in the Last hour, Last day, Last 7 days, or filter by a Custom date and time range.
- Deploy context
- Deploy status
SuccessfulUnsuccessful(includesFailed,Canceled, orSkippeddeploys)Enqueuedfor deploys that are in the queue awaiting deploymentPending review,Accepted, orRejectedfor deploys triggered by an unrecognized author. Learn more about deploy requests and permissions.
Rollbacks
Section titled “Rollbacks”If you need to roll back, you can publish one of the previous deploys listed in the UI as the live version of your site in production. Use the Publish Deploy button on the detail page of any successful deploy. This doesn’t trigger a new deploy but instead publishes a previous atomic deploy that is still available to you. Rollbacks are instantaneous.
Locked deploys
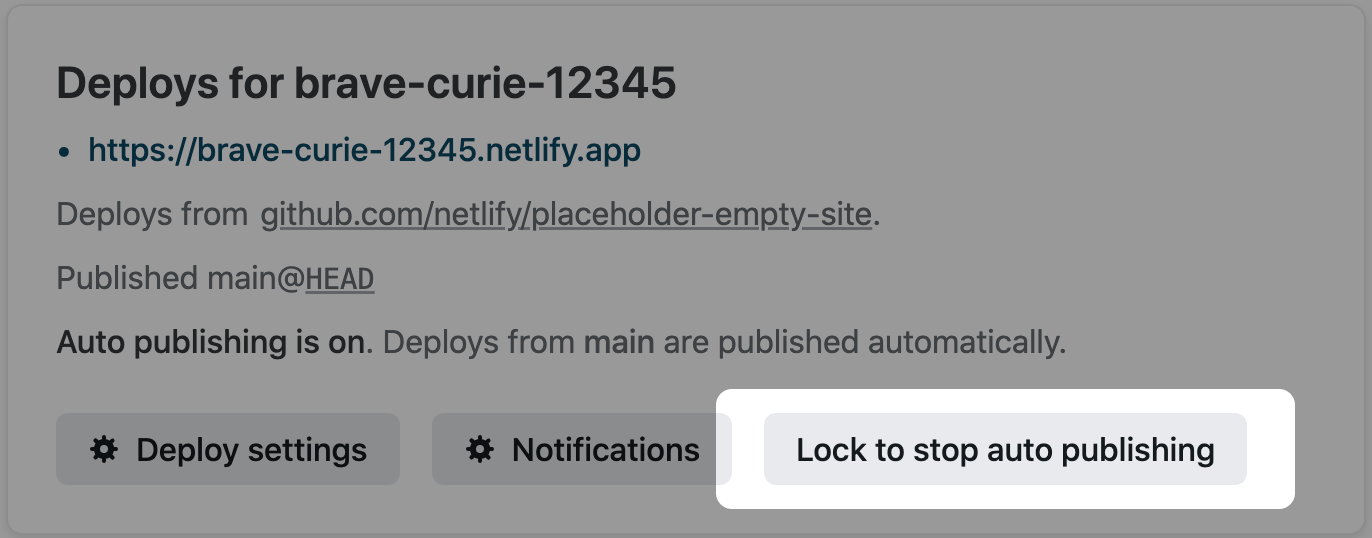
Section titled “Locked deploys”Locked deploys give you the ability of pinning a site to the latest published deploy for the time being. New deploys won’t be published to the main site, although Netlify will still build them and they will be ready for whenever you want to publish them.
Lock a published deploy
Section titled “Lock a published deploy”You can lock a deploy by disabling auto publishing. To disable auto publishing, navigate to your site’s Deploys list and select Lock to stop auto publishing.
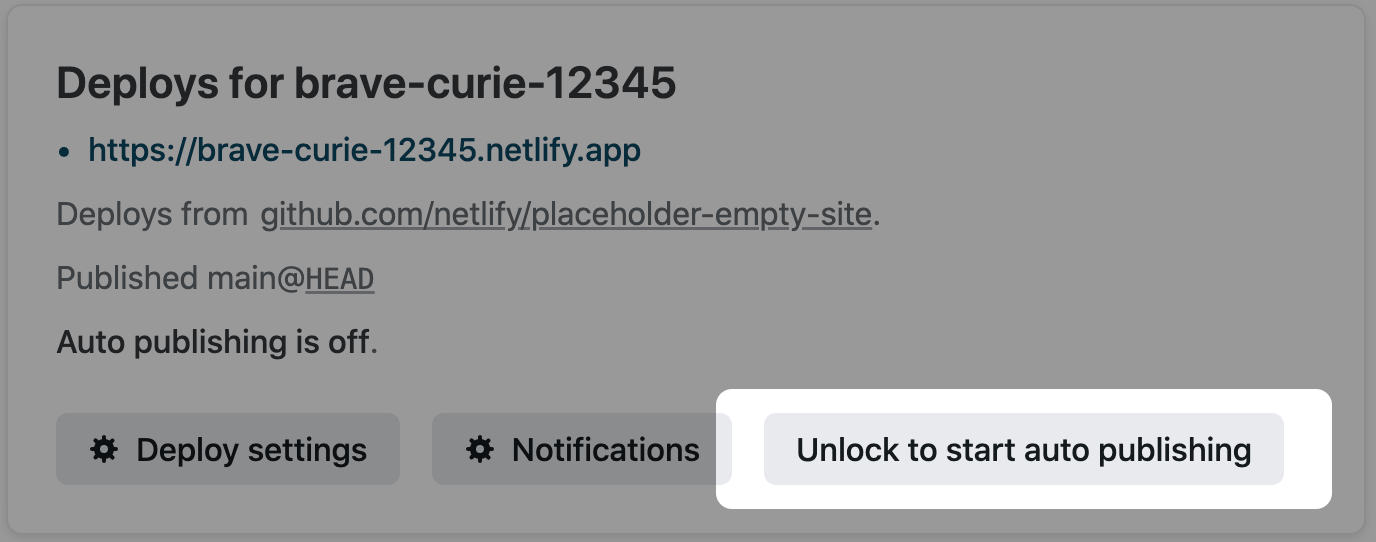
Unlock a locked deploy
Section titled “Unlock a locked deploy”After a deploy has been locked, you can use Unlock to start auto publishing to unlock it from the same Deploys list.
Event notifications
Section titled “Event notifications”You can get notifications about locked deploys by email, outgoing webhook, or Slack. Netlify can notify you when a deploy is either locked or unlocked.
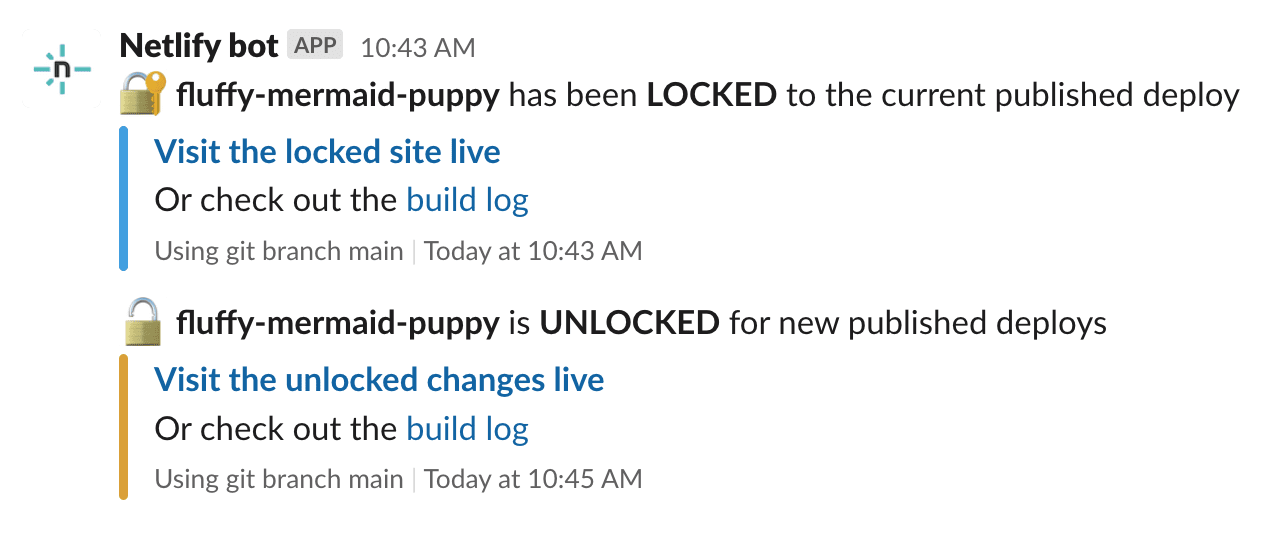
You can configure these notifications from the notifications section in Project configuration Notifications Deploy notifications. Visit the deploy notifications documentation to learn more.
Cancel a deploy
Section titled “Cancel a deploy”Sometimes, you may want to cancel a deploy after it has started. To do this, go to the detail page of the deploy in progress and select Cancel deploy. You’ll then be prompted to confirm the canceling action. Select Yes, cancel deploy to confirm.
If you later want to restart the deploy, you can deploy from the latest branch commit.
Skip a deploy
Section titled “Skip a deploy”Sometimes, you may want to push commits to a branch without triggering a deploy on Netlify.
-
To avoid generating a Deploy Preview for a pull/merge request, add
[skip ci]or[skip netlify]to the title of the pull/merge request. -
To avoid generating a branch or production deploy for a commit pushed directly to a branch, add
[skip ci]or[skip netlify]anywhere in the Git commit message. -
To avoid generating a branch or production deploy for multiple commits pushed together, add
[skip ci]or[skip netlify]to the most recent commit, and it will apply to all other commits in the push.
The next commit pushed without one of those messages will trigger a new branch deploy or production deploy, including all changes from the skipped commits as well. To generate a Deploy Preview from a pull/merge request, remove [skip ci] or [skip netlify] from the title and push a new commit.
To trigger a deploy at will on your production branch, go to your site’s Deploys page and select Trigger deploy at the top of the deploy list.
To avoid triggering automated deploys of any kind, you can stop builds for the entire site.
If you would like to continue building your deploys but don’t want them published to your main URL, you can stop auto publishing.
Retry deploy from latest branch commit
Section titled “Retry deploy from latest branch commit”If your build fails or you run into other issues, you can retry your deploy with the latest branch commit. You can also retry your deploy with a cleared cache.
When you retry a deploy, the build triggers from the HEAD of your branch. If the HEAD of the branch differs from the original deploy SHA, Netlify still builds from the HEAD of the branch.
Automated cleanup for failed and canceled deploys
Section titled “Automated cleanup for failed and canceled deploys”By default, Netlify automatically deletes failed and canceled deploys older than 30 days (or 90 days on paid plans) as a part of deploy cleanup and maintenance.
Once deleted, you can expect deploys and their associated builds to disappear from the Netlify UI and API queries.
Automatic deploy deletion
Section titled “Automatic deploy deletion”By default, Netlify will delete deploys after 30 days (or 90 days on paid plans). This includes deploys triggered by either source control changes, the Netlify UI or CLI, manual uploads, or third-party integrations.
Netlify will not automatically delete:
- The deploy currently published to your site (also called the published deploy.
- The most recent successful production deploy.
- The most recent successful branch deploy for a given branch.
Owners and Developers on an Enterprise plan can adjust the default retention period for up to 365 days.
Once a deploy is automatically deleted, you can expect the deploy and its associated builds to disappear from the Netlify UI and API queries. If you visit the deploy permalink for an automatically deleted deploy, a generic 404 page is returned.
The team audit log updates with Deploy retention has changed when a Developer or Team Owner changes the deploy retention limit for a site.
Change the deploy retention limit
Section titled “Change the deploy retention limit”To adjust a site’s default deploy retention limit, you must be a Team Owner or Developer.
After you change the deploy retention limit for a site and save, all changes take effect instantly. For example, if you set your site’s deploy retention to 30 days and confirm this update, all eligible deploys older than 30 days will delete with no additional warning. Netlify runs deploy deletions daily.
-
As a Developer or Team Owner, go to Project configuration Build & Deploy Automatic Deletion.
-
Select Configure, and use the drop-down to select a new deploy retention limit.
-
Confirm with Save setting.
Manual deploy deletion through the Netlify UI
Section titled “Manual deploy deletion through the Netlify UI”You may want to delete a deploy to remove sensitive data, as a part of your team’s security best practices, or to clean up your Netlify deploys list. Deploy deletions are logged in the team audit log as Deploy deleted actions.
Deploy deletion requirements
Section titled “Deploy deletion requirements”To delete a deploy manually in the Netlify UI, you must be a Developer or Team Owner.
You cannot delete the deploy that was most recently published to a site’s main URL.
You also cannot delete a deploy that is still in progress. You must either cancel the deploy or wait until the deploy is finished before you can delete it.
Deploy deletion considerations
Section titled “Deploy deletion considerations”Be aware that deleting a deploy is permanent and does not reduce costs for your Netlify team or help you preserve build minutes. More details on this are below.
Once a deploy is deleted, you cannot access any artifacts associated with the deploy, including URLs, deploy logs, or functions unique to the deploy. The deploy permalink for the deleted deploy will no longer work and will show a generic 404 error message instead.
After you delete a deploy, you may encounter the following:
- The deploy context URL may no longer work. If you delete a deploy and there are no other deploys in the context, the deploy context URL will return a generic 404 message.
- Your deploy context URL may show changes from a different deploy. If you delete the most recent deploy to a deploy context, then that URL will point to the next most recent deploy in the same context.
- Split testing results may be disrupted. If the deleted deploy is from a branch with split testing configured, your split testing results may be disrupted.
After a deploy is deleted, the deploy’s associated build is removed from the team’s builds list on the main Builds page. However, the build data from deleted deploys is still included in the aggregated build minute counts and insights analytics to help you make an accurate assessment of your team’s build minutes usage.
Delete a deploy through the UI
Section titled “Delete a deploy through the UI”As a Developer or Team Owner, you can delete a single deploy manually through the UI.
-
To find the deploy you want to delete, go to the Deploys page for your site and select the deploy from the deploy list or use the deploy search.
-
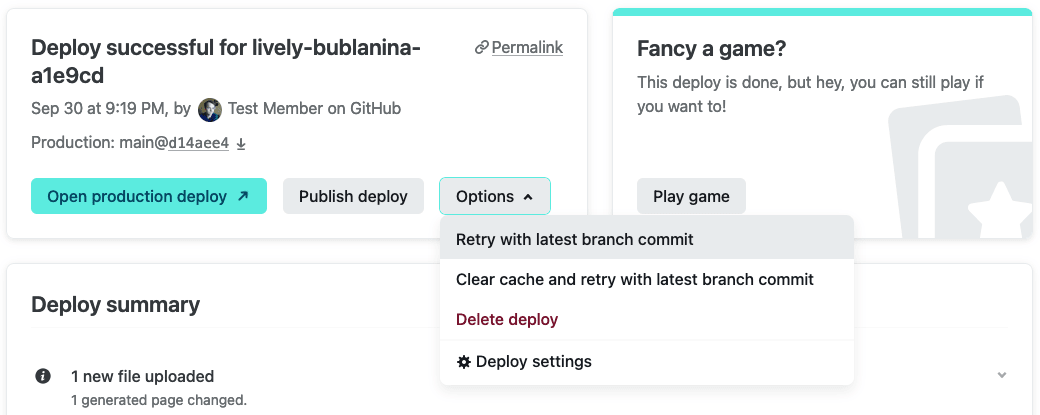
From the deploy details page:
- For successful deploys, select Options > Delete deploy.

- For failed or canceled deploys, select Delete deploy.
If the Delete deploy option is not available, make sure the deploy meets the requirements for deploy deletion.
- For successful deploys, select Options > Delete deploy.
-
To confirm, review the deploy deletion warning, then select Delete.
Download a deploy
Section titled “Download a deploy”From the detail page of any successful deploy, including Netlify Drop deploys, you can download individual files or an entire copy of your site.
Download an individual file
Section titled “Download an individual file”-
On the detail page for a successful deploy, scroll down to Deploy file browser.
-
Search for or browse to the file you want to inspect, then select Download.

Download all deployed files
Section titled “Download all deployed files”To generate a ZIP file containing all of your deployed files:
-
In the deploy detail page header for a successful deploy, select Download.
-
When the ZIP finishes generating, select Download ready to download the deploy.

If you’re looking to update a site you deployed manually through the UI, you can download and edit the deployed files locally, and then use the deploy dropzone to deploy the update.
Configure your deploy environment
Section titled “Configure your deploy environment”You can use environment variables to control the environment your site gets deployed to.
Environment variables created using the Netlify UI, CLI, or API are available to Builds, Functions, Runtime and Post processing scopes. This means that you can use them in your serverless functions and edge functions at execution time, snippet injection during post processing, and more.
Note that environment variables created in a netlify.toml are not available to the deploy environment.
To learn more about how to set and use environment variables review our environment variables docs. For more information on using environment variables with functions during runtime specifically, review environment variables with serverless functions and edge functions.
Failed deploy troubleshooting tips
Section titled “Failed deploy troubleshooting tips”To help you fix failed deploys, Netlify offers AI capabilities that diagnose and suggest solutions for deploy failures and build errors so you can get back to shipping code.
Learn more about Netlify’s AI capabilities to give solutions for failed deploys.
 For more help troubleshooting failed builds, check out our Build troubleshooting tips. If your deploy returns an error, you can also clear your cache and retry the deploy in the Netlify UI or trigger a new deploy.
Did you find this doc useful?
Your feedback helps us improve our docs.