Deploy notifications
Deploy notifications can inform you or external services about a specific site’s deploy activity.
Netlify supports the following deploy events:
- Deploy started: event emitted when Netlify starts building your site for a new deploy.
- Deploy succeeded: event emitted when Netlify finishes uploading a new deploy to our CDN.
- Deploy failed: event emitted when a deploy does not complete.
- Deploy deleted: event emitted when a deploy is manually deleted.
- Deploy locked: event emitted when the site is locked to a published deploy, stopping auto publishing.
- Deploy unlocked: event emitted when deploys are unlocked, resuming auto publishing.
- Deploy request pending: event emitted when an untrusted deploy requires approval to begin building.
- Deploy request accepted: event emitted when an untrusted deploy request is accepted and can begin building.
- Deploy request rejected: event emitted when an untrusted deploy request is rejected.
- Deploy restored: event emitted when a deploy is manually published (usually for rollback or rollforward.
- Previously successful deploy failed: event emitted when a deploy was previously successful but then failed.
- Previously failed deploy succeeded: event emitted when a deploy succeeded after it had failed.
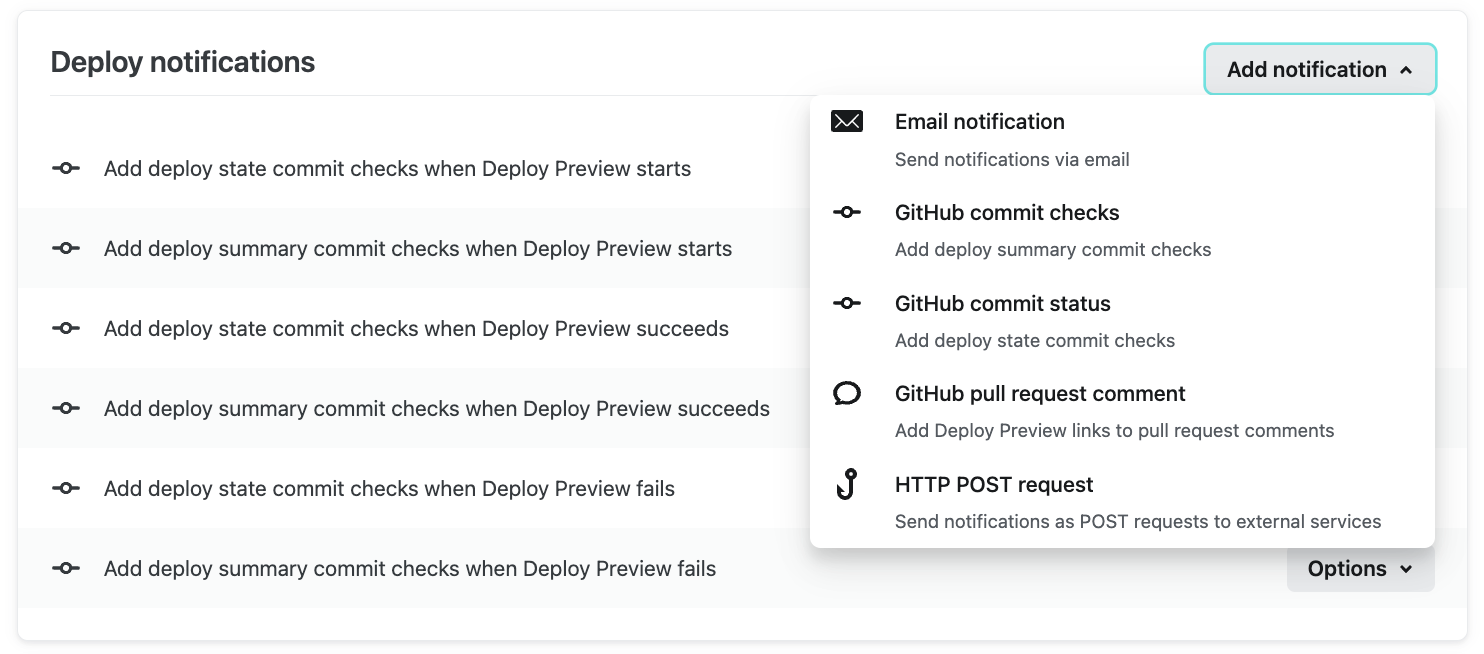
You can enable notifications for deploy events in Project configuration Notifications Deploy notifications. Select the type of notification you want to create and add the required configuration.

You can also set up Slack notifications with our Netlify App for Slack.
Slack notifications
Section titled “Slack notifications”Send deploy event information to a Slack channel. Learn more in our Netlify App for Slack docs.
Email notifications
Section titled “Email notifications”This type of notification allows you to send event information to an email address of your choice.

HTTP Post Request
Section titled “HTTP Post Request”This type of notification works as an outgoing webhook and allows you to send event information to an arbitrary URL using a POST request.
The body of the outgoing webhook request will have a JSON representation of the object relevant to the event.

Payload signature
Section titled “Payload signature”If you provide a JWS secret token for an outgoing webhook, Netlify will generate a JSON Web Signature(JWS) and send it along with the notification in the request header X-Webhook-Signature.
We include the following fields in the signature’s data section:
iss: always sent with valuenetlify, identifying the source of the requestsha256: the hexadecimal representation of the generated payload’s SHA256
You can use any JWT client library to verify this signature in the service receiving the notification. This is an example of an API built with the Sinatra framework that verifies the signature header:
require "digest"require "jwt"require "sinatra"
def signed(request, body)  signature = request["X-Webhook-Signature"]  return unless signature
  options = {iss: "netlify", verify_iss: true, algorithm: "HS256"}  decoded = JWT.decode(signature, "your signature secret", true, options)
  ## decoded :  ## [  ##   { sha256: "..." }, # this is the data in the token  ##   { alg: "..." } # this is the header in the token  ## ]  decoded.first[:sha256] == Digest::SHA256.hexdigest(body)rescue JWT::DecodeError  falseend
post "/netlify-hook" do  body = request.body.read  halt 403 unless signed(request, body)
  json = JSON.parse(body)  # do something with the notification payload hereend
If your project uses Node.js with Express for backend, you need to compare the incoming request data before it’s transformed to JSON:
import crypto from "crypto";import jwt from "jsonwebtoken";import express from "express";
const app = express();
// parse body and keep the raw contentsapp.use(  bodyParser.json({    verify: (req, res, buffer, encoding) => {      req.rawBody = buffer;    }  }));
app.post("/", (req, res) => {  const signature = req.headers['x-webhook-signature'];  const isValid = validateSignature(signature, req.rawBody);  res.send(isValid);});
app.listen(3000);
const secret = "your signature secret";
function validateSignature(token, buffer) {  const options = { issuer: "netlify", algorithms: ["HS256"] };  const decoded = jwt.verify(token, secret, options);  const hashedBody = crypto.createHash("sha256").update(buffer).digest("hex");  return decoded.sha256 === hashedBody;}
GitHub commit statuses
Section titled “GitHub commit statuses”This type of notification sets commit status directly in your GitHub pull requests and commit lists. For successful deploys, this will include a link to the Deploy Preview. For failed deploys, this will include a link to the detail page for the deploy where you can examine the deploy log and deploy the latest branch commit.

These notifications are added to all new GitHub-connected Netlify sites by default. You can add, remove, or edit them in Project configuration Notifications Deploy notifications.
The settings include a field for a custom message, which will replace the “Deploy preview ready!” message that displays by default.

GitHub pull request comments
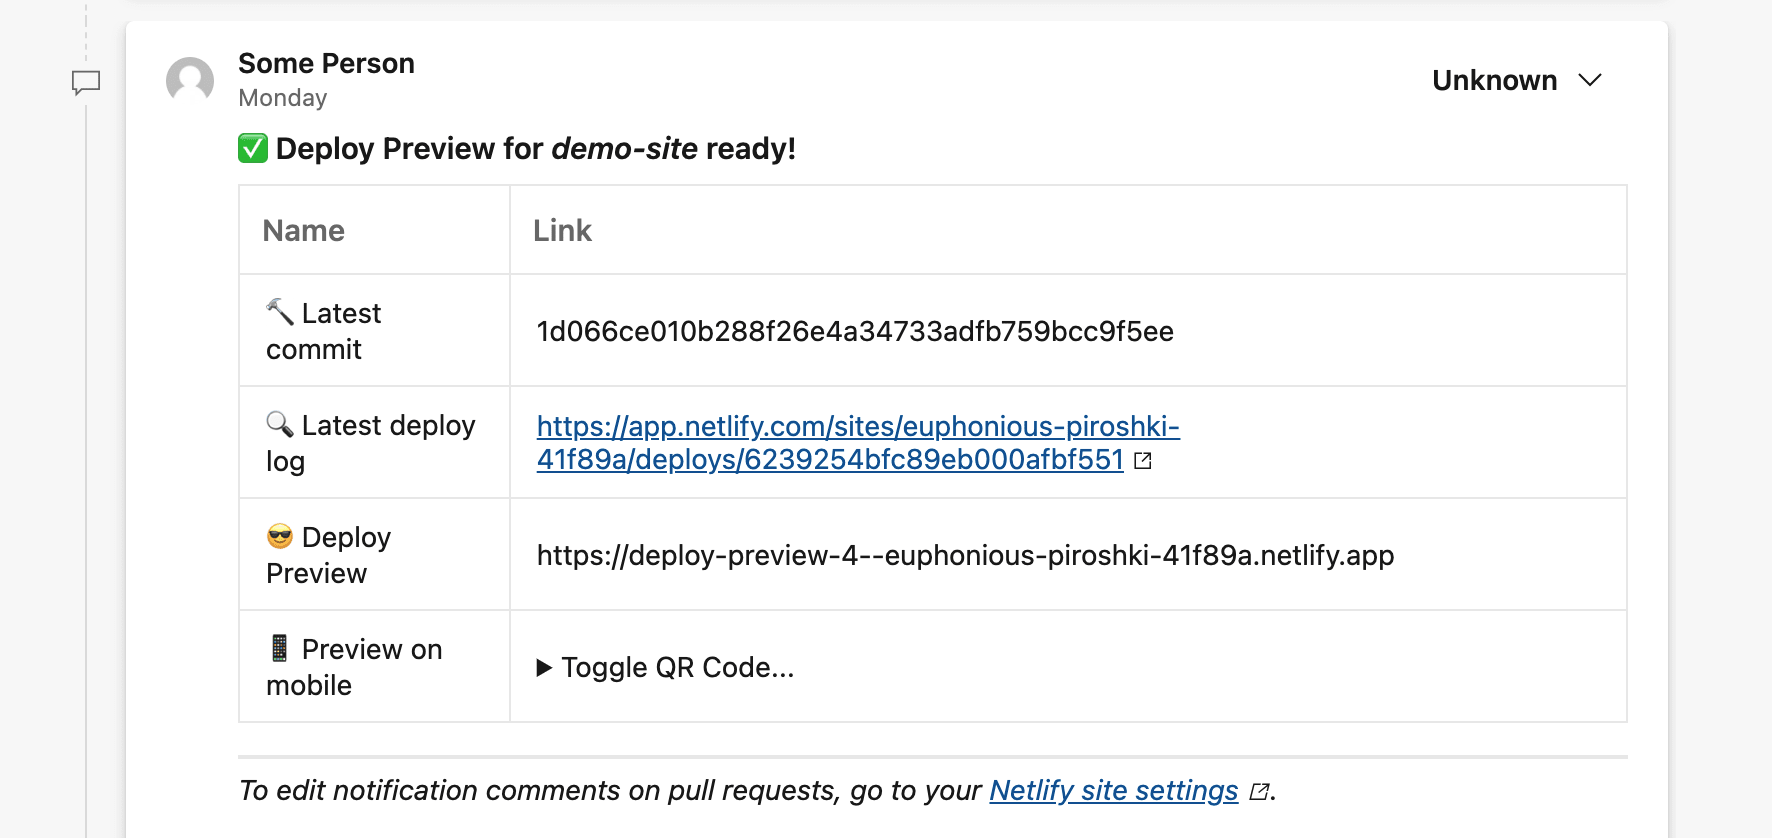
Section titled “GitHub pull request comments”This type of notification adds a comment to your GitHub pull requests indicating the status of the associated deploy and providing a link to the Deploy Preview when ready. If you append more commits to a pull request, this notification will update the comment to indicate status changes.

GitHub pull request comment notifications are added to all new GitHub-connected Netlify sites by default. You can add, remove, or edit them in Project configuration Notifications Deploy notifications.
The settings include a field for a custom message, which will replace the “Deploy preview ready!” message that displays by default.

GitHub commit checks
Section titled “GitHub commit checks”This type of notification adds rich deploy information from your deploy summary to your GitHub pull requests and commit lists. This includes more detailed information in the Checks tab of your pull requests on GitHub.

These notifications are added to all new GitHub-connected Netlify sites by default. You can add, remove, or edit them in Project configuration Notifications Deploy notifications.

If you don’t find the option for GitHub commit checks in the Add notification menu, you will need to configure your site to use the Netlify GitHub App.
GitLab commit statuses
Section titled “GitLab commit statuses”This type of notification creates commit statuses in your GitLab repositories.

You can configure this notification through the Netlify UI using your GitLab personal access token (PAT). Your PAT must have the api scope. Learn more in GitLab’s PAT docs. You can add, remove, or edit access in Project configuration Notifications Deploy notifications.

GitLab merge request comments
Section titled “GitLab merge request comments”This type of notification adds a comment to your GitLab merge requests indicating the status of the associated deploy and providing a link to the Deploy Preview when ready. If you append more commits to a merge request, this notification will update the comment to indicate status changes.

You can configure this notification through the Netlify UI using your GitLab personal access token (PAT). Your PAT must have the api scope. Learn more in GitLab’s PAT docs. You can add, remove, or edit access in Project configuration Notifications Deploy notifications.

Troubleshoot GitLab deploy notifications
Section titled “Troubleshoot GitLab deploy notifications”If you set up your GitLab deploy notifications with a GitLab API access token, you’ll need to edit your notifications settings in the Netlify UI and add a GitLab personal access token (PAT).
GitLab 15.0 no longer supports OAuth tokens without an expiration date and introduced a 2-hour expiration window. Learn more about expiring tokens in GitLab’s OAuth docs.
GitLab deploy notifications stop working
Section titled “GitLab deploy notifications stop working”If your GitLab deploy notifications stop working, ensure that you are using a GitLab personal access token (PAT) with the right scopes.
- On GitLab, generate a new GitLab PAT with the
apiscope. Learn more in GitLab’s PAT docs. - On Netlify, add your GitLab PAT for each desired deploy notification at Project configuration Notifications Deploy notifications.

Bitbucket notifications
Section titled “Bitbucket notifications”Deploy notifications for Bitbucket allow your team to check out the latest deploy status and Deploy Preview from Bitbucket.
Bitbucket commit statuses
Section titled “Bitbucket commit statuses”This type of notification sets commit statuses directly in your Bitbucket branches, pull requests, and commit lists. For successful deploys, this will include a link to the Deploy Preview. For failed deploys, this will include a link to the detail page for the deploy where you can examine the deploy log and deploy the latest branch commit.

Bitbucket pull request comments
Section titled “Bitbucket pull request comments”This type of notification adds a comment to your Bitbucket pull requests with a Deploy Preview link and deploy status. This comment automatically updates with any new commits to your pull request.

Azure DevOps notifications
Section titled “Azure DevOps notifications”Deploy notifications for Azure DevOps allow your team to check out the latest deploy status and Deploy Preview from Azure DevOps.
Azure DevOps commit statuses
Section titled “Azure DevOps commit statuses”This type of notification adds a Netlify Deploy Preview link to the Commit details page for successfully deployed commits.
To set up this notification, you must create an Azure DevOps personal access token (PAT) with Code: Read & write permissions.
Once you have a PAT, configure the notification on Netlify. Go to Project configuration Notifications Deploy notifications, select Azure DevOps commit status, and add your PAT.

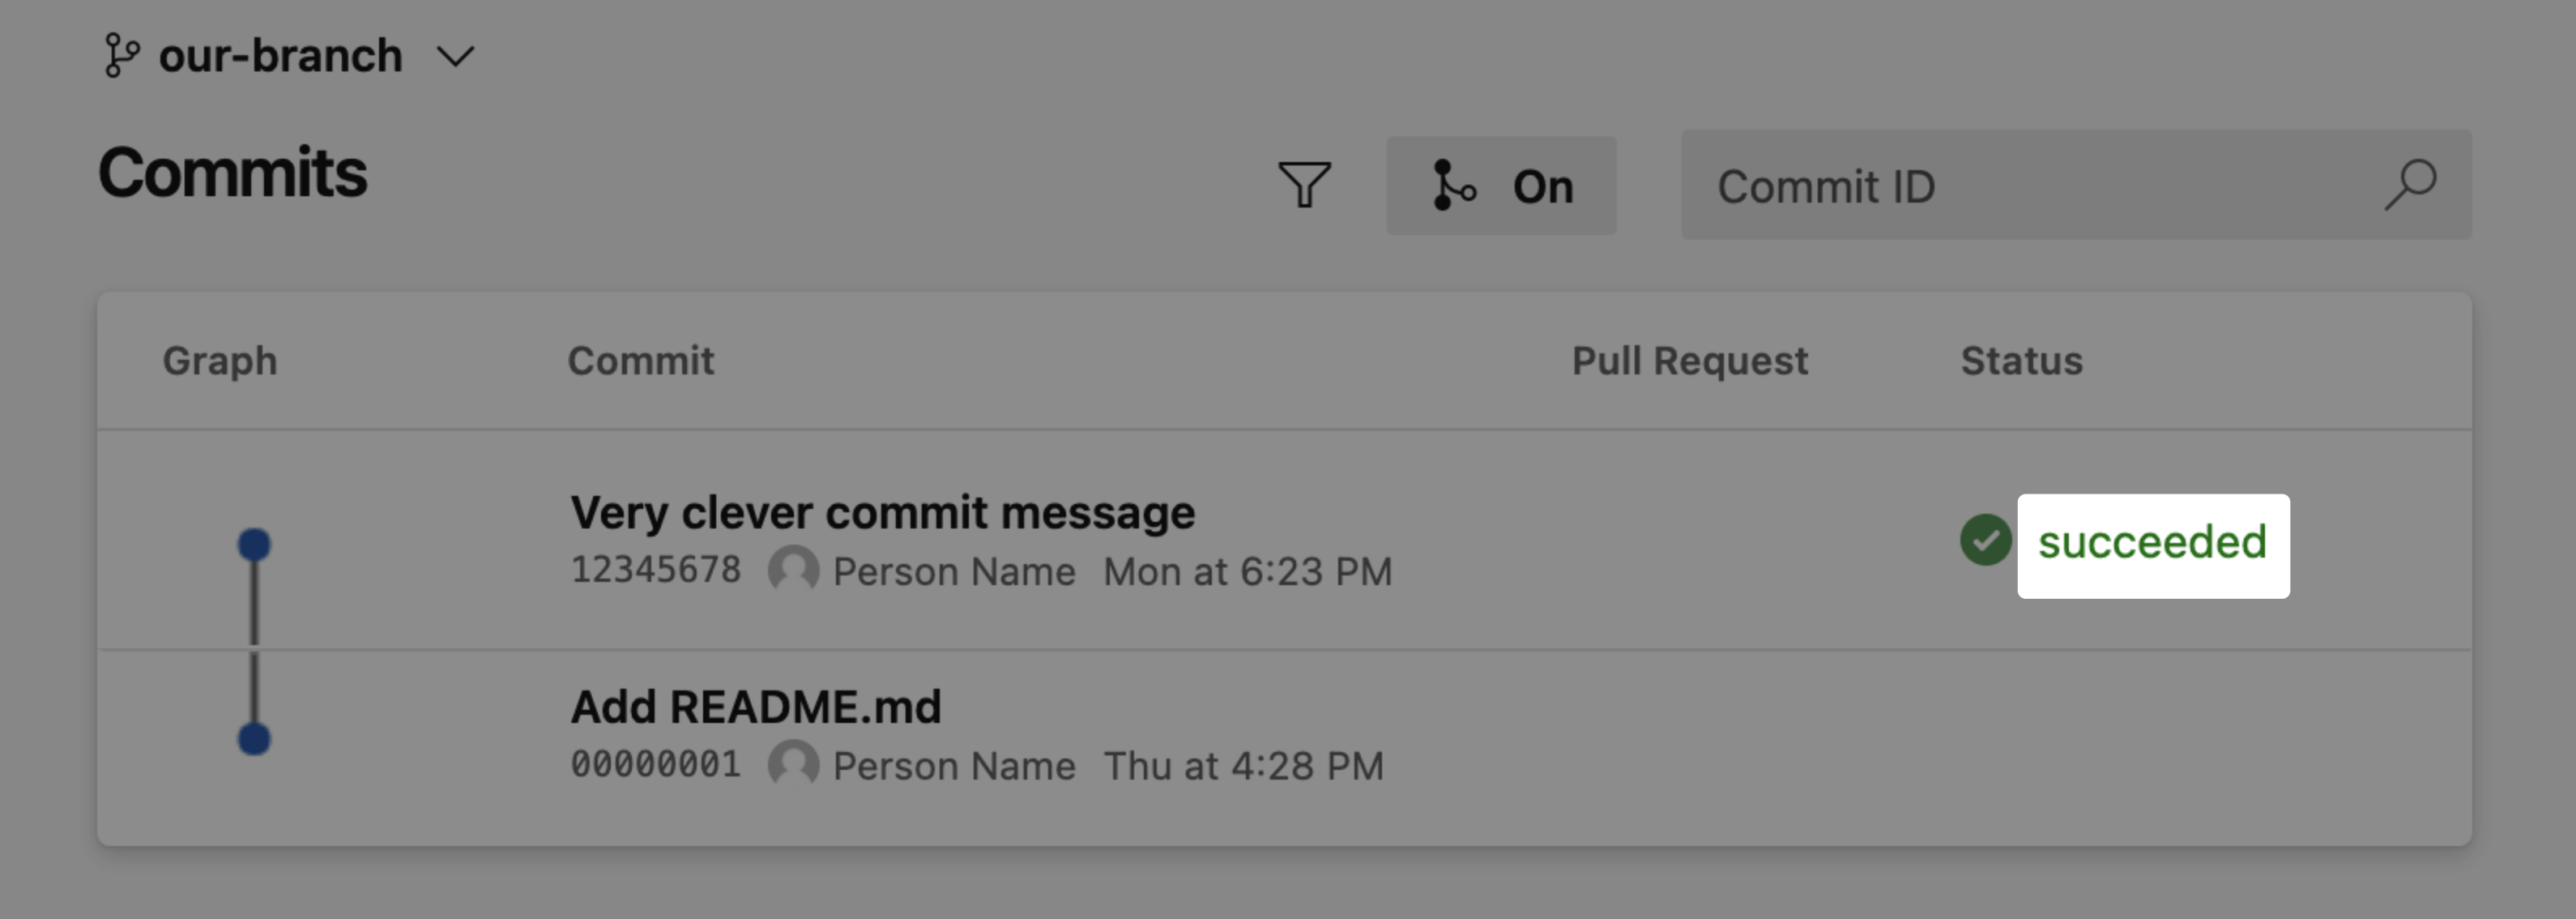
Once configured, you can open a Deploy Preview for a commit with a successful build. To open a Deploy Preview from Azure DevOps, go to the Commit details page, and select the succeeded build status for the desired commit.


Azure DevOps pull request comments
Section titled “Azure DevOps pull request comments”This type of notification adds a comment to your Azure DevOps pull requests with a Deploy Preview link and deploy status. This comment automatically updates with any new commits to your pull request.

To set up this notification, you must create an Azure DevOps personal access token (PAT) with Code: Read & write permissions.
Once you have a PAT, configure this notification on Netlify. Go to Project configuration Notifications Deploy notifications, select Azure DevOps pull request comment, and add your PAT.

Notifications for monorepos or repositories building multiple apps
Section titled “Notifications for monorepos or repositories building multiple apps”For monorepos or setups where one repository builds multiple applications, you can manage the amount of commit status and commit check notifications for sites linked from GitHub or GitLab. This team-level setting works in tandem with deploy notifications configured individually for each site. Check out our monorepo docs to learn more.
Zapier integrations
Section titled “Zapier integrations”Netlify is available on Zapier, where you can connect Netlify with over 1,000 other applications. You can use Zapier “Zaps” to trigger an action in another service on every successful deploy or when a deploy does not complete. You can find out more on our blog, or use one of the templates below to get started:
n8n integrations
Section titled “n8n integrations”Netlify is available on n8n, an open source tool that allows you to connect Netlify with other applications. By using one of n8n’s Netlify nodes, you can create your own automated workflow. To get started, you can use the Netlify node, Netlify Trigger node, or you can use the existing workflow below:
Did you find this doc useful?
Your feedback helps us improve our docs.