For the complete Netlify documentation index, see llms.txt. Markdown versions of this page are available by appending .md to the URL. Manage who belongs to your Netlify team, what they can access, and how they contribute to projects and review workflows. Learn how to invite members and Reviewers, assign roles, and remove members so the right people can contribute to, review, and ship projects without friction.
You can also customize project access for certain roles.
Add new team members
Section titled “Add new team members”Team Owners can invite new members to the team.
As an Owner, to add members to a team:
- Go to your Netlify Team dashboard.
- From your project dashboard, in the top left, choose Projects next to your project name.
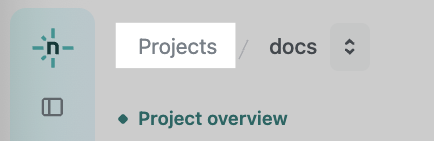
- From your project dashboard, in the top left, choose Projects next to your project name.
-
Go to Members in the left navigation.
-
Select Add members, follow the prompts, and confirm.
Learn more about roles and permissions and project access.
Depending on your team plan, you may need to upgrade in order to add new members. For more information, please contact sales.
Invite Reviewers
Section titled “Invite Reviewers”Team Owners can invite Reviewers to their team for free so they can give context-rich feedback exactly where you want it using our collaboration review tools for Deploy Previews.
As an Owner, to add Reviewers to a team:
- Go to your Netlify Team dashboard.
- From your project dashboard, in the top left, choose Projects next to your project name.
- From your project dashboard, in the top left, choose Projects next to your project name.
-
Go to Members in the left navigation.
-
Select Add members, follow the prompts, and confirm.
These changes will take effect immediately and there are no additional costs since the Reviewer role is free.
Search and filter members
Section titled “Search and filter members”To filter your team’s members by project access, role, or invite status:
- Go to Members in the left navigation.
- Under the search bar, select Edit filters, choose your filter combination, then select Apply filter.
Change team member roles, permissions, or project access
Section titled “Change team member roles, permissions, or project access”If you’re a Team Owner, you can change a team member’s permissions from the Team members list on your team’s Members page. Team member permissions include changing a team member’s role or modifying their access to projects.
If a team member is provisioned by your organization’s Directory Sync, then keep these guidelines in mind.
Change team member roles
Section titled “Change team member roles”As an Owner, to change someone’s role:
- Go to your Netlify Team dashboard.
- From your project dashboard, in the top left, choose Projects next to your project name.
- From your project dashboard, in the top left, choose Projects next to your project name.
-
Go to Members in the left navigation.
-
From the Team members list, select .
-
Follow the prompts to update the member's project access and confirm your changes. Visit our roles documentation for more information on the available roles.
These changes will take effect immediately.
Manage project access
Section titled “Manage project access”For help managing project access, check out our docs on managing project access.
Approve or block reviewers
Section titled “Approve or block reviewers”Pending Reviewers must be approved by a Team Owner or Developer before they can collaborate on Deploy Previews.
To approve a Reviewer:
- Go to your Netlify Team dashboard.
- From your project dashboard, in the top left, choose Projects next to your project name.
- From your project dashboard, in the top left, choose Projects next to your project name.
-
Go to Members in the left navigation.
-
Go to the Reviewers section of the Members list. The Reviewers list indicates whether a Reviewer is pending or approved.
-
Select .
To block a Reviewer:
-
Go to the Reviewers section of the Members list.
-
Select to remove a pending Reviewer from the Reviewers list and block any future Reviewer requests with the associated email address.
Reviewers have access to certain collaboration features to provide feedback, while Developers and Owners have extended capabilities to manage feedback and troubleshoot reported issues. When a Developer or Reviewer is added to a site, they are granted team-wide access for collaborating on Deploy Previews.
Guidelines for managing Directory Sync users
Section titled “Guidelines for managing Directory Sync users”Note that Directory Sync requires Organization SSO and requires a Netlify Enterprise plan.
If a team member is provisioned by your organization’s Directory Sync, then keep the following guidelines in mind:
- Organization Owners can change a SCIM provisioned person's role by editing their directory group mapping.
- We recommend Organization Owners and Identity Provider admins give users the least permissions necessary.
- Team Owners can upgrade a user's permissions for a specific project, such as an internal tool, by editing project access in the Netlify project dashboard. This overrides the team default role set by SCIM Directory Sync for a specified project.
- A Team Owner can give members provisioned by SCIM access to additional projects not specified in their directory group mapping or the identity provider.
- These updates will not be visible through the identity provider or Organization Owner's admin dashboard, but can be viewed from the Netlify team dashboard or project members dashboard.
Remove a team member
Section titled “Remove a team member”To remove a team member, select . You can also use this option to remove yourself from a team.
Note that every team must have at least one Owner. As an Owner, you cannot remove or demote yourself unless there is an additional Owner on the team.
Delete inactive Git Contributors
Section titled “Delete inactive Git Contributors”On the Members page for your team, you can access a list of your active and inactive Git Contributors. To remove an inactive Git Contributor, choose the Git Contributor you would like to remove and select .
Note that deleting the Git Contributor does not automatically remove the user from the associated Git repository. Unless you remove them from the repository, the user can still trigger a build.
Did you find this doc useful?
Your feedback helps us improve our docs.