For the complete Netlify documentation index, see llms.txt. Markdown versions of this page are available by appending .md to the URL. When you link a site to a Git repository, Netlify must gain permission to access your repository code. We may also require permission if you need to access other repositories during your site build.
Git provider permissions
Section titled “Git provider permissions”Netlify’s method for obtaining permission varies by Git provider. For all sites connected to GitLab or Bitbucket, as well as some existing sites connected to GitHub, we use the Git provider’s OAuth2 authentication to obtain a client token to store in your browser.
For all new sites connected to GitHub, we use the Netlify GitHub App. The next section explains the advantages of using the Netlify GitHub App, along with instructions for converting an existing site to use the newer app.
For sites connected to Azure DevOps, we use Azure’s OAuth authentication to obtain a client token to store in your browser. To connect your Azure organization’s repositories to the Netlify UI, your organization must enable Third-party application access via OAuth. The Azure DevOps user you authenticate with when connecting a repo must also have Azure DevOps permissions to Edit subscriptions and View subscriptions. Learn more about getting started with Azure DevOps or troubleshooting Azure access.
Authentication with the Netlify GitHub App
Section titled “Authentication with the Netlify GitHub App”When you create a new site from a GitHub repository, Netlify obtains permission to do this by installing the Netlify GitHub App on your GitHub account. For self-hosted GitHub repositories, Netlify obtains permission by installing your custom GitHub App on your GitHub Enterprise Server account.
Authenticating using a GitHub App offers many advantages over traditional OAuth apps on GitHub, including:
- Scoped repository access. You can choose to grant access to all repositories belonging to your GitHub user or organization, or to specific repositories only. There is no need for special organization-level settings as was previously required for OAuth apps.
- Finer-grained permissions. This allows Netlify to request only the permissions we need, stated when you install the app, and in the GitHub App settings panel.
- No deploy keys or webhooks. GitHub App installations automatically create outgoing webhooks as needed, and handle repository access with generated, limited-scope tokens that expire after one hour for increased security.
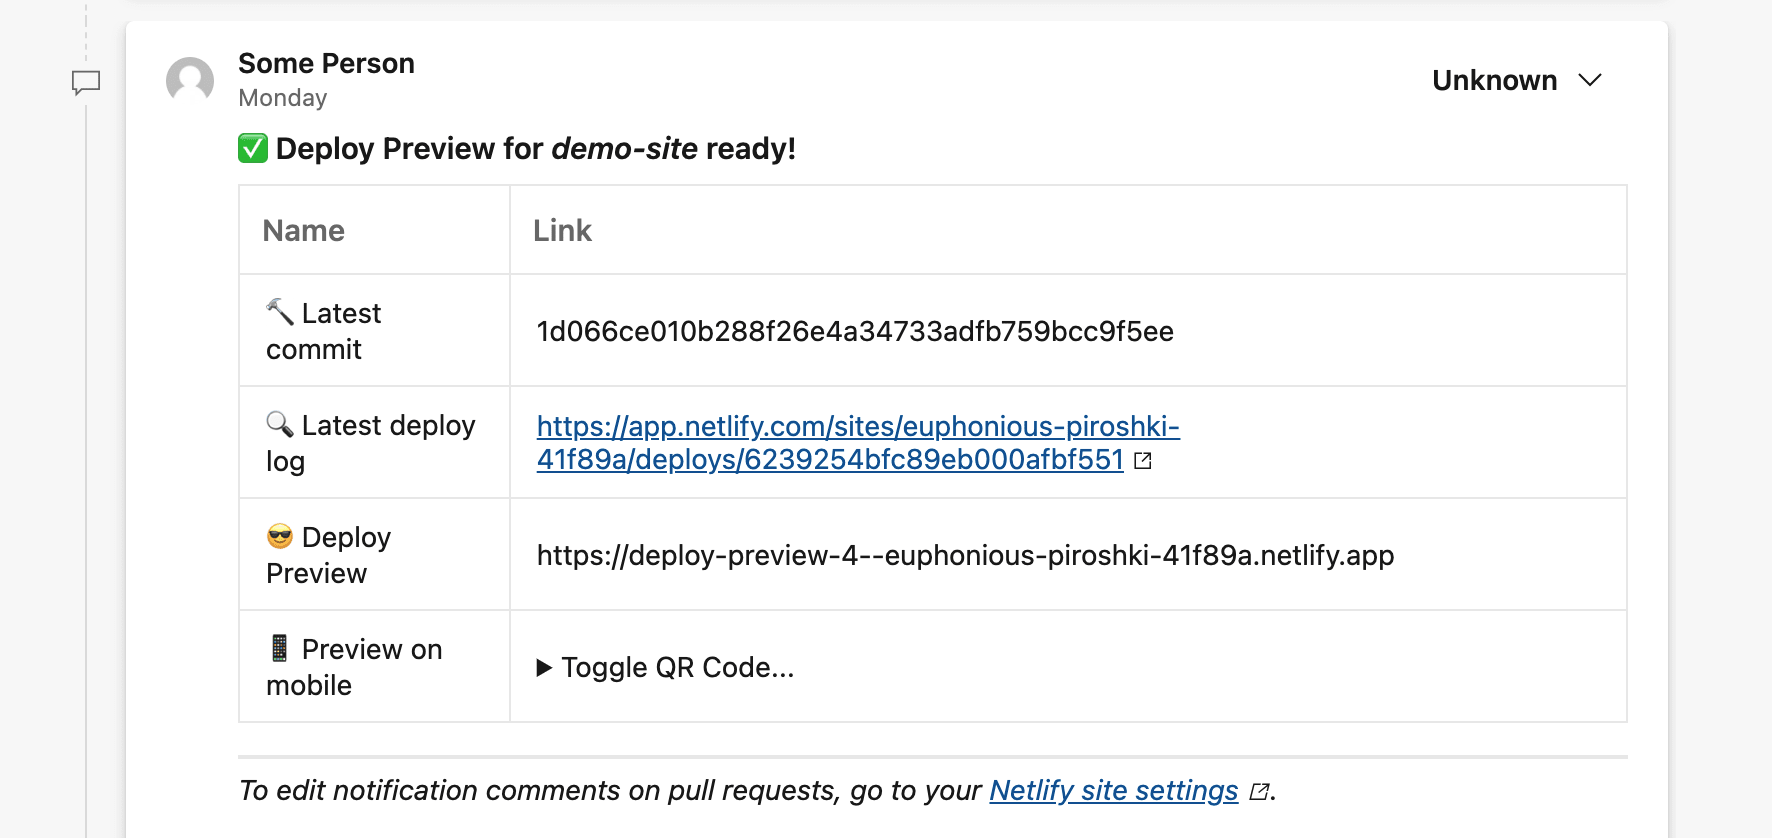
- Better comment notifications. Integrations like our pull request comment notifications can be sent directly by the Netlify GitHub App, without the need for a personal user access token.
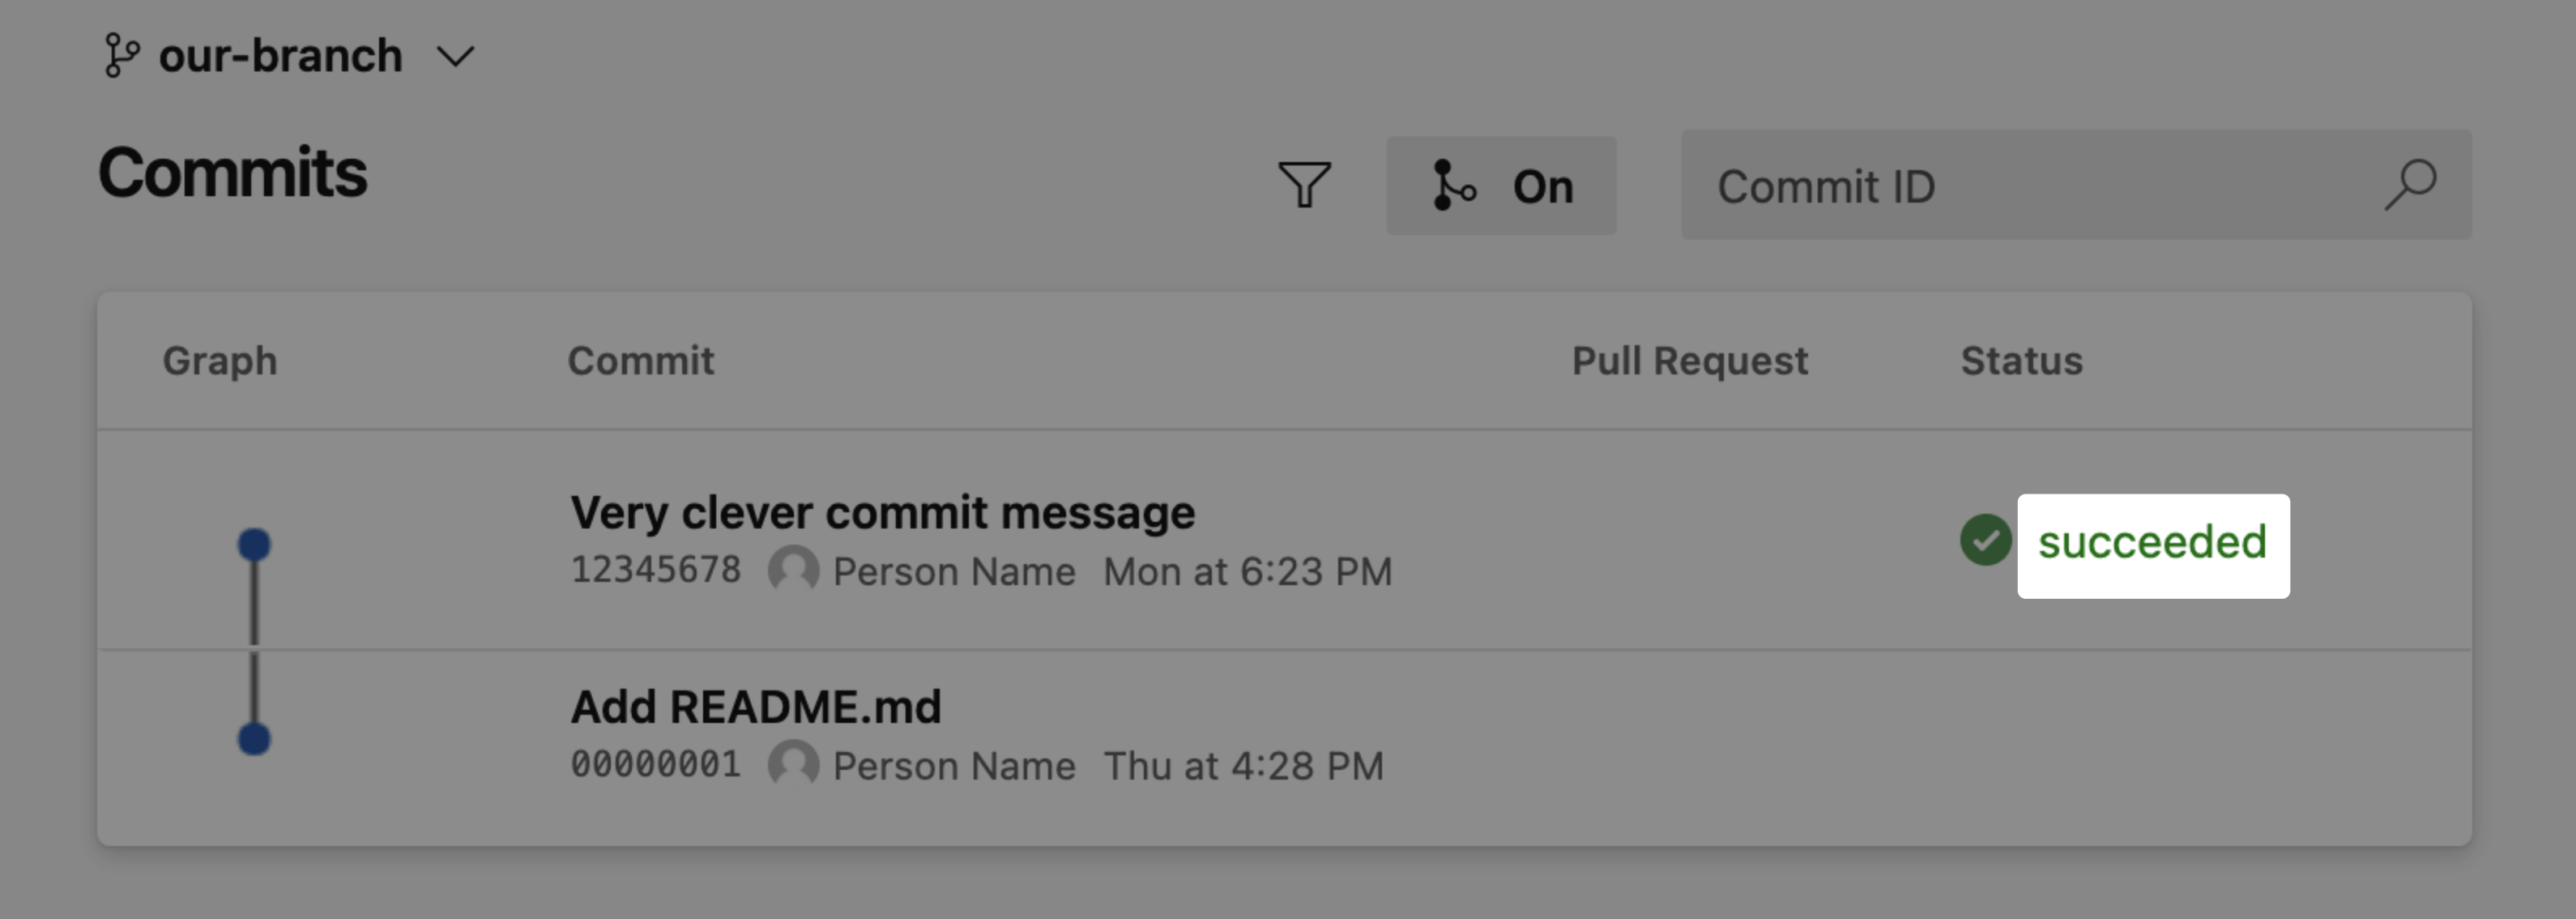
- GitHub checks. GitHub Apps have access to GitHub’s checks API, which enables you to receive rich deploy summary information in your GitHub pull requests and commit lists.
Install on a new site
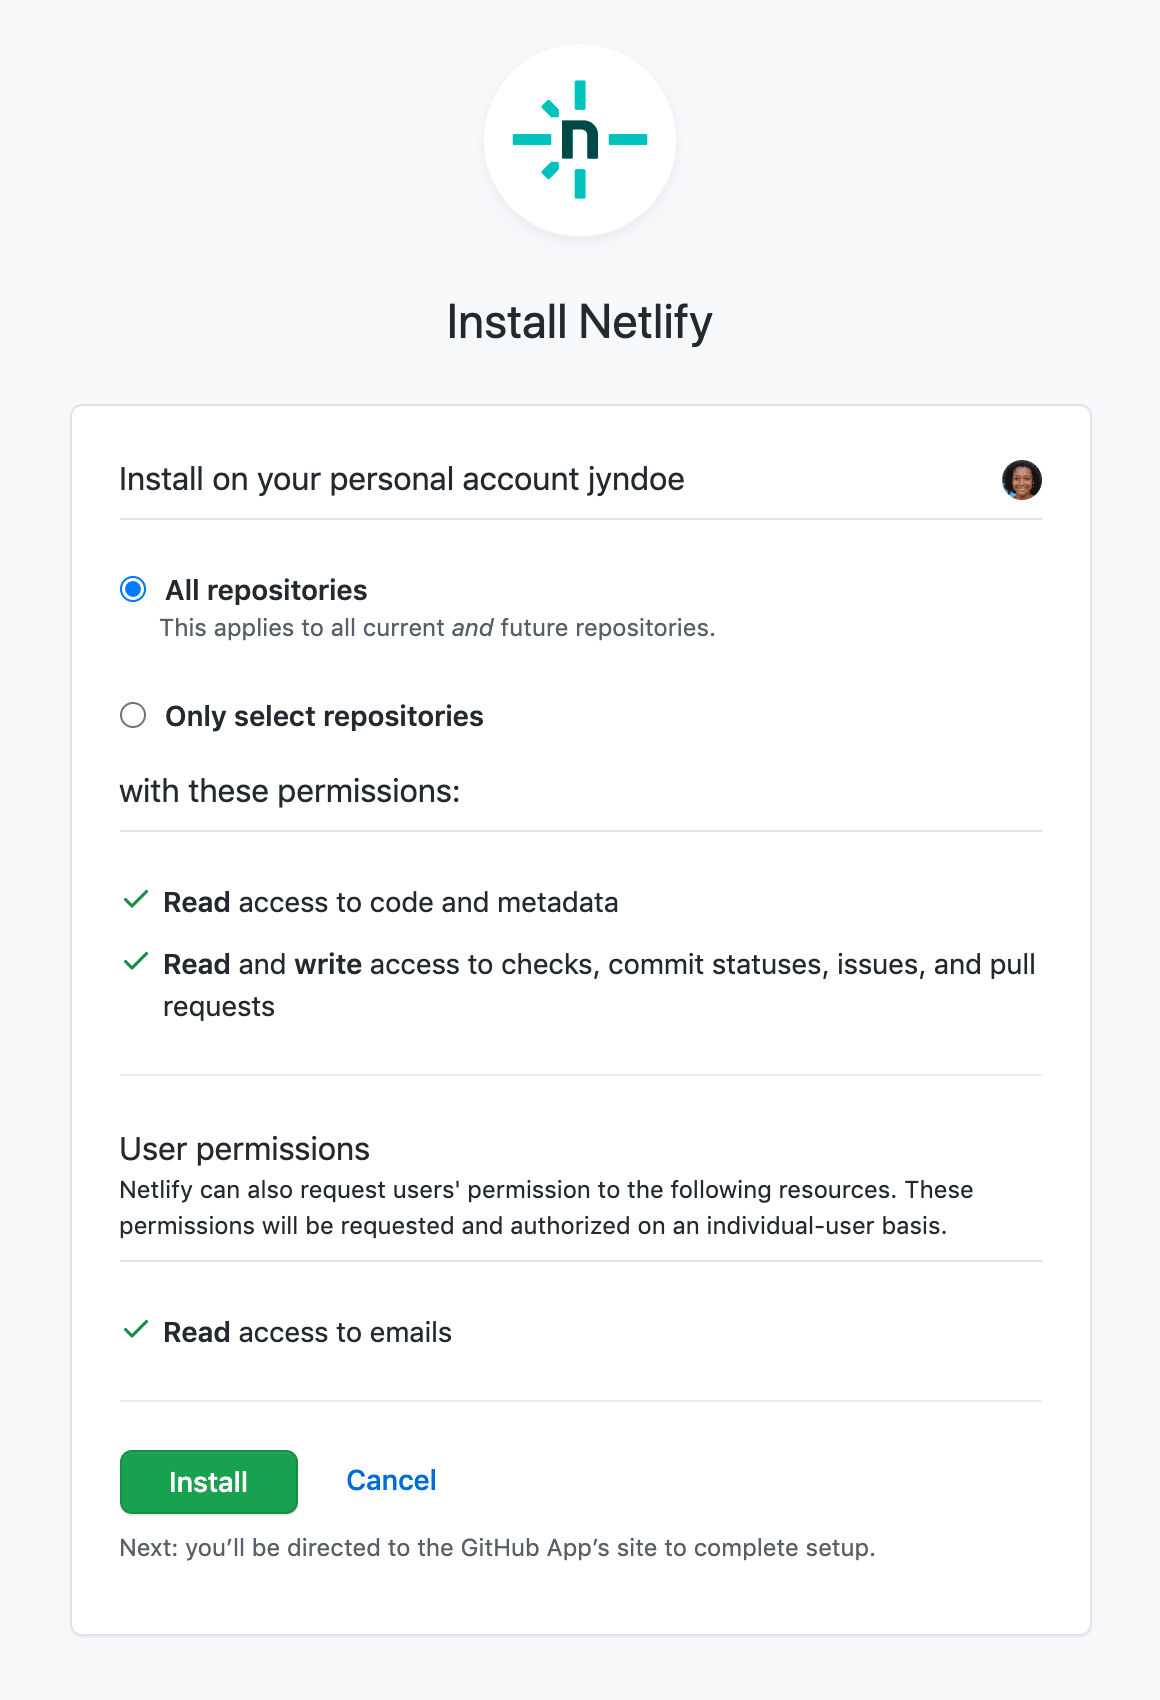
Section titled “Install on a new site”When you create a new Netlify site from Git and select GitHub as your Git provider, you will be prompted to install the Netlify GitHub App, if you haven’t already.
During installation, you can choose to grant the app access to all repositories belonging to your GitHub user or organization, or to specific repositories only.
If you don’t get this install prompt, the app has already been installed on your GitHub account or on a GitHub organization you belong to. You can confirm that the app is installed and has the correct permissions by checking your Installed GitHub Apps.
If you don’t find the repository or organization you need, this is likely because you have not granted access to it. Check our guidance on troubleshooting repository linking to learn how you can adjust organization/repository access.
Install on an existing site
Section titled “Install on an existing site”If you created a site using a Deploy to Netlify button or using the older OAuth app authentication, you will need to manually install the Netlify GitHub App.
You can install the Netlify GitHub App through the Netlify UI. On the Site overview page, select Install in the Install the Netlify GitHub App section.

During installation, you can choose to grant the app access to all repositories belonging to your GitHub user or organization, or to specific repositories only.
You can confirm that the app was installed successfully and has the correct permissions by checking your Installed GitHub Apps.
If the Install the Netlify GitHub App section isn’t available in the Netlify UI and the app isn’t included in your Installed GitHub Apps list, you can also unlink and relink your repository to launch the app install process. Start the repository unlink and relink process at Project configuration Build & deploy Continuous deployment Repository. Select Manage repository, then Link to a different repository.
Change the app’s repository access
Section titled “Change the app’s repository access”Once installed, you can configure the Netlify GitHub App at any time to add or remove access to repositories.
If you grant the app access to all repositories owned by your GitHub user or organization, all future repositories and all new sites linked to these repositories will use the app automatically.
Troubleshoot GitHub repository linking
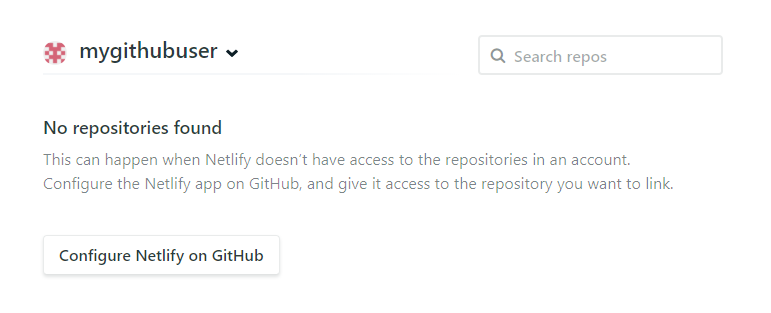
Section titled “Troubleshoot GitHub repository linking”If you can’t find the repository or organization you’re searching for as you go through the repository linking process, this is likely because you didn’t grant access to that resource during the Netlify GitHub App installation.
To grant the Netlify GitHub App access to a repository:
- While linking a repository, in the empty repository selection list, select Configure Netlify on GitHub or Configure Netlify on your self-hosted GitHub to install the app for the desired organization and configure the app’s repository access.
- You can also go directly to your GitHub Apps settings to configure repository access for the installed app. For GitHub Enterprise Server accounts, you can install the app in a similar manner.
Link a Git repository
Section titled “Link a Git repository”You can link a site to a Git repository in the Netlify UI. To do so, go to Project configuration Build & deploy Continuous deployment Repository and select Link repository. Alternatively, you can link a site to a Git repository with the Netlify CLI.
When you link a site to a Git repository, Netlify automatically sets up continuous deployment for that site.
Change linked Git repository
Section titled “Change linked Git repository”To change which repository is linked to your site, go to Project configuration Build & deploy Continuous deployment Repository, select Manage repository, then Link to a different repository.
Unlink a Git repository
Section titled “Unlink a Git repository”You can unlink a site’s Git repository, which can be useful for troubleshooting, deploying with drag and drop, and disabling continuous deployment.
Unlinking a repository breaks continuous deployment settings. While the site is unlinked, you will only be able to publish new deploys manually using the CLI, API, or drag and drop. In addition, when you unlink a repository the following are deleted:
- Deploy keys
- Build hooks
To unlink a repository from an existing site, go to Project configuration Build & deploy Continuous deployment Repository, select Manage repository, then Unlink the current repository. Alternatively, you can unlink a site from a Git repository with the Netlify CLI.
Get started with Azure DevOps
Section titled “Get started with Azure DevOps”We recommend following these steps to get started with Netlify from an Azure repo.
-
Ensure your Azure organization has enabled Third-party application access via OAuth on Azure DevOps. This is required to access your Azure organization’s repositories on Netlify. Learn more about organization policies in the Azure DevOps docs.
-
Set up continuous deployment by linking an Azure repo to a new or existing Netlify site in the UI. To troubleshoot your builds or repository linking, check out Troubleshoot your Azure DevOps connection.
-
Customize your build configurations and branch deploys as needed.
-
Configure automated deploy notifications for Azure DevOps commit statuses and pull requests.
Now you’re ready to preview changes to your Netlify site and share Deploy Previews with your team.
Troubleshoot your Azure DevOps connection
Section titled “Troubleshoot your Azure DevOps connection”If you’re having issues with your site that builds from an Azure DevOps repo, check out these common issues and solutions.
Azure repo setup incomplete for continuous builds and deploys
Section titled “Azure repo setup incomplete for continuous builds and deploys”The Azure project or organization that owns your site repo must have “Edit Subscription” permissions. If the Azure project or organization doesn’t have the right permissions, your repo cannot fully connect to Netlify and run continuous builds or deploys.
To resolve this repo connection error, someone with “Edit Subscription” permissions needs to relink the Azure repo to Netlify.
To gain the necessary permissions to link and fully connect site repos in your Azure project or organization to Netlify, ask your Azure admin to upgrade your permissions. Your Azure admin can upgrade your permissions in one of the following ways:
- Add you to the Project Administrator group on Azure DevOps.
- Add you to the Project Collection Administrators or Organization Administrators group.
- Grant these specific permissions to your user.
Relink your Azure repo to complete repo setup
Section titled “Relink your Azure repo to complete repo setup”If you have the necessary Azure permissions, you can relink your Azure repo to Netlify to fully connect the repo.
To relink your Azure repo to Netlify and enable continuous builds and deploys:
-
Go to Project configuration Build & deploy Continuous deployment Repository. Then select Manage repository and Link to a different repository.
-
Choose a repo to connect to Netlify. The same Azure repo that failed to connect can be reselected.
-
To confirm that continuous builds and deploys are now working, create a new deploy and check your deploys page in the Netlify UI.
Azure repos don’t load when importing an existing project
Section titled “Azure repos don’t load when importing an existing project”If your Azure repos don’t load when importing an existing project, ensure Third-party application access via OAuth is enabled for your organization. Learn more at Manage a policy for Azure DevOps.
Site never builds or deploys new changes after initial setup deploy
Section titled “Site never builds or deploys new changes after initial setup deploy”If Netlify detects that the Azure user account used to connect your site repo to Netlify does not have adequate permissions, then your site repo cannot fully connect to Netlify and run continuous builds or deploys.
Azure user accounts used to connect a site repo to Netlify must have “Edit Subscription” permissions in the Azure project or organization that owns the site repo. If you have the necessary Azure permissions, you resolve this error by relinking your Azure repo on Netlify.
New changes don’t build or autopublish
Section titled “New changes don’t build or autopublish”If your latest changes don’t build or autopublish, there may be an issue with your Azure DevOps connection. For repositories in Azure organizations, ensure Third-party application access via OAuth is enabled for your organization. Learn more at Manage a policy for Azure DevOps.
Site stops building and deploying
Section titled “Site stops building and deploying”If the user who authorized Netlify’s connection to an Azure repo no longer has access to the repo, then your site may stop building and deploying. A new user with access to the repository will need to link the Netlify site to the Azure repo again to reauthorize Netlify.
To link your Netlify site to your Azure repo again, go to Project configuration Build & deploy Continuous deployment Repository, and select Link to a different repository. You can choose the same repository you previously connected to Netlify.
Access other repositories at build
Section titled “Access other repositories at build”If you need to fetch contents from other repositories, public or private, you’ll need to make some accommodation for this. The two most common methods for accessing other repositories during the build are Git submodules and npm packages.
Git submodules
Section titled “Git submodules”To include an outside repository as a subdirectory in your own repository, always configure it as a submodule. If you do not, it may work locally using cloning, but the sub-repository content will not be pushed to your Git provider, and it will not be available to your build on Netlify.
If a submodule repository is public, you can use https format (for example, https://github.com/owner/project) to link it in your submodule configuration. If the repository is private, or if you prefer to use ssh format (for example, git@github.com:owner/project.git), you will need to follow the instructions below to generate a deploy key in Netlify and add it to the submodule repository settings.
Git submodule limitations
Section titled “Git submodule limitations”- Netlify doesn’t support recursive submodules. If you include a submodule that has a submodule, Netlify won’t detect and clone the secondary submodule during the build process. You can try to work around this by including Git’s
--recursiveoption flag when setting up a submodule with a submodule, but doing so may result in unintended failures resulting from the submodule chain’s configuration. - Netlify doesn’t support client-side Git hooks and won’t run Git hooks from a submodule. Learn more about Git hooks.
Deploy keys
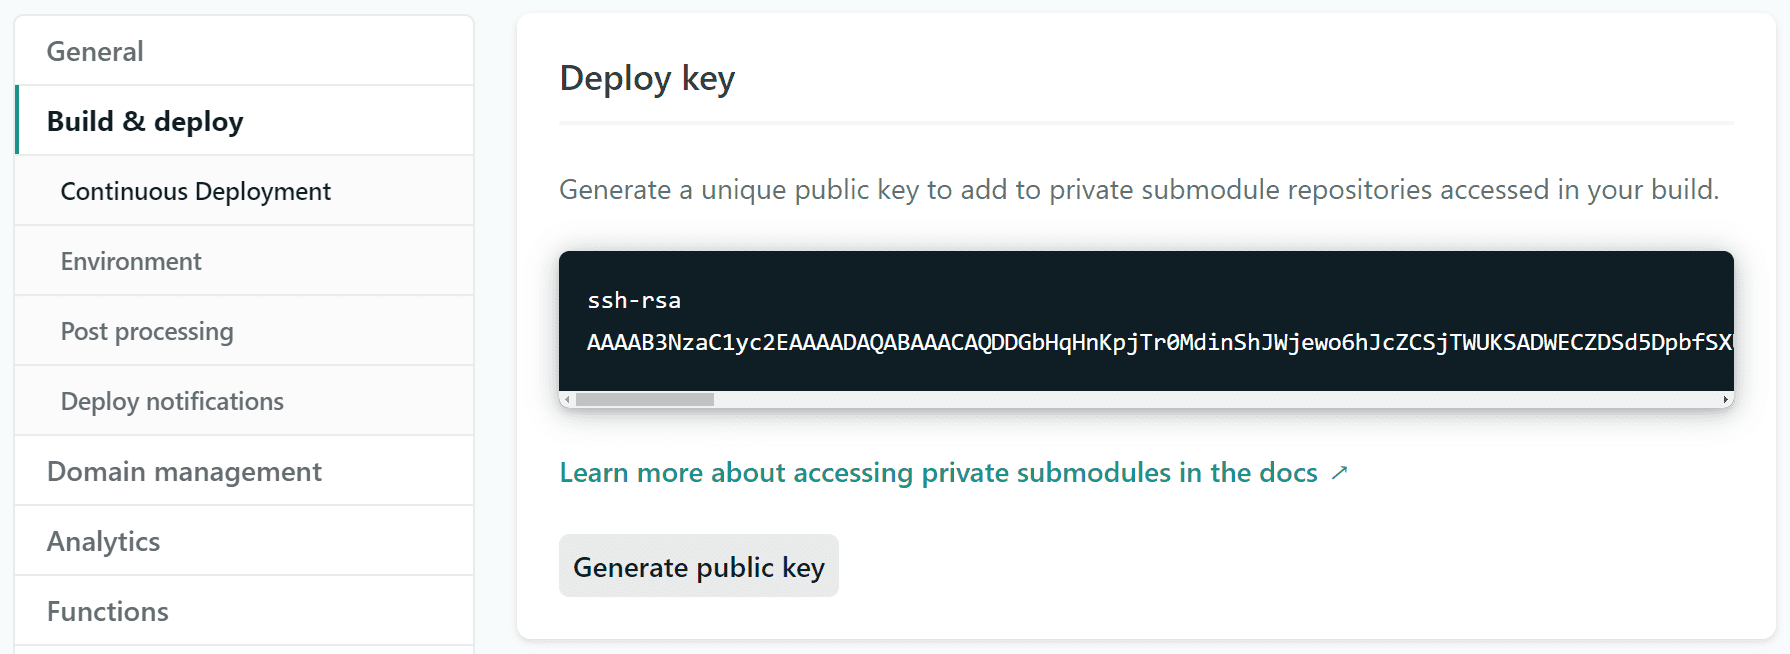
Section titled “Deploy keys”Submodule repositories linked in ssh format, including all private submodule repositories, require an SSH key called a deploy key (in GitHub and in GitLab, access key (in Bitbucket, or SSH key (in Azure DevOps.
SSH keys are actually a pair of keys: one private, and one public. To generate a new key pair for a Netlify site, go to Project configuration Build & deploy Continuous deployment Deploy key, and select Generate public key. Netlify will store the private key and provide the public key for you to add to the repository settings for your submodule.
npm packages
Section titled “npm packages”You can reference public or private repositories formatted as npm packages in your package.json file dependencies. Private repository modules require a special link syntax that varies by Git provider.
For GitHub, create a GitHub personal access token with read-only access, and include it in the package URL as follows:
"package-name": "git+https://oauth2:<github_token>@github.com/<user>/<repo>.git"For GitHub Enterprise Server, create a GitHub personal access token with read-only access, and include it in the package URL as follows:
"package-name": "git+https://<github_token>:x-oauth-basic@<self-hosted-instance.url>/<user>/<repo>.git"For GitLab, create a GitLab deploy token with read_repository access, and include it in the package URL as follows:
"package-name": "git+https://<token-username>:<token>@gitlab.com/<user>/<repo>.git"For GitLab self-managed, create a GitLab deploy token with read_repository access, and include it in the package URL as follows:
"package-name": "git+https://<token-username>:<token>@<self-hosted-instance.url>/<user>/<repo>.git"For Bitbucket, create a Bitbucket app password with read-only access, and include it in the package URL as follows:
"package-name": "git+https://<user>:<app-password>@bitbucket.org/<user>/<repo>.git"For Azure DevOps, create an Azure DevOps personal access token with read-only access, and include it in the package URL as follows:
"package-name": "git+https://<azure_token>@dev.azure.com/<organization>/<project>/_git/<repo>"Community resources
Section titled “Community resources”To get help or join the discussion, visit our Forums for a verified Support Guide on accessing other repositories in the build environment.
Did you find this doc useful?
Your feedback helps us improve our docs.