Netlify Connect overview
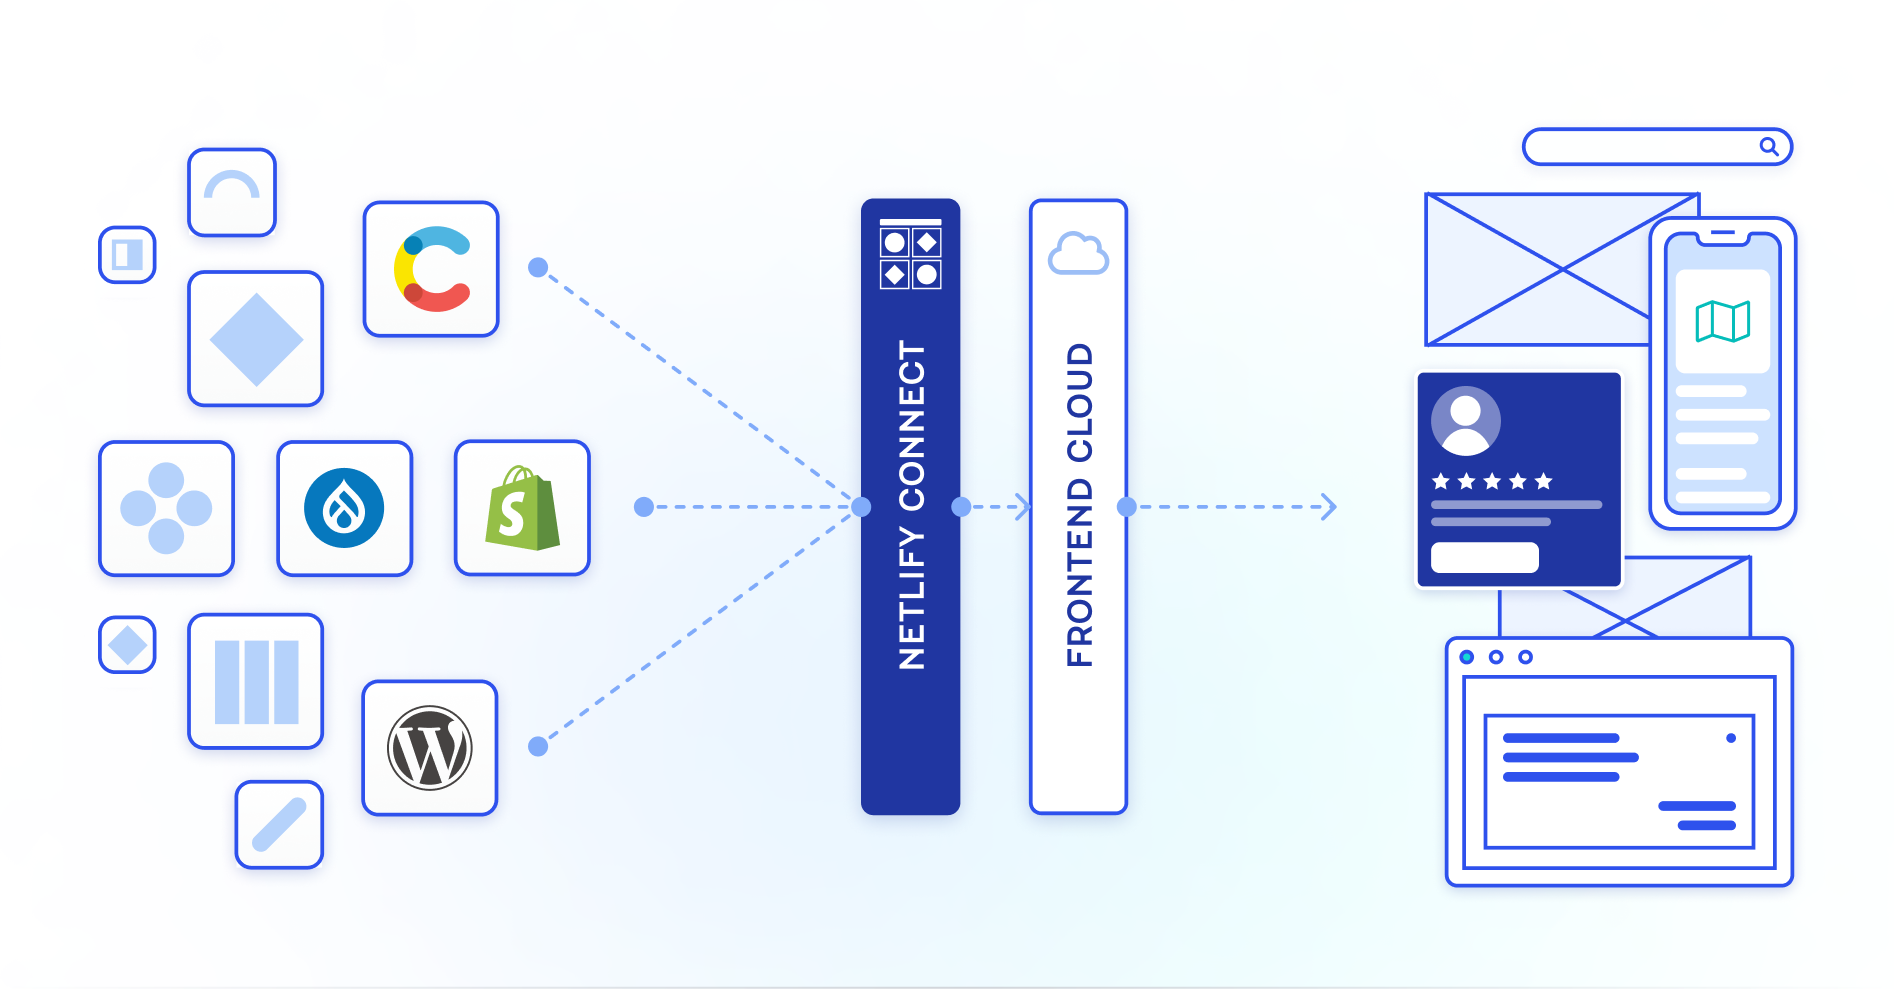
With Netlify Connect, you can integrate content from multiple sources into a single data unification layer for easy access through a GraphQL API. Data updates sync automatically to ensure your sites and other web properties always have access to the latest content, all cached at the edge.
When you unify your content sources through Connect, you unlock a number of benefits that make it easier to modernize your web architecture:
-
A single data unification layer that is cached at the network edge and is optimized for global availability, reliability, and performance
-
No-code integrations that allow you to use data from legacy systems alongside data from your modern CMS
-
The ability to create private data integrations that allow you to use data from your proprietary systems
-
A scalable GraphQL API that allows you to use CMS providers without having to worry about the CMS API’s rate-limiting or expensive bandwidth usage limits
-
Flexibility to access data through the GraphQL API with any frontend framework — including Remix, Next.js, Gatsby, Vue, Svelte, and Astro
-
Multiple data revisions cached for each data layer that capture the GraphQL schema and data at a point in time, with the ability to pin a specific revision for your API to use while planning for a major release or troubleshooting an error
-
The ability to specify cross-references between data sources and retrieve combined data through a single query for a faster user experience and better developer experience
-
Reduced web architecture migration risk with a modular approach that allows you to create data redundancy (by caching data in Connect) and then change or update architecture components over time
How Connect works
Section titled “How Connect works”Netlify helps you build for an open web by allowing you to synchronize data from a single data unification layer, which is cached at the network edge and optimized for global availability, reliability, and performance.
Caching data
Section titled “Caching data”Connect queries and caches data following these general steps:
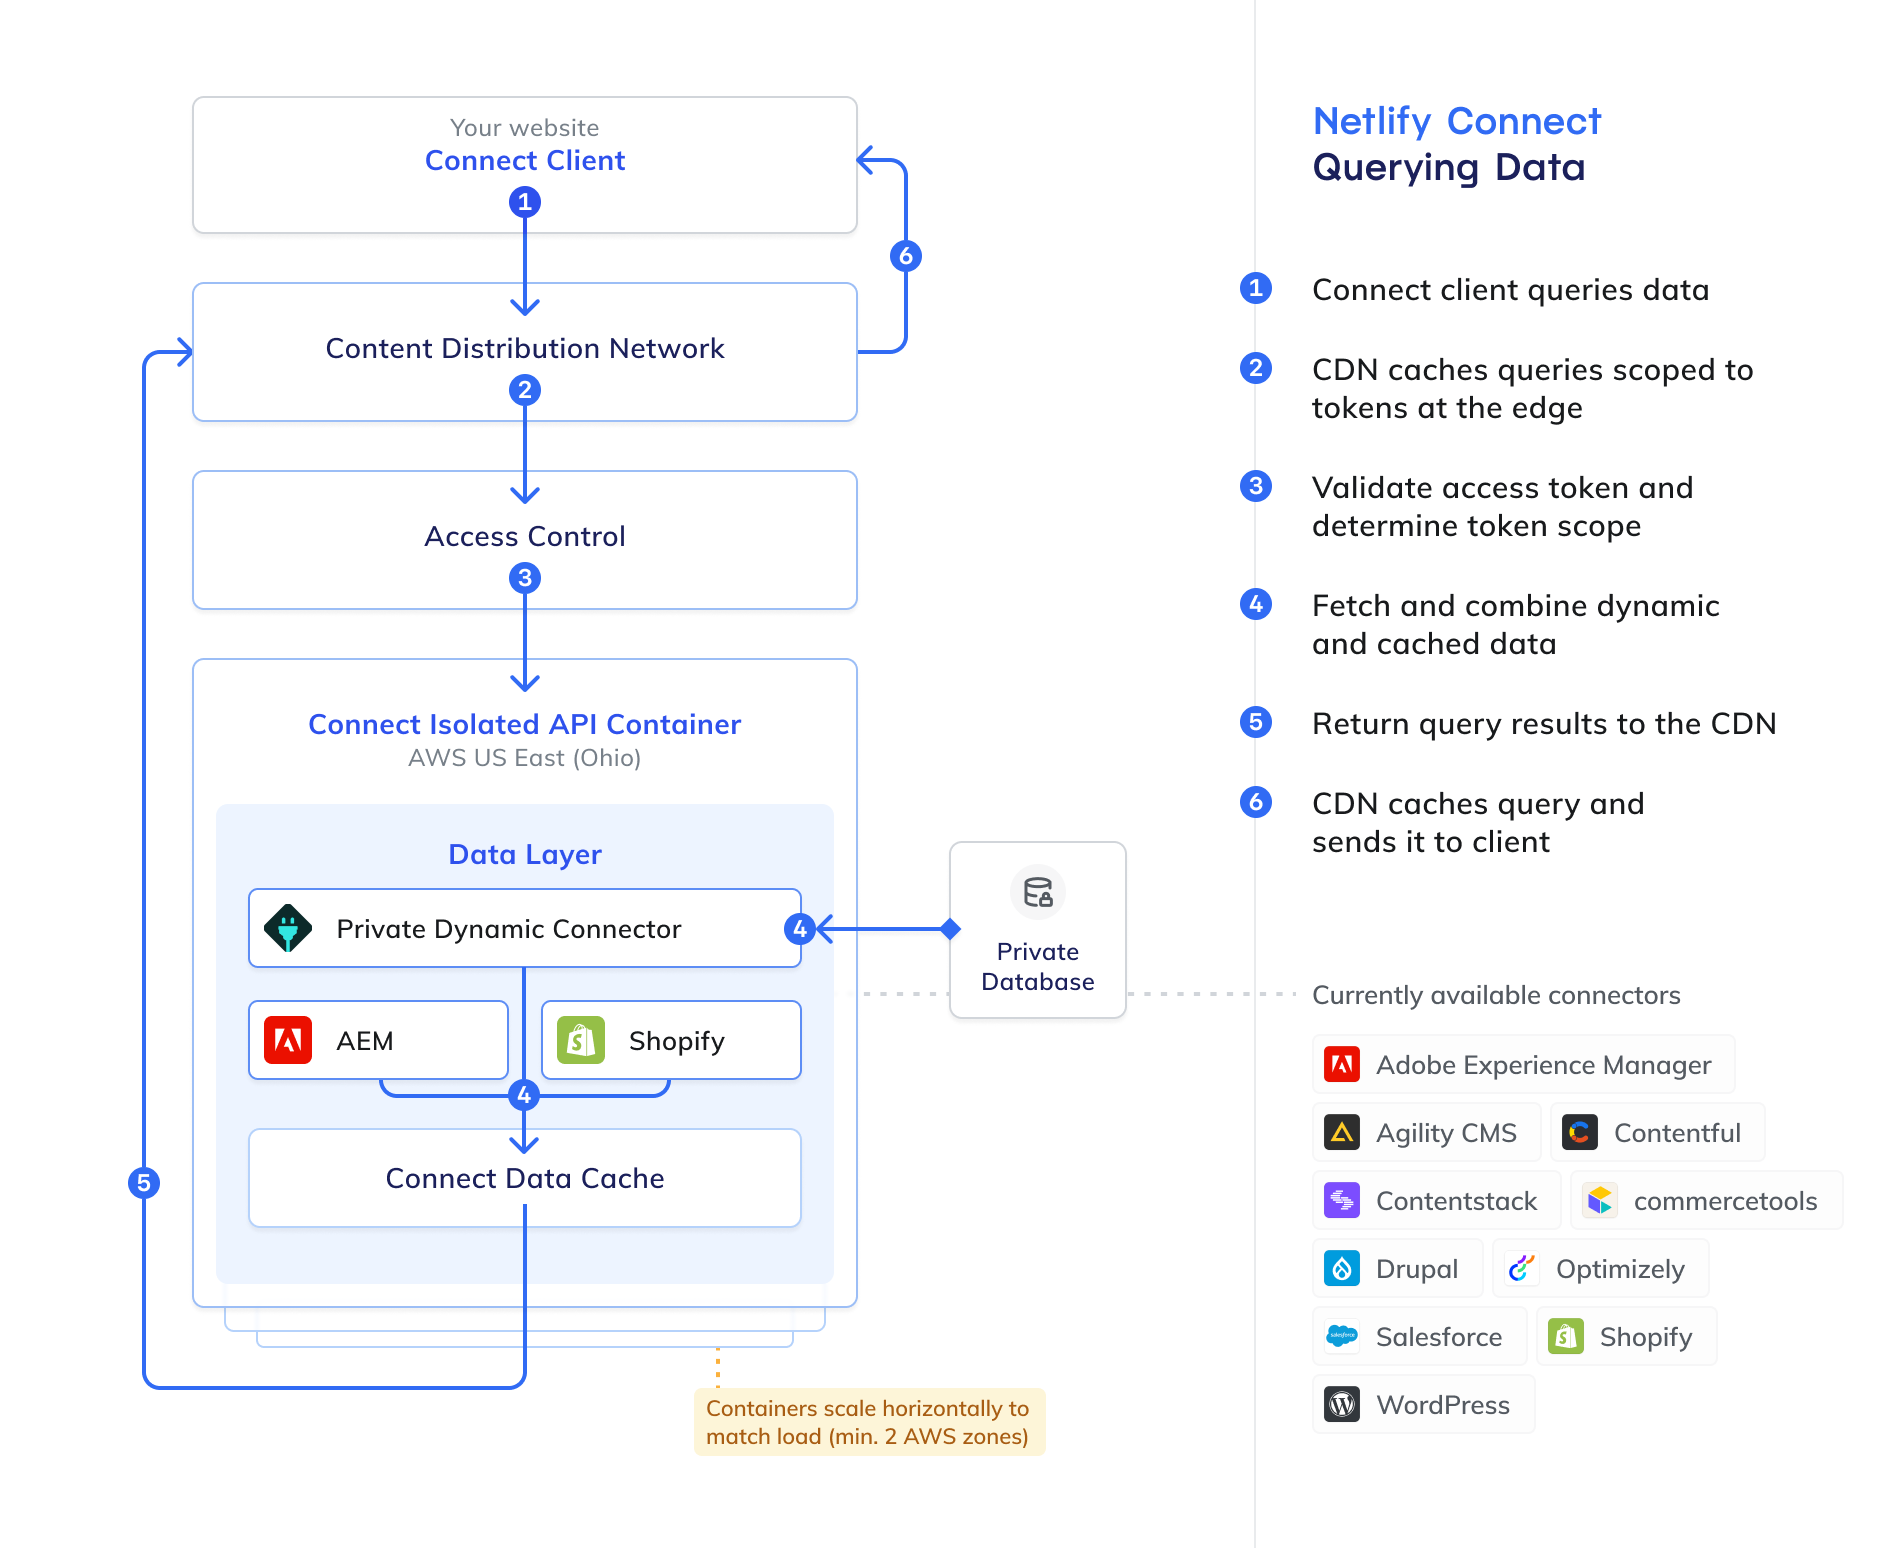
- Connect client queries data
- CDN checks token-scoped cache for query
- Connect client validates access token and determines token scope
- Connect client fetches and combines dynamic and cached data
- Connect client returns query results to the CDN
- CDN caches token-scoped query and sends it to the client
Syncing data
Section titled “Syncing data” 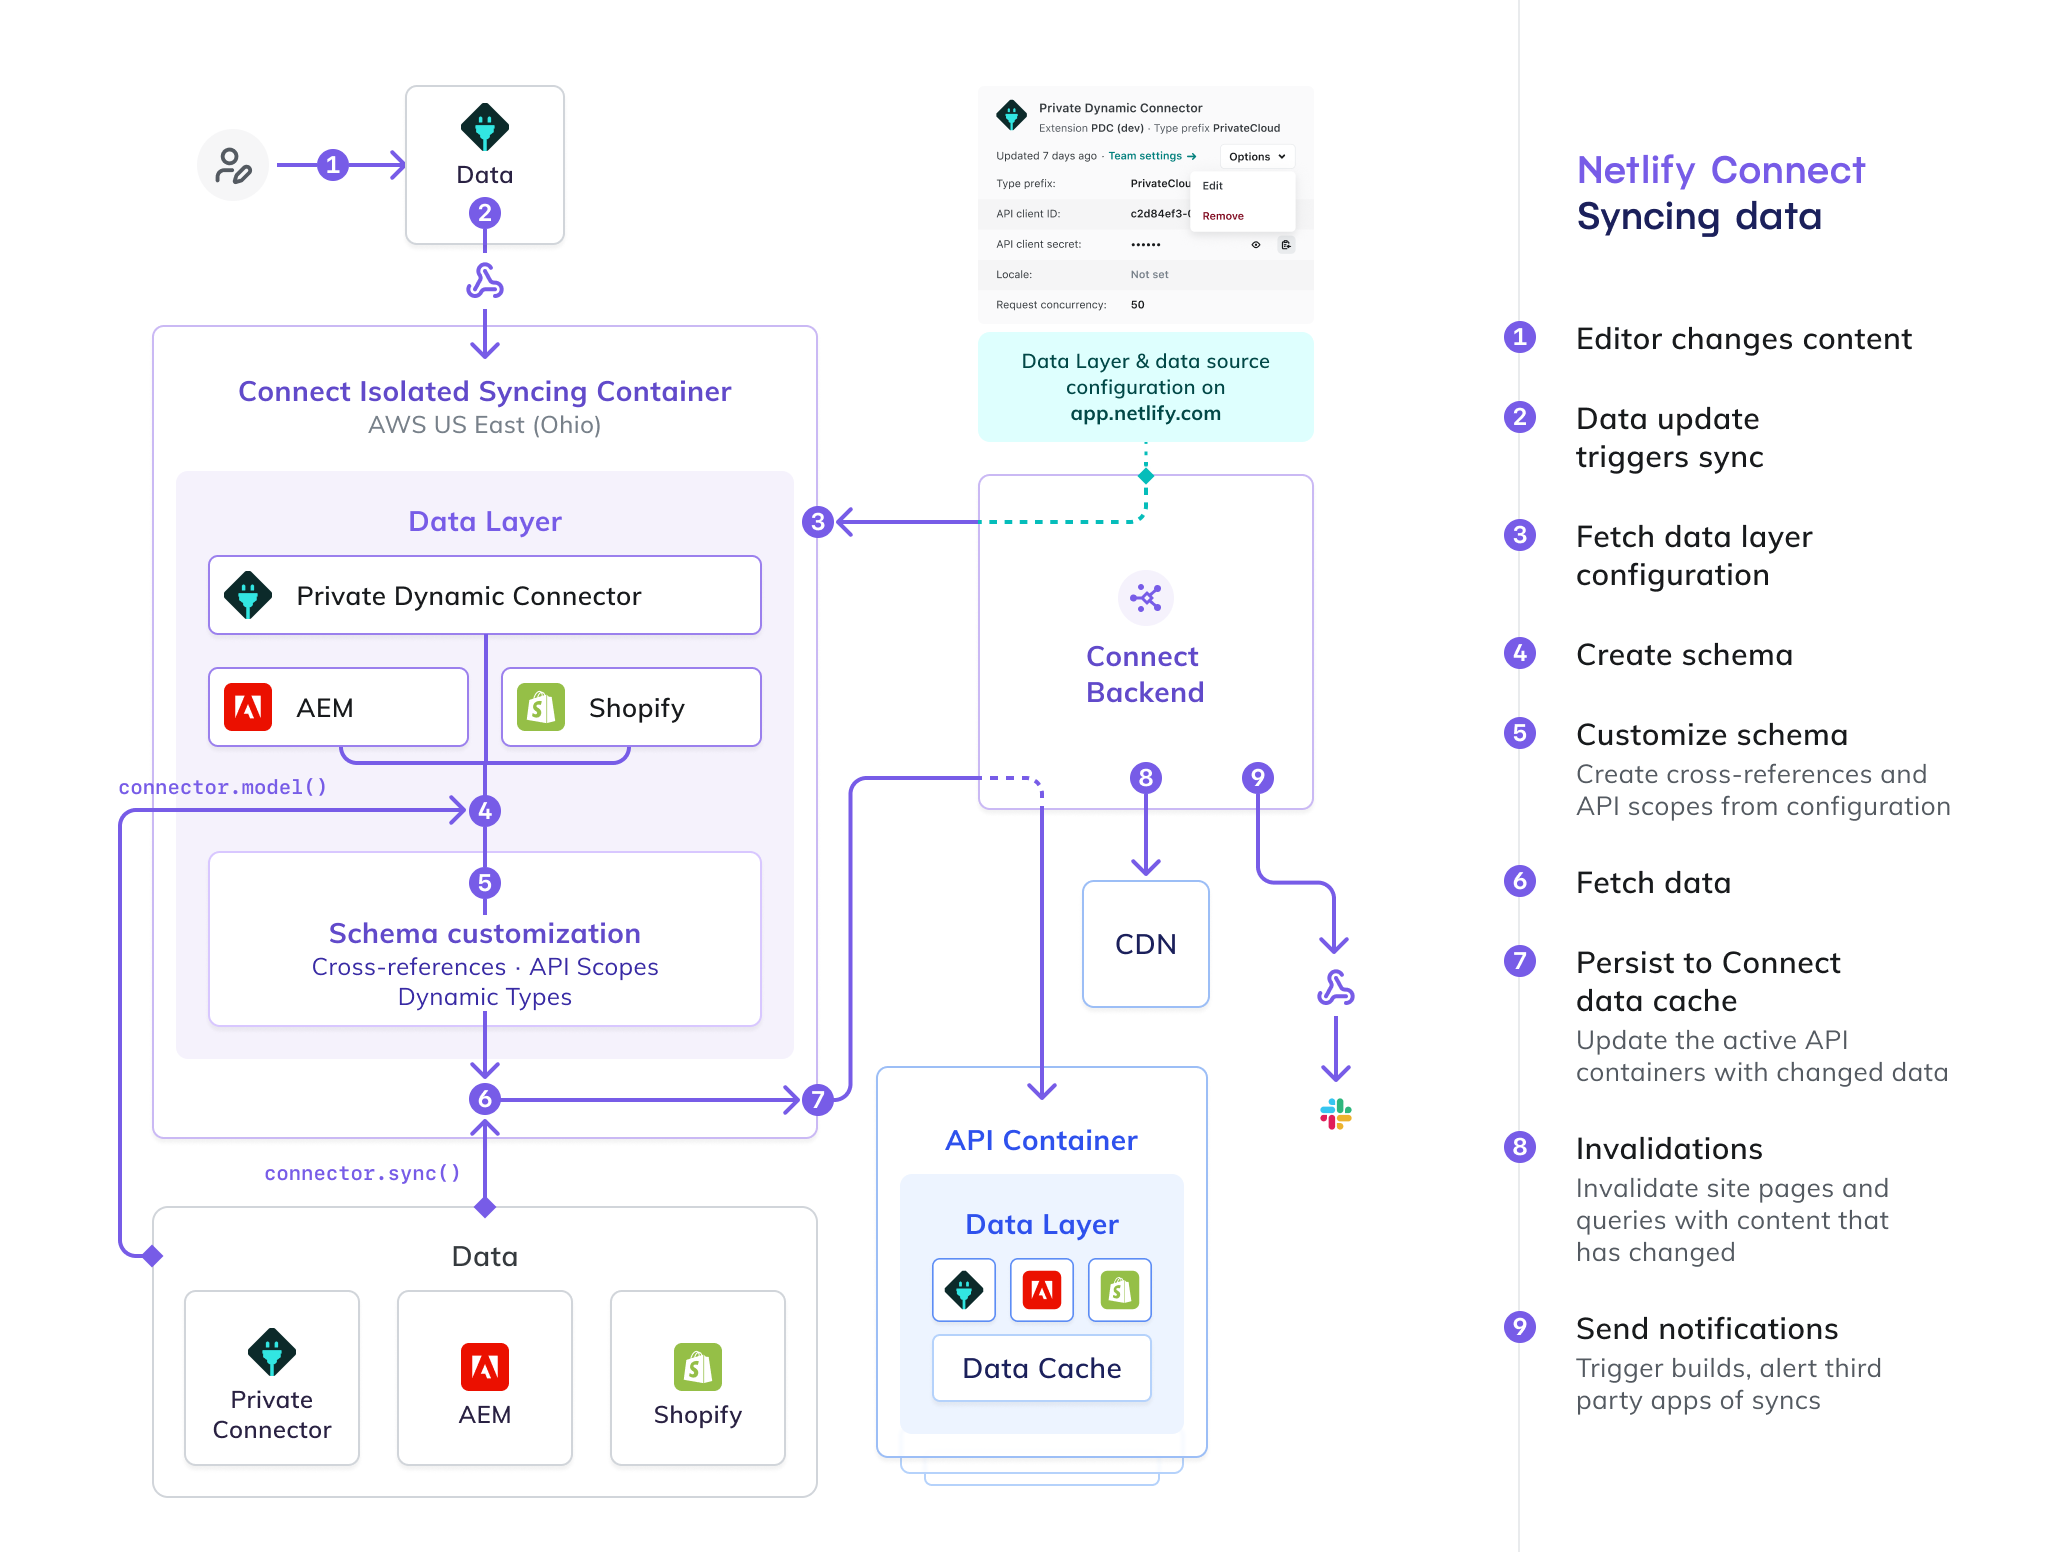
- A person makes a change to content
- Data update triggers sync
- Fetch data layer using configuration from
app.netlify.com - Schema is created
- Schema is customized by cross-referencing API scopes from the configuration
- Fetch data
- Persist to Connect data cache
- Invalidations (invalidate site pages & queries with content that has changed)
- Send notifications by triggering builds and alerting third-party apps of syncs
Supported data sources
Section titled “Supported data sources”Connect supports the following data source types:
- commercetools
- Contentful
- Contentstack
- Drupal
- Salesforce Commerce Cloud
- Shopify
- WordPress
- Custom — third-party or proprietary data sources supported by private or partner data integrations built with the Netlify SDK
Enable Connect
Section titled “Enable Connect”To enable Connect, contact our sales team to request a demo.
Once enabled, the Connect page will be unlocked in the Netlify UI for your team.
Get started
Section titled “Get started”Once a Sales team member has enabled Connect for your team, here’s how to get started:
- Create your first data layer with at least one data source and site connected.
- Monitor the events as we complete the initial data sync for your new data layer.
- Use the GraphQL sandbox to create and test queries against your data layer.
- Generate an API token to use in all requests to the GraphQL API.
- Add code to your site to query the GraphQL API for your data layer and use the results in your site. For a better user and developer experience, use the Connect client for your queries.
- Modify content in your data source, review the data sync event, and confirm that your connected sites rebuild to get the latest data.
- Go back and edit your data layer to add more data sources and add cross-references. If you need to, you can also access different data revisions and pin a specific revision for your API to use. You can also add API scopes to restrict access to certain data and then generate new API tokens to access that data.
Repeat the above steps to add additional data layers, as needed.
Limitations
Section titled “Limitations”- Connect logs are retained for 5 days. All sync events are listed in the Activities section but the logs are currently retained for only five days.
- Data revisions are retained for 60 days. All data revisions are deleted after 60 days, except for the data revision that the API is currently using (by default or as a result of pinning).
- Continuous deployment is required for site updates. For Netlify to automatically build and deploy your site when data changes, your site must be linked to a Git repository to enable continuous deployment, and it must have active builds.
- Data changes trigger only production branch builds for connected sites. When data changes in your data layer, Netlify automatically builds and deploys the production branch of all connected sites. Currently, it’s not possible to specify a different branch to connect. But, you can use notifications as a workaround.
- Responses to large queries do not get cached. If your query is larger than 9 KB, the response will not be cached at the edge. Learn more about how to adjust your queries to ensure the responses are cached and data is returned faster.
More Connect resources
Section titled “More Connect resources”Did you find this doc useful?
Your feedback helps us improve our docs.