Set up Netlify DNS for your new or existing domain.
Netlify DNS offers you advanced subdomain automation and deployment features, such as:
- standalone subdomains, such as
docs.company.comwithout delegatingcompany.com - branch deploys, such as deploying the
stagingbranch of your site/app - a wildcard SSL certification for all your deploys
Netlify DNS also ensures that your site uses our CDN for the apex domain as well as subdomains like www. Learn more in Why Netlify DNS.
Enable Netlify DNS
Section titled “Enable Netlify DNS”There are several pathways to enabling Netlify DNS.
For a domain already added to your site
Section titled “For a domain already added to your site”If you already assigned a production domain to your site, to set up Netlify DNS:
-
Go to your site’s dashboard, then select domain management from the left sidebar.
-
Next to your domain, select Options, then Set up Netlify DNS.
-
Follow the prompts to finish setting up Netlify DNS.
For a domain you already registered
Section titled “For a domain you already registered”If your domain is registered with another provider, you can still take advantage of Netlify’s managed DNS service by delegating your domain to Netlify.
Delegate to Netlify
Section titled “Delegate to Netlify”Assuming you have copied existing DNS records from your current provider, the final step to making your DNS records live is to update your domain registrar with the name servers that will be authoritative for your domain.
The process for changing your domain’s name servers varies from registrar to registrar. Check your domain registrar’s documentation for updating name servers. For your convenience, we’ve gathered links to instructions for popular registrars GoDaddy, Google Domains, AWS, Name.com, and Hover.
To delegate your domain to Netlify:
- Go to your Netlify Team dashboard.
- From your project dashboard, in the top left, choose Projects next to your project name.
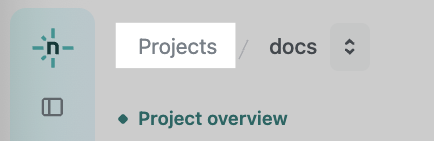
- From your project dashboard, in the top left, choose Projects next to your project name.
- Select DNS from the left sidebar.

- Select your domain.
- Make note of the four name servers listed in the Name servers panel.
- Log in to the account you have with your domain registrar and find their instructions for updating name servers.
- Replace the name servers with the name servers for your Netlify DNS zone. If your registrar requires name server IP addresses, visit our Forums for a verified Support Guide on finding the IP addresses for Netlify’s name servers.
It may take up to a day for the changes to propagate to the public internet.
For a new domain you need to buy and register
Section titled “For a new domain you need to buy and register”Check out our instructions to register and buy a domain from Netlify.
Did you find this doc useful?
Your feedback helps us improve our docs.