Get extra guided help as you add visual editing to an existing site in the Netlify UI.
Once you have successfully deployed your site and enabled the visual editor, you’ll find guided help configuring the visual editor in the Netlify UI in your visual editor site settings at Project configuration Visual Editor .
For even more guided help, you can consult this doc as you go along through the Netlify UI’s guided help.
This doc also helps you get started before the walkthrough help is activated.
Before you begin
Section titled “Before you begin”Check that you have successfully:
- confirmed your site meets the visual editor requirements
- deployed your site
- enabled visual editing
Step 1: Deploy site to Netlify
Section titled “Step 1: Deploy site to Netlify”Skip to the next step if your site is already successfully deployed on Netlify.
If you haven’t already, deploy your site to Netlify. This allows you to confirm that your site can successfully deploy to Netlify first.
-
From the Netlify dashboard for your team, go to the projects list page at
app.netlify/[YOUR-TEAM-NAME]/projects. -
Select Add new project, then select Import an existing project. Be sure you know your site repository name.

-
Follow the guided setup to deploy your site to Netlify. After this setup, Netlify will deploy your site to an internal Netlify domain, such as
https://YOUR-SITE-NAME.netlify.app(unless you have an automatic deploy domain configured).
Step 2: Set up the preview environment
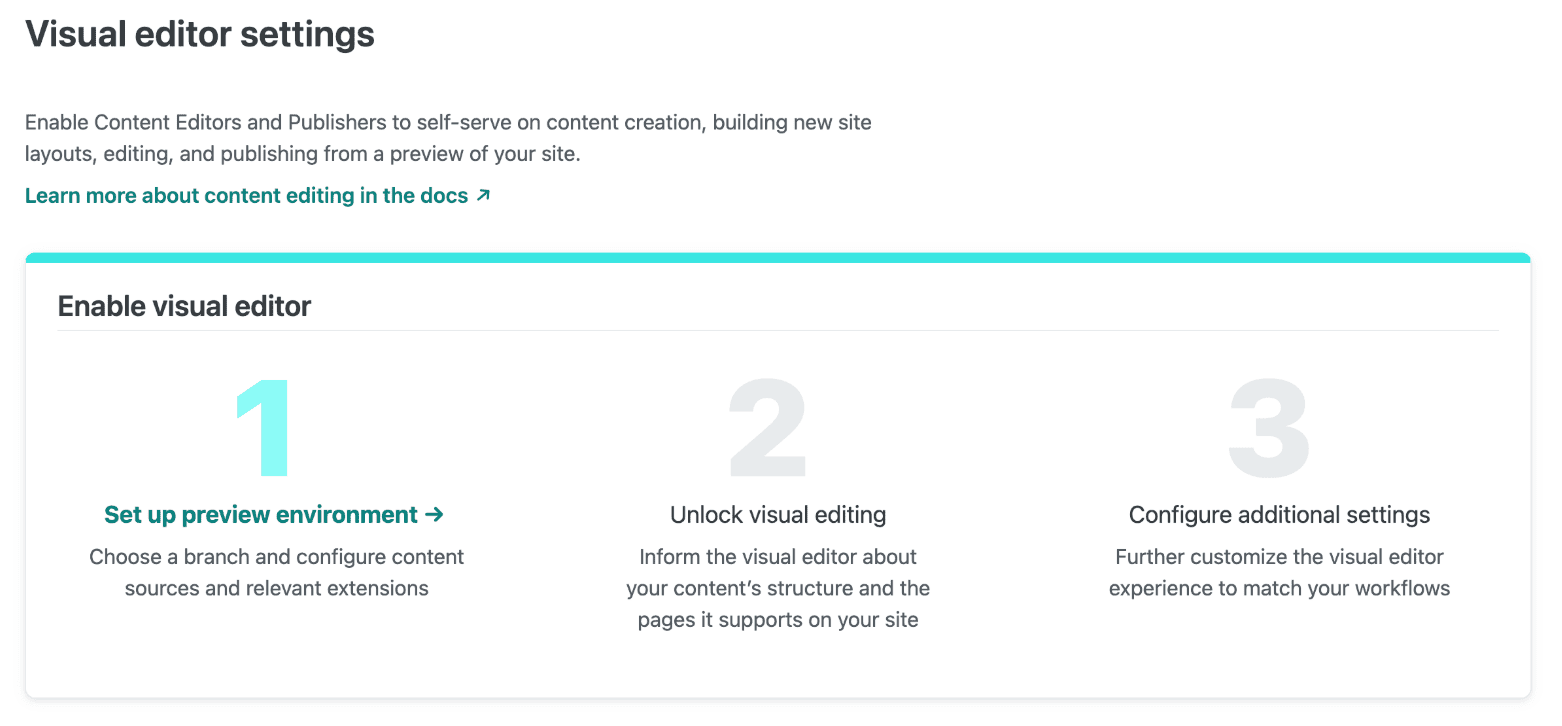
Section titled “Step 2: Set up the preview environment”From your visual editor settings page, you’ll find the setup walkthrough in the Netlify UI.
To set up the preview environment for the visual editor:
-
Go to your visual editor site settings at Project configuration Visual Editor and select Set up preview environment.
-
Choose your working branch. For most cases, we recommend
previewfor your working branch. You can pick from any of your repository’s branches that are not the primary publishing branch such asmainormaster. Ifpreviewis chosen, a newpreviewbranch will be added to the repository.If your content is stored in a headless CMS, ensure environment variables are configured under project configuration > Environment variables. Learn how to set up environment variables, check out supported sources.
-
Authorize access to your site repository:
- For site repositories hosted on GitHub, install the GitHub app for the Netlify visual editor and follow the necessary prompts.
- For site repositories hosted on BitBucket, add your access key and install the BitBucket app if prompted
If you’re having access issues, check out our troubleshooting resources.
-
Exit any remaining access setup windows and select Save.
The visual editor configuration file will be added to your site repository with the content source defined and any environment variables you selected.
Step 4: Configure visual editing
Section titled “Step 4: Configure visual editing”Configuring the page editor helps you unlock visual editing so you can try out visual editing and collaborate on Netlify.
Choose whether you are configuring the page editor for a site with Git CMS or headless CMS.
Unlock visual editing for Git CMS
Section titled “Unlock visual editing for Git CMS”To configure the page editor, you need to tell the visual editor:
- how your content is structured
- how your site’s content matches the visual editor’s content model types for a
page - where to find your content files (only necessary for Git CMS)
Key terms for how the visual editor structures content: Models: Represent the structure of content.
There are three types:
- Page models represent the shape of a page.
- Data models represent content meant to stand alone or be referenced from a page.
- Object models represent repeatable content embedded in another model.
For example, a web page can apply visual editor models in this way:
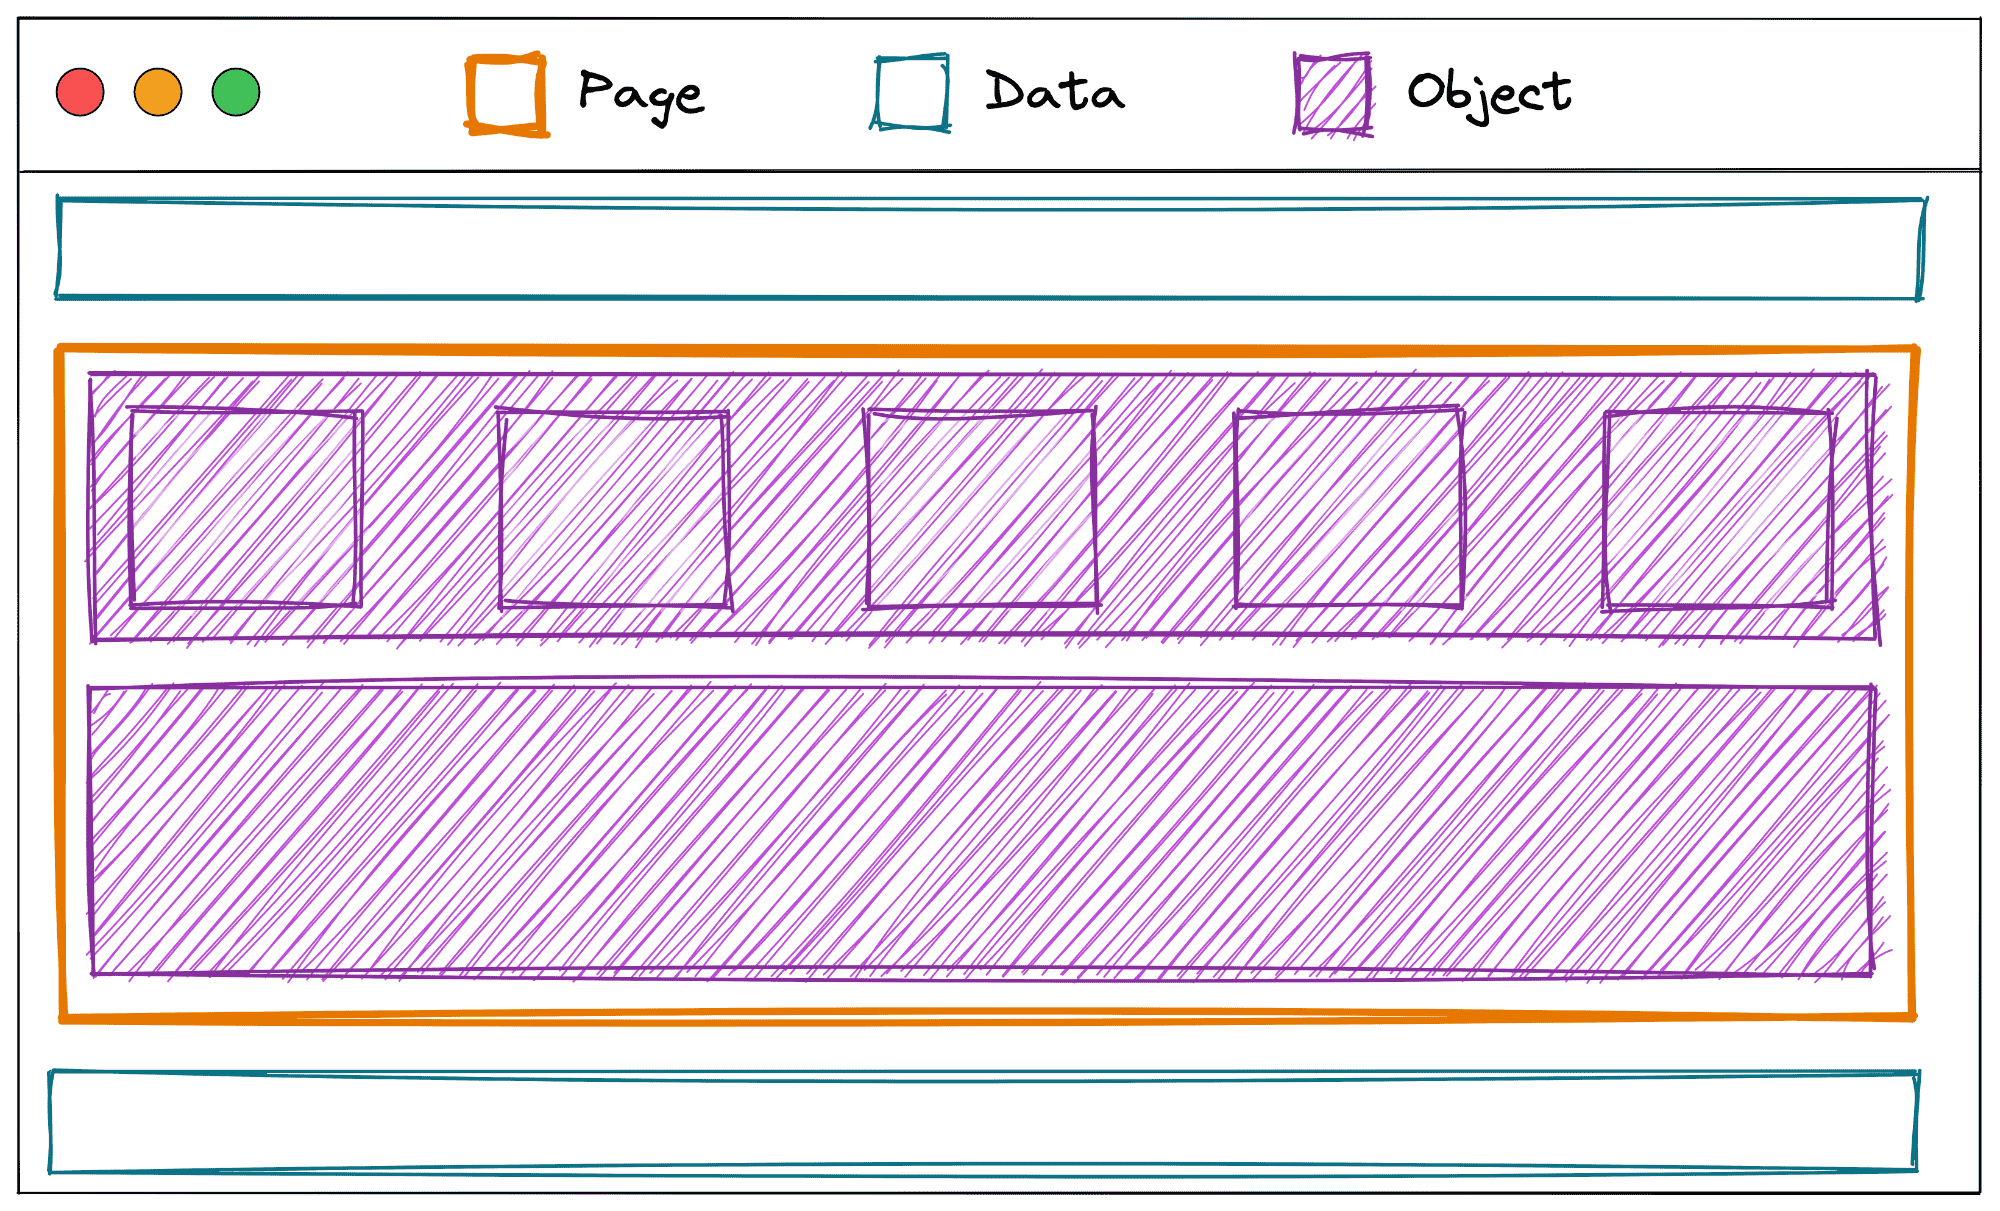
For more details, check out our structured content docs or you can follow along with some examples in this setup guide.
To configure the page editor for a site using no CMS (or storing content in files):
- Go to your site’s
stackbit.config.tsfile and define the structure of your content with themodelsproperty by specifying your modeltypeandname.
For example, if you have a content file in Markdown with this frontmatter in a file called content/pages/my-first-post.md:
---type: Post # The `type` property is a reserved word that tells the visual editor which model this content file belongs totitle: My post title---
My post body
You’ll add your content structure like this, where filePath describes where to find your content and fields describes your frontmatter properties:
// stackbit.config.tsimport { defineStackbitConfig } from "@stackbit/types";import { GitContentSource } from "@stackbit/cms-git";
export default defineStackbitConfig({  // ...  contentSources: [    new GitContentSource({      rootPath: __dirname,      contentDirs: ["content"],      models: [        {          name: "Post",          urlPath: "/{slug}",          // Tell the visual editor where to find content          filePath: "content/pages/{slug}.md",          fields: [{ name: "title", type: "string", required: true }]        }      ],    })  ]});
For this content file, the visual editor would infer a document looking like:
{ // There would be more fields but the "fields" key is what I was trying to highlight "id": "/content/pages/my-first-post.md", "fields": [ { name: "title", type: "string", required: true, value: "My post title" }, { name: "slug", type: "slug", value: "my-first-post", // not sure if the type here is true { name: "markdown_content", value: "My post body", type: "markdown_content" } ]}-
Next, tell the visual editor which models (structured data objects) represent pages.
For example, add the
typeproperty:
      // stackbit.config.ts    import { defineStackbitConfig } from "@stackbit/types";    import { GitContentSource } from "@stackbit/cms-git";
export default defineStackbitConfig({ // ... contentSources: [ new GitContentSource({ rootPath: __dirname, contentDirs: ["content"], models: [ { name: "Post", type: "page", urlPath: "/{slug}", filePath: "content/pages/{slug}.md", fields: [{ name: "title", type: "string", required: true }] } ], }) ] });- To let the visual editor know where your content lives, specify the URL path for your pages. This connects page models to specific URLs. There are two ways to do this. You can add a
siteMapfunction which offers more control (most commonly used) or take a static route and specify theurlPathproperty for each page model in themodelExtensionsproperty.
Example specifying urlPath
Section titled “Example specifying urlPath”In this example, you specify urlPath property for each model defined in your modelExtensions property:
// stackbit.config.tsimport { defineStackbitConfig, SiteMapEntry } from "@stackbit/types";
export default defineStackbitConfig({  // ...  contentSources: [    new GitContentSource({      rootPath: __dirname,      contentDirs: ["content"],      models: [        {          name: "Post",          type: "page",          // Static URL path derived from the "slug" field          urlPath: "/{slug}",          filePath: "content/pages/{slug}.md",          fields: [{ name: "title", type: "string", required: true }]        },        // ...      ],    })  ],});
Unlock visual editing for headless CMS
Section titled “Unlock visual editing for headless CMS”In general, the visual editor automatically inherits the schema (collection of models) from the API CMS.
However, most Headless CMS options don’t have the concept of a “page” in their content model so you need to tell the visual editor what counts as a page with the modelExtensions property.
Key terms for how the visual editor structures content:
Models: Represent the structure of content.
There are three types:
- Page models represent the shape of a page.
- Data models represent content meant to stand alone or be referenced from a page.
- Object models represent repeatable content embedded in another model.
For example, elements on a web page can be modeled in this way:
Learn more about how to model content for a headless CMS in these structured content docs or in the examples below in this setup guide.
To configure the page editor for a site using headless CMS:
- Go to your site’s
stackbit.config.tsfile and tell the visual editor which of your models (or structured data objects) are pages.
For example, if your CMS has a model called post , then you can indicate it’s a page model by implementing the modelExtensions property with { name: "post", type: "page" }:
 // stackbit.config.ts import { defineStackbitConfig } from "@stackbit/types";
 export default defineStackbitConfig({   // ...   modelExtensions: [     // Extend the "page" and "post" models by defining them as page models     { name: "post", type: "page" }   ] });
Now that we know which models are pages, we need to connect them to URL routes so the visual editor knows where your site’s editable pages are.
- To connect page models to URLs, you can add a
siteMapfunction which offers more control (most commonly used) or take a static route and specify theurlPathproperty for each page model in themodelExtensionsproperty.
Step 5. Restart the preview
Section titled “Step 5. Restart the preview”-
Confirm you have merged changes you made in
stackbit.config.tsinto the visual editor’s working branch, which ispreviewby default, on your site’s remote repository on GitHub or BitBucket. -
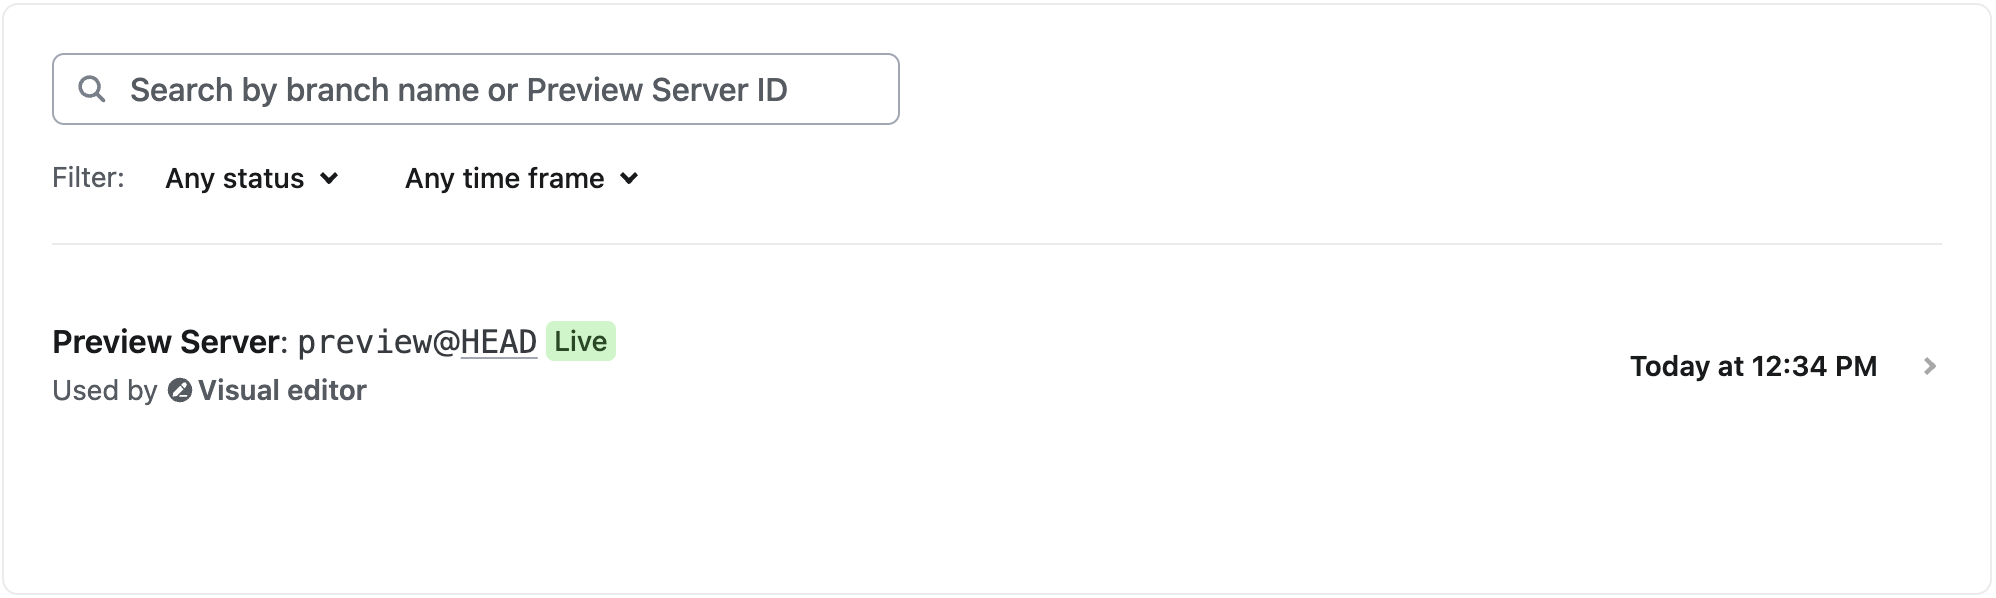
If the Preview Server for the visual editor was already running, it will automatically restart. If the Preview Server was not already running, it will start automatically when you open visual editor.
You can verify that your Preview Server has restarted by going to Preview Servers.
Step 6. Try the visual editor
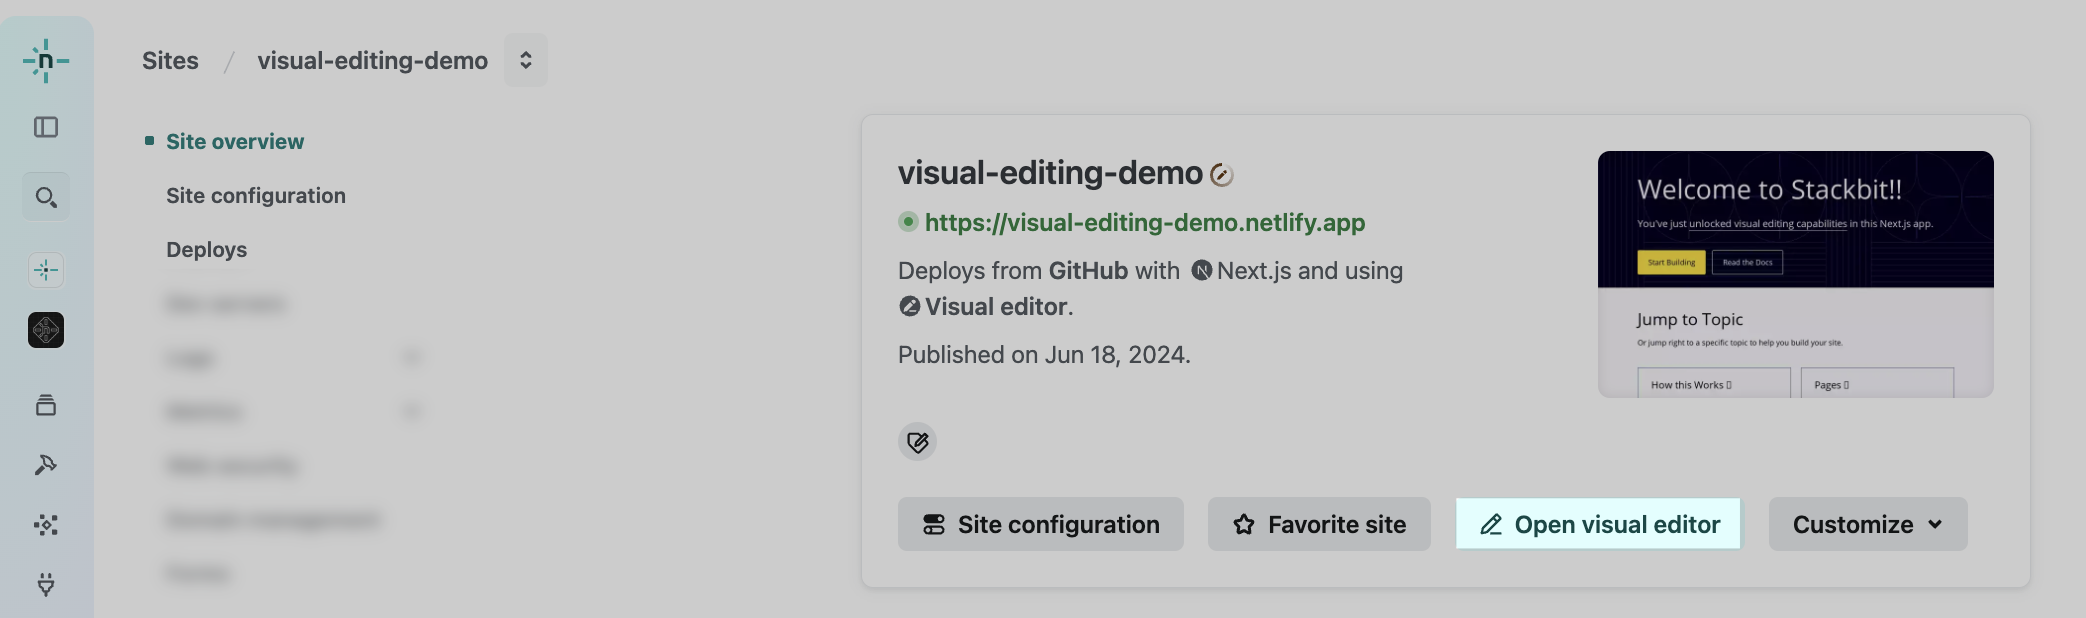
Section titled “Step 6. Try the visual editor”After the Preview Server has successfully restarted, you can try the visual editor.
- From your site overview, select Open visual editor.
Next steps
Section titled “Next steps”For next steps, you can customize the visual editor further for your team’s workflow and explore its advanced features.
Developers typically further customize visual editing by:
- Enabling inline editing to make changes directly in the preview
- Configuring asset sources
Learn more about how to customize the visual editing experience.
Did you find this doc useful?
Your feedback helps us improve our docs.