Data revisions in Netlify Connect
Every data layer in Netlify Connect has access to a unified GraphQL API with support for multiple data revisions.
With each successful data sync, Netlify generates a new data revision for your data layer that represents the GraphQL schema and data at that point in time. You can query against each data revision using the revision’s GraphQL sandbox or its unique API URL.
By default, your data layer’s GraphQL API uses the latest data revision but you also have the option to pin a different data revision instead.
The ability to pin and access different data revisions for your data layer allows you to:
- rollback and point your data layer’s API to a specific data revision while you troubleshoot and fix bugs
- lock the data layer’s API to a specific data revision while you prepare for a major release
- access and audit data from a specific date and time
Netlify records the pinning and unpinning of data revisions in the team audit log.
Data revisions include cross-references
When Netlify generates a new data revision for your data layer, the revision includes any cross-references that apply at the time. If you add, edit, or delete a cross-reference, the changes only apply to new data revisions generated after that modification.
This document provides an overview of data revisions in Connect. It also outlines how to pin and unpin revisions, and how to access their data.
# Manage data revisions
Every successful sync to your data layer generates a new data revision, with a unique data revision ID.

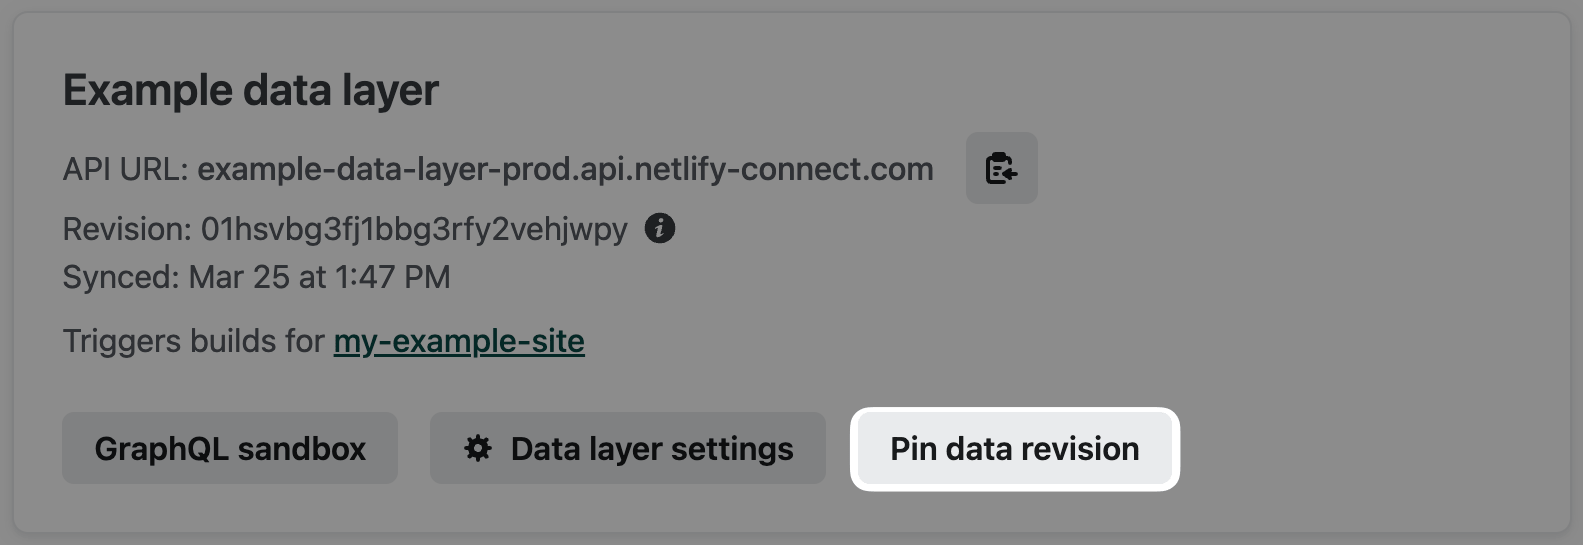
At the top of the data layer’s overview page, you will find information about the data revision that your data layer’s GraphQL API is currently using — including the data revision ID and whether or not the API is using a pinned revision.
Netlify retains data revisions for 60 days
All data revisions are deleted after 60 days, except for the data revision that the API is currently using (by default or as a result of pinning).
In the Netlify UI, you can review all available data revisions. You can also manage which data revision your API uses by pinning and unpinning data revisions.
# Review data revisions
To review the data revisions available for your data layer:
- Navigate to the page for your team in the Netlify UI.
- Select the data layer from the Data layers list.
- On the data layer’s overview page, select Revisions.
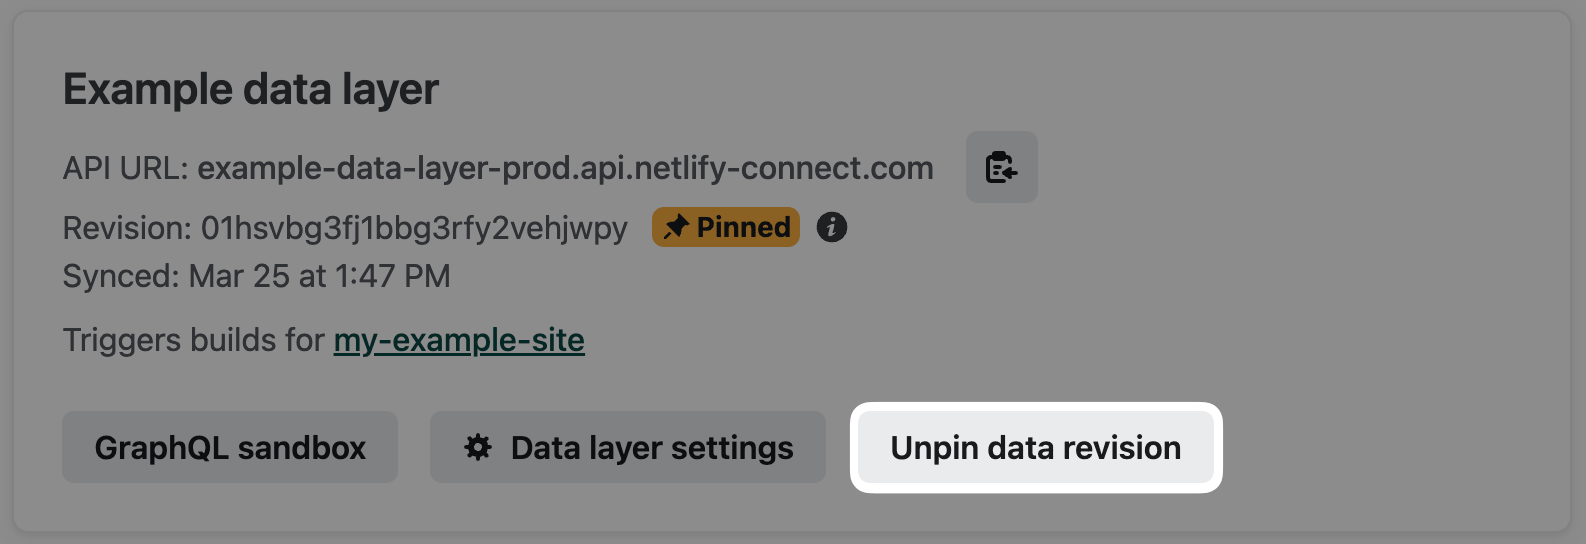
The data revision that your API is currently using is labelled with either the Default or Pinned badge. The Pinned badge indicates that you have pinned this specific data revision and the API will always use this one, even if newer revisions are available. The Default badge indicates that you have not pinned a data revision and the API is using this newest revision by default.
# Pin a data revision
When you pin a data revision, the GraphQL API for your data layer will lock to that data revision. Successful syncs will continue to generate new data revisions but the API will always use this version.
The data layer’s API URL and GraphQL sandbox will reflect the pinned revision but you can still access other data revisions using each revision’s unique API URL and sandbox.
To pin the latest data revision:
- Navigate to the page for your team in the Netlify UI.
- Select the data layer from the Data layers list.
- At the top of the data layer’s overview page, select Pin data revision.
- To confirm, select Pin the latest data revision.
To pin an older data revision:
- Navigate to the page for your team in the Netlify UI.
- Select the data layer from the Data layers list.
- On the data layer‘s overview page, select Revisions to access the list of available data revisions.
- Find the revision you want to pin, select Options, and then select Pin this data revision.
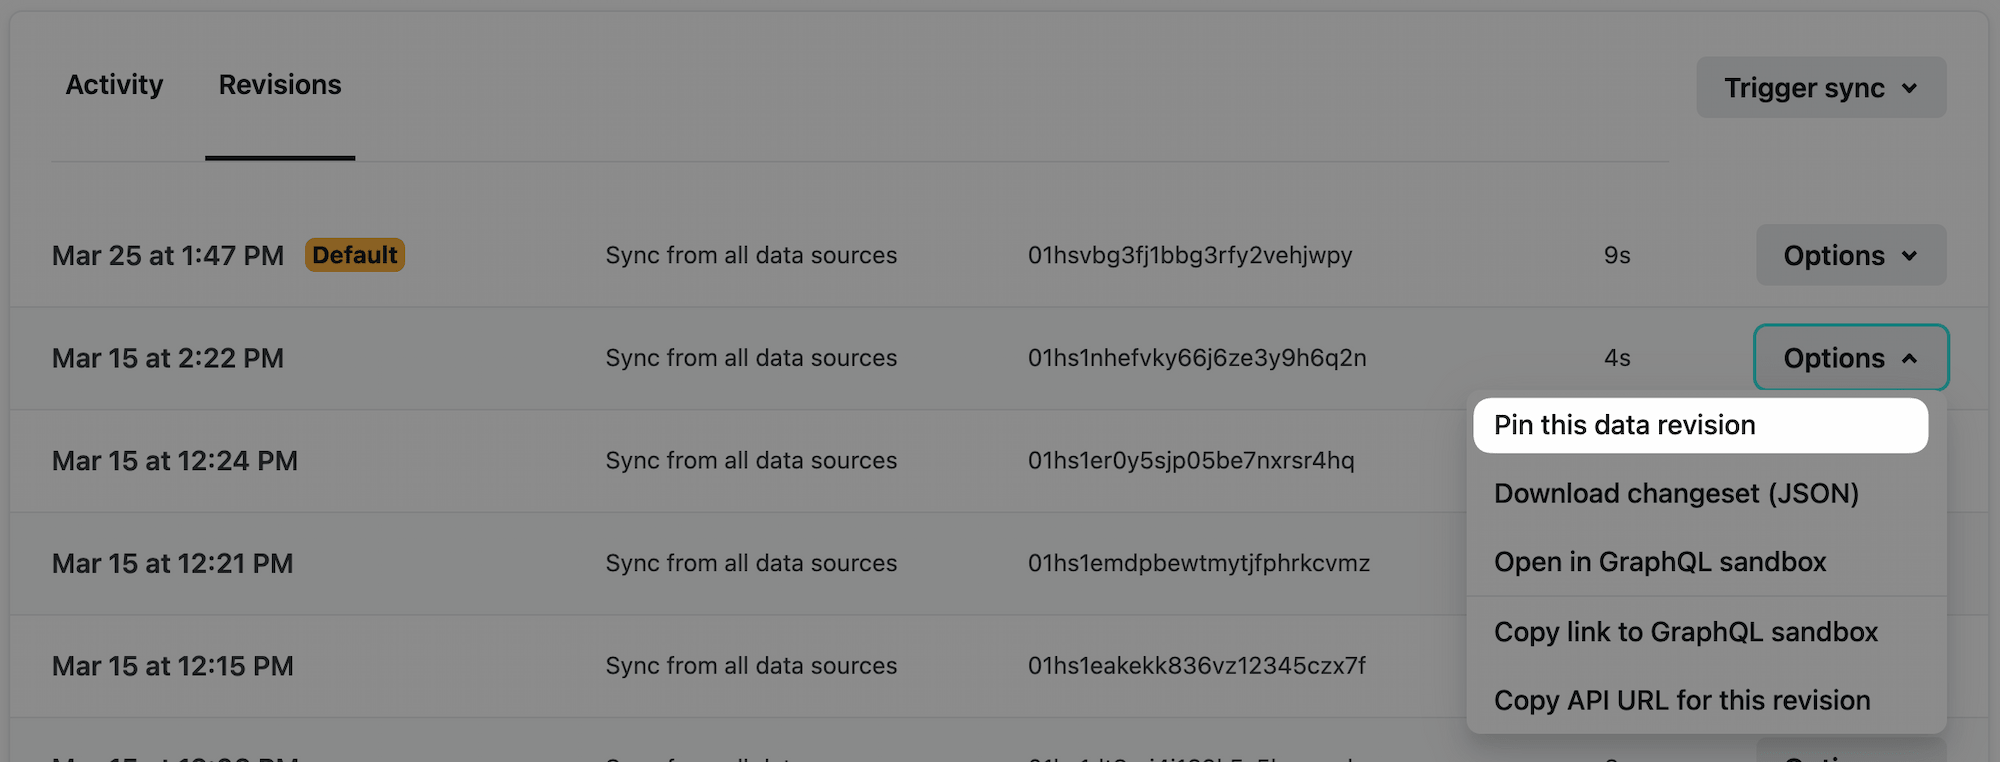
- To confirm, select Pin this data revision.
Netlify will automatically rebuild and redeploy your connected sites to ensure they use data from this pinned data revision.
# Unpin a data revision
When you unpin a data revision, the data layer’s GraphQL API will default to the most recent data revision. As Netlify syncs new data and generates new revisions, the API will always point to the latest one.
Note that if you unpin a data revision that is older than the retention period of 60 days and a newer revision is available, the old revision will be deleted within 24 hours.
To unpin the data revision:
- Navigate to the page for your team in the Netlify UI.
- Select the data layer from the Data layers list.
- At the top of the data layer’s overview page, select Unpin data revision.
- To confirm, select Unpin data revision.
Netlify will automatically rebuild and redeploy your connected sites to ensure they use data from the most recent data revision.
# Access data revisions
For each data revision, you have the option to download the changeset and make GraphQL queries using a revision-specific sandbox and API URL.
# Download the changeset for a revision
For each data revision, you get access to a changeset JSON file that outlines what new data was synced in the selected data revision compared to the previous data revision.
To access the changeset for a data revision:
- Navigate to the page for your team in the Netlify UI.
- Select the data layer from the Data layers list.
- On the data layer‘s overview page, select Revisions to access the list of available revisions.
- Find the revision you want to review, select Options, and then select Download changeset (JSON).
# Use the GraphQL sandbox for a revision
You can access the GraphQL sandbox for a data revision to build, test, and run queries on the data from a specific point in time.
To access the sandbox for a specific data revision:
- Navigate to the page for your team in the Netlify UI.
- Select the data layer from the Data layers list.
- On the data layer‘s overview page, select Revisions to access the list of available revisions.
- Find the revision you want to access, select Options, and then select Open in GraphQL sandbox.
Note that saved queries will appear across all versions of the sandbox but the query will only run against and return data for the associated data revision. To confirm which data revision you are querying against, check the data revision ID at the top of the sandbox.
Learn more about using the GraphQL sandbox in Connect.
# Query the GraphQL API for a revision
You can access the GraphQL API for a data revision to query the data as it existed at a specific point in time.
Each data revision has a unique API URL, with the following format: https://{data_layer_key}-{data_revision_id}.api.netlify-connect.com. Note that the data layer key is different from the data layer ID.
If you haven’t already, remember to generate an API token before you query the API.
To find the GraphQL API URL for a specific data revision:
- Navigate to the page for your team in the Netlify UI.
- Select the data layer from the Data layers list.
- On the data layer‘s overview page, select Revisions to access the list of available revisions.
- Find the revision you want to access, select Options, and then select Copy revision API URL.
Learn more about using the GraphQL API in Connect.
Did you find this doc useful?
Your feedback helps us improve our docs.