Troubleshooting tips for Netlify Connect
This document provides troubleshooting tips for Netlify Connect.
# Find your data layer ID
Need your data layer ID for a support conversation or for a manual set-up step for a data source? Once you add a data layer, you can find the ID in the URL for the data layer’s pages in the Netlify UI.
The URL is formatted as https://app.netlify.com/teams/YOUR-TEAM-NAME/connect/data-layers/YOUR-DATA-LAYER-ID/...
If you are in the initial flow to create and configure a new data layer, you can find the ID for the data layer in the URL starting from the add data sources step.
If you have already created a data layer, the ID will appear in the URL as you navigate through the different Netlify UI pages for that data layer:
- Navigate to the page for your team in the Netlify UI.
- Select the data layer from the Data layers list.
- Find the data layer ID in the URL.
# Find your data layer’s webhook URL
Every data layer comes with a default Webhook URL that can be found in your Data layer settings under
. It is formatted ashttps://webhook.netlify-connect.com/hooks/data_layer/data_source/publish/{data_layer_id}. However, we recommend generating a new authenticated webhook URL and using that instead. Learn more about how to create and manage webhooks for your data layer.
# Find the slug for a data integration
While setting up a webhook on a data source or troubleshooting an error, you may need to refer to the slug for the data integration you’re using.
To find the slug:
- Navigate to the page for your team.
- Find the extension for the data integration and then select it.
- Review the URL to find the slug, which is the last part of the URL.
For example, if the URL for the Drupal data integration is https://app.netlify.com/teams/your-team-name/extensions/cms/drupal-content, the slug is drupal-content.
# Data integration for custom data source doesn’t show up as an option
If you try to add a custom data source to your data layer and the data integration for that data source doesn’t appear as an option in the Netlify UI, confirm that you have installed the integration for your team.
- In the Netlify UI, navigate to the page for your team.
- Find the data integration for the custom data source you wish to use and select it.
- If it’s not already installed, select Install.
If you can’t find the data integration or the integration is already installed, work with the integration developer to ensure that it was published correctly.
If the above steps don’t seem to resolve this issue, contact support.
# Other questions about custom data sources
For help with a custom data source, refer to the data integration’s details page in the Netlify UI and any external documentation the page links out to. You can find the details page by navigating to
and searching for the integration by name.If you have questions, please contact the integration developer directly.
# Initial sync fails after configuring a data source
If you add a new data source and the initial sync isn’t successful, check the following:
- Confirm that you completed the steps to prepare your data source instance for Connect, if applicable. To review the preparation steps, check our documentation on how to add new data sources and filter for the data source type to reveal the instructions. If there are additional steps to take, the instructions include a section with a title that begins with
Prepare, such asPrepare your Contentful instance. - Confirm that the configuration details entered for your data source instance are correct. To review your settings:
- Navigate to the page for your team in the Netlify UI.
- Select the data layer from the Data layers list, and then select Data layer settings.
- On the data layer settings page, select Data sources.
- Select the data source you want to review.
- If there are any errors, select Edit, update the fields as needed, and then select Save.
- After you make any changes, manually trigger a sync.
If the above steps don’t seem to resolve this issue, contact support.
# Changes in data source don’t trigger a sync
Connect relies on your data source to send a notification whenever data changes. If a change does not trigger a sync in Connect, check the settings on your data source:
- Confirm that a webhook with your data layer’s webhook URL exists. If a webhook doesn’t exist, you likely need to add one manually. This is often a prerequisite step for adding a data source to Connect, especially custom data sources. Review our documentation on how to add and configure data sources.
- Confirm that the webhook is set to trigger on the data types and events you want to sync. For example, you may be missing a “product” type or a “delete” event. Refer to the documentation for your data source to learn more about configuring webhooks on their system.
- Confirm that the webhook is enabled.
If the above steps don’t seem to resolve this issue, contact support.
# Handle large Contentful or WordPress payloads
If you encounter errors syncing a Contentful data source due to the payload size, edit the data source to lower the Page limit value from the default of 1000 so that data is retrieved in smaller batches.
Similarly, if your WordPress data source has errors due to the payload size, edit the data source to lower the Per page value from the default of 100 so that data is retrieved in smaller batches.
# Responses from the data layer API are slow
Responses to queries that are larger than 9 KB are not cached. If a large response is not cached, each subsequent query for the data will take a similar length of time to process.
To get maximum performance from your data layer’s API, we recommend that you take advantage of pagination by using skip and limit filters in your queries. If that’s not possible, consider making multiple small queries that return smaller response bodies, which can be cached separately.
Note that a data sync clears the edge cache entries for the modified data and that updates to more than 100 or so entries purge the cache for the entire data layer. As a result, initial queries following a data sync may take longer than usual.
Learn more about how we calculate query complexity.
# Clear database cache and sync again
If you are debugging an issue and want to clear out your data layer’s database and start fresh, you can use the clear cache option.
Navigate to the
page for your team and select the data layer from the Data layers list.In the Activity section, select
.
Netlify will clear the database cache and start syncing the data from all sources again to create a fresh database for your data layer.
# Sync event is complete but the API reflects old data
If the Activity section reflects a successful data sync but the data layer API still reflects old data, make sure your API isn’t using a pinned data revision. If a data revision is pinned, successful syncs will continue to generate new data revisions but the API will always use the pinned version.
- Navigate to the page for your team in the Netlify UI.
- Select the data layer from the Data layers list.
- Check the data layer overview to confirm whether or not the API is using a
pinnedrevision.
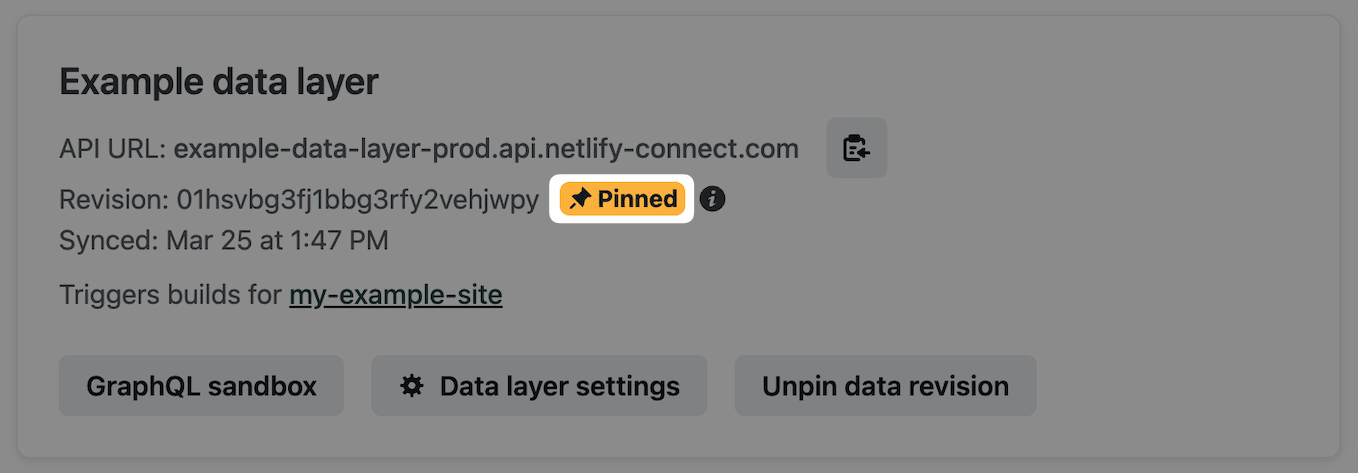
If a specific data revision is pinned and you want to check the data in a revision before unpinning or updating the pin, you can query the data for that specific revision.
# Trigger builds automatically for a specific branch
When data changes in your data layer, Netlify automatically builds and deploys the production branch of all connected sites. Currently, it’s not possible to specify a different branch when you connect a site.
If you would like to trigger builds for a different branch, you can follow this workaround to create a Netlify build hook and add it as a notification to your data layer.
- First, create a build hook for your site. Navigate to .
- Select Add build hook.
- Enter a Build hook name and select the Branch to build, then select Save.
- Find the new build hook in the list and copy the webhook URL.
- Now, create a notification for your data layer. Navigate to the page for your team.
- Select the data layer from the Data Layers list, and then select Data layer settings.
- On the data layer settings page, select Notifications.
- Select Add a notification.
- Enter a Name for this notification.
- Paste the copied build hook into the URL field.
- Select Create notification to add the notification to your data layer.
Now, whenever your data layer updates, Netlify automatically triggers the notification. The notification then triggers the build hook to start a new build and deploy for the specified branch.
# API query does not return the expected types and fields
If you make a query to your data layer’s API and not all of the data you expect is returned, make sure your API token has the correct scopes for that data.
Navigate to the
page for your team in the Netlify UI.Select the data layer from the Data layers list, and then select Data layer settings.
On the data layer settings page, select API access control.
In the API scopes section, find the scope for the data required.
Select the scope to expand the details and review the list of tokens, fields, and types that the scope applies to.
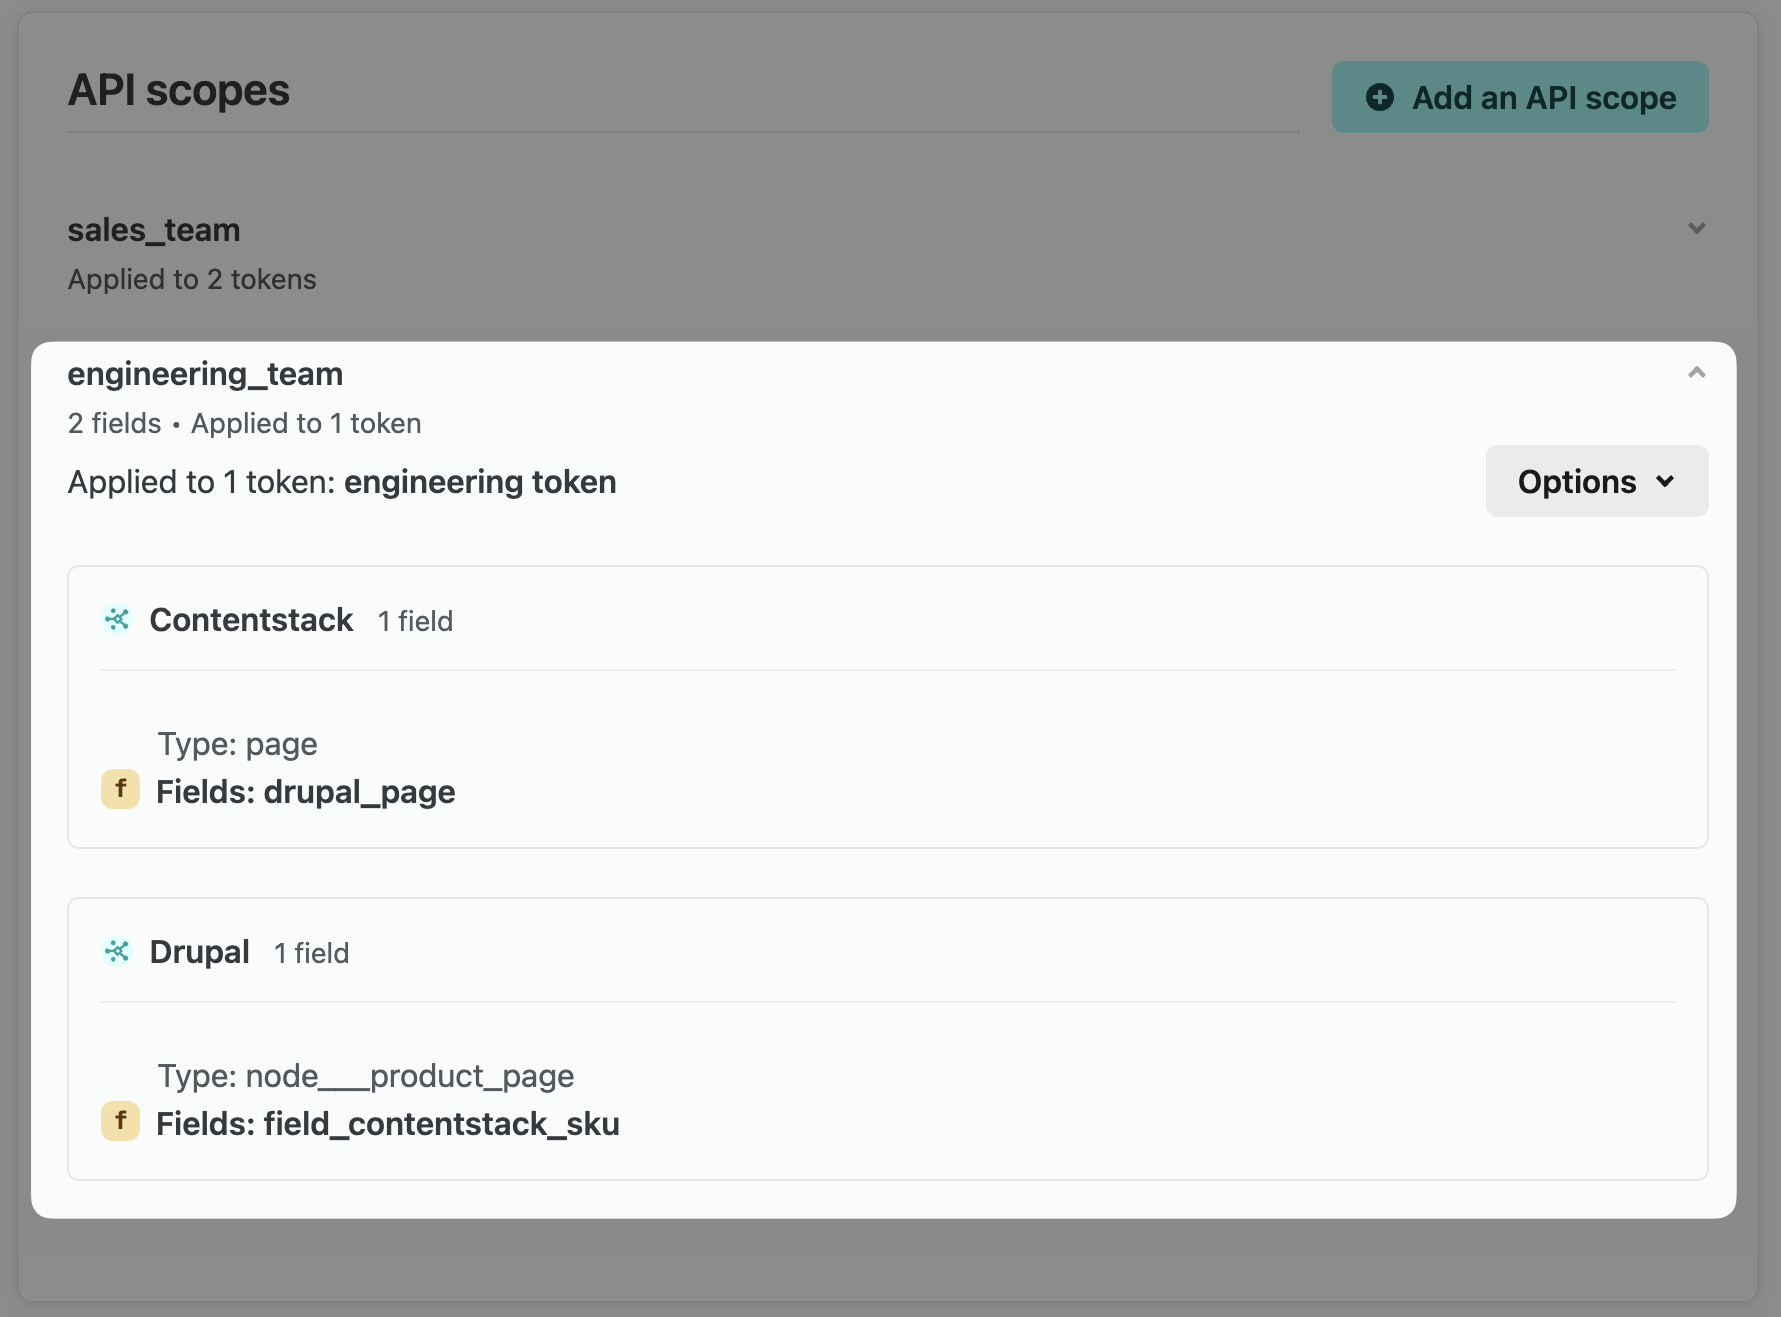
If your token is not on the list, use one of the tokens listed instead. Or generate a new token with that scope.
# Get help with Connect client
If you use the Connect client to query your data layer’s GraphQL API, refer to the connect-client readme for troubleshooting tips and support.
Did you find this doc useful?
Your feedback helps us improve our docs.