Gatsby + Contentful tutorial
This tutorial gets you up and running with the basics of Netlify Create using a Gatsby site with Contentful as the content source.
# Project setup
Let's begin by getting the example project setup on your local machine.
# Prerequisites
- Machine equipped to run Node.js version 18 or newer
- Contentful account
- Blank Contentful space (without content or content models)
- API access to your Contentful space, including space ID, delivery and preview tokens, and a personal access token (sometimes called a management token)
# Clone example project
Use create-stackbit-app to clone the example project and install dependencies.
npx create-stackbit-app@latest --example tutorial-gatsby-contentful
Change into the project directory when installation has completed. Unless otherwise noted, all commands will be run from the project root.
cd tutorial-gatsby-contentful
# Set environment variables
Copy .env.example to .env and set the appropriate values.
CONTENTFUL_SPACE_ID="..."
CONTENTFUL_PREVIEW_TOKEN="..."
CONTENTFUL_DELIVERY_TOKEN="..."
CONTENTFUL_MANAGEMENT_TOKEN="..."
# Import content
Run the setup script to fill the new space with content models and sample content.
npx cross-env npm run setup
# Run the website
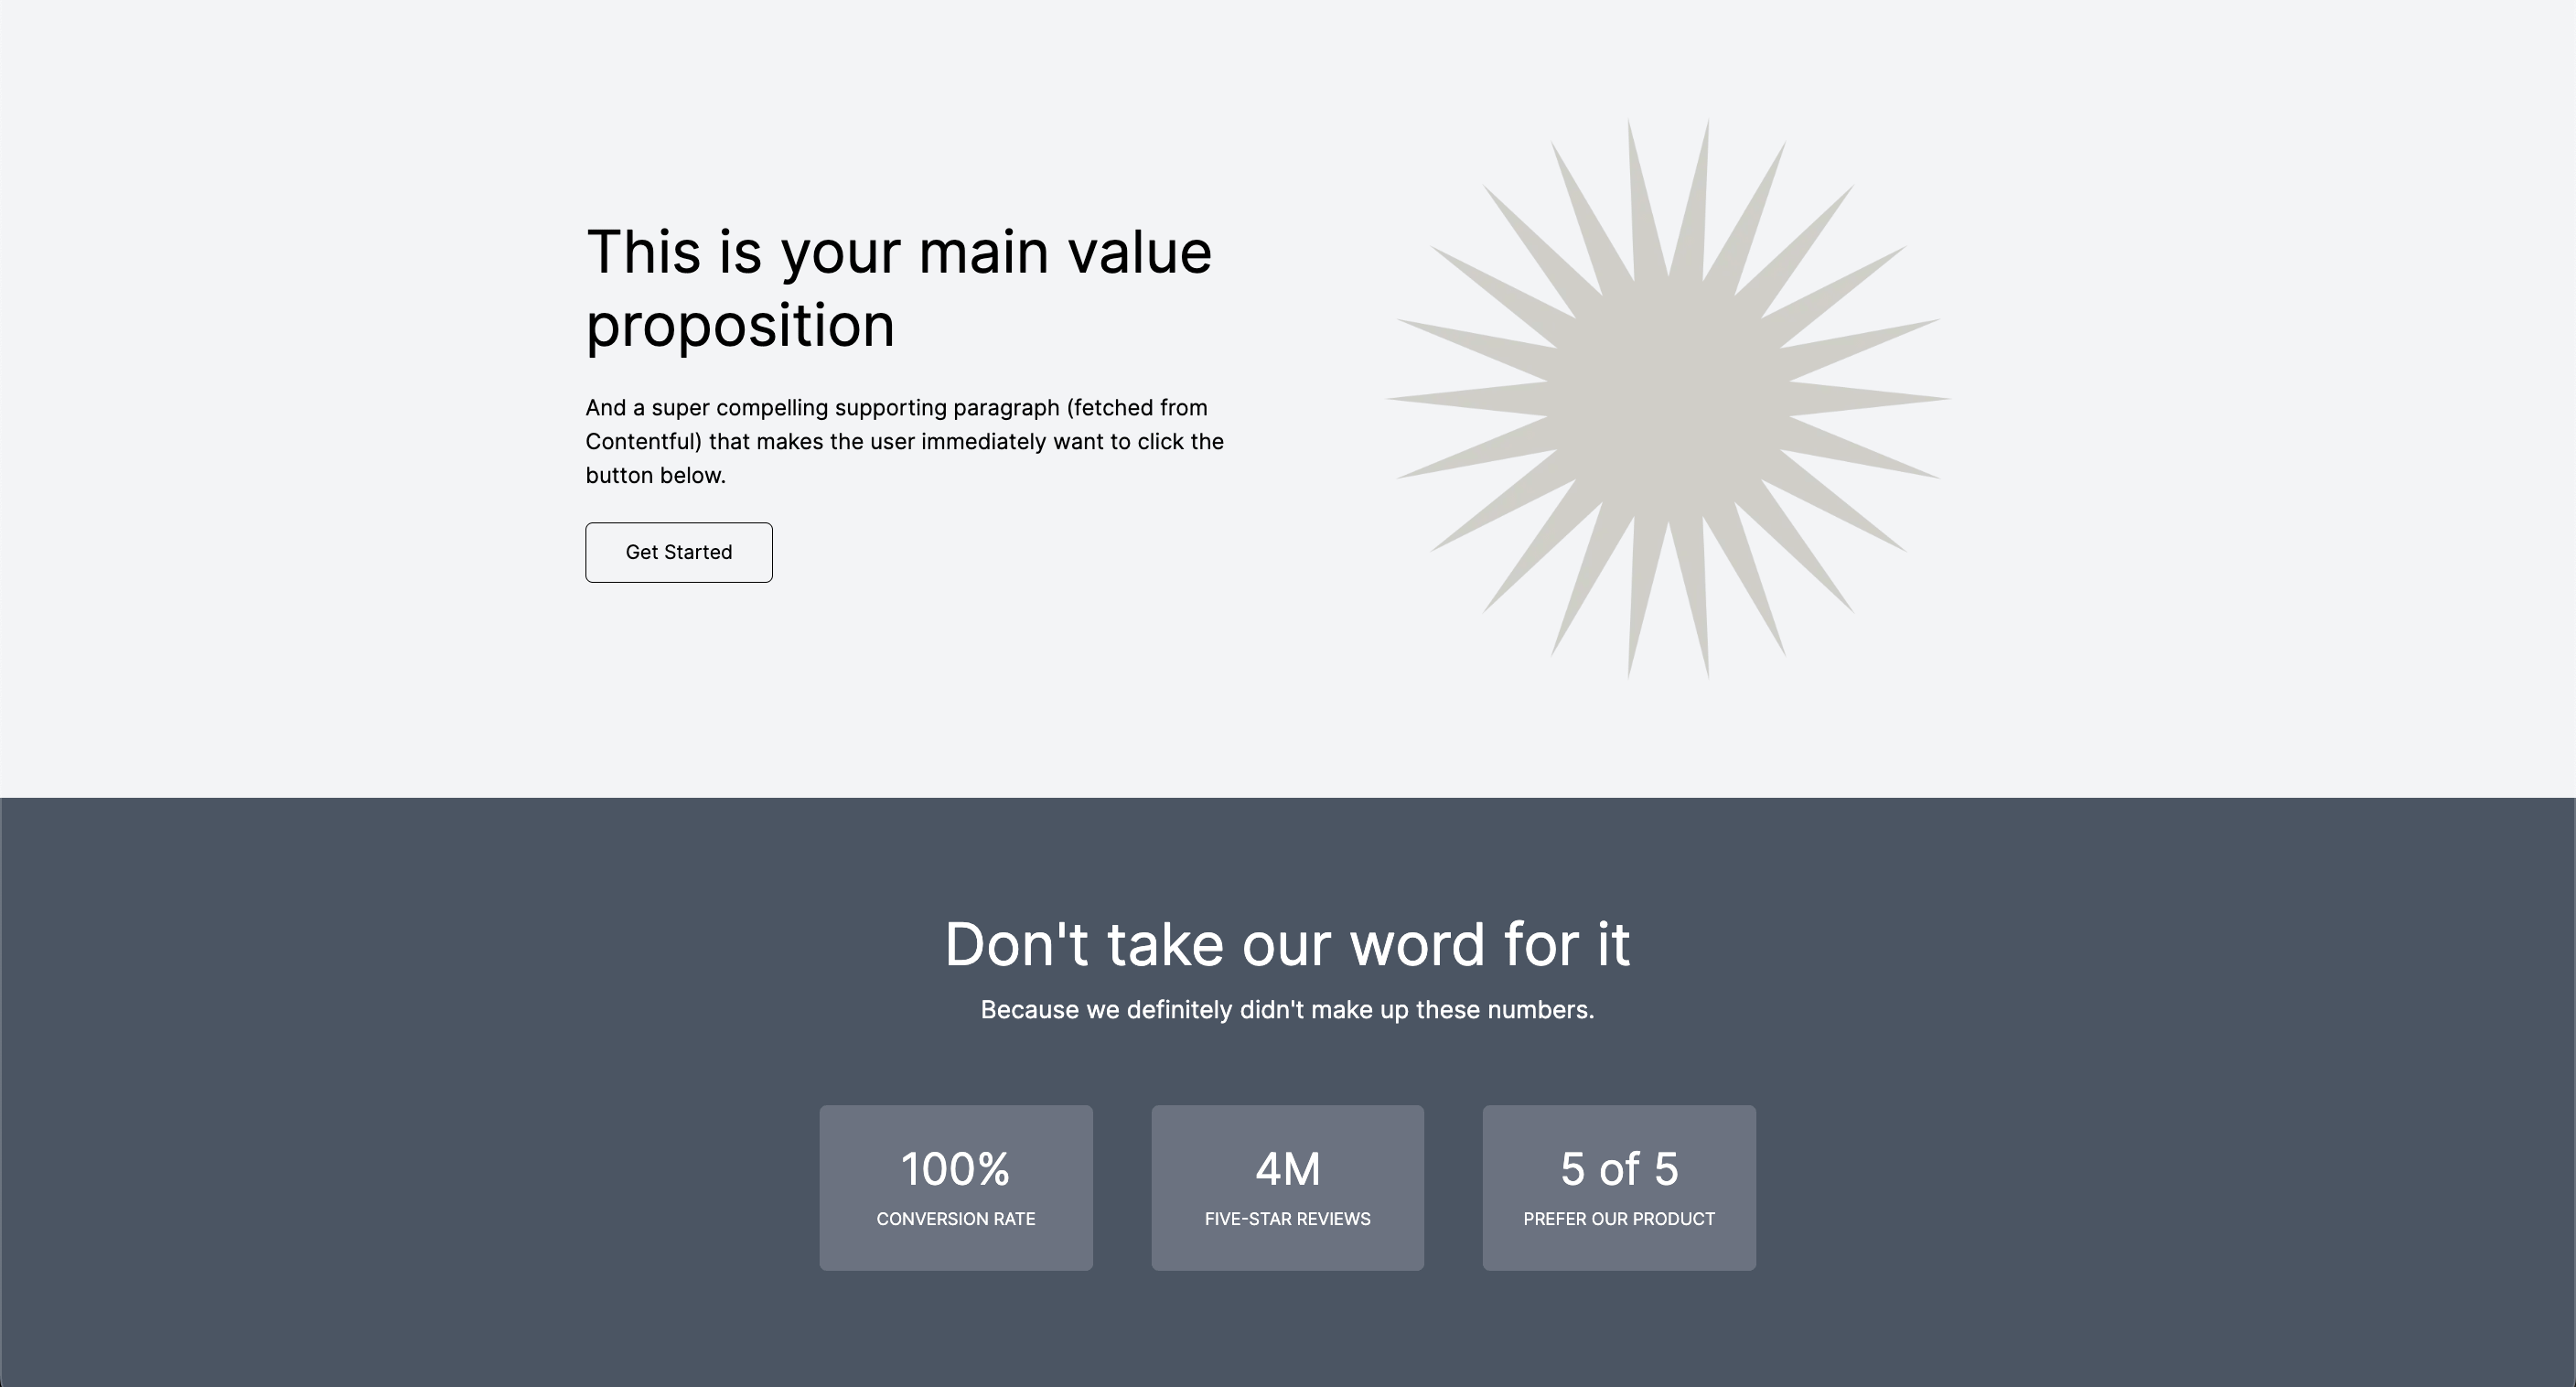
You should now be able to run the Gatsby development server and access the site at localhost:8000.
npm run dev
# Netlify Create configuration
Adding Netlify Create’s local visual editor application to an existing site takes just a few quick steps.
# Basic configuration
Netlify Create needs a bit of configuration to be able to properly proxy to your Gatsby development server. Begin by installing a development dependency to help with this process.
npm install -D @stackbit/types
Then, add a stackbit.config.ts configuration file to tell Netlify Create that we’re working with Gatsby.
// stackbit.config.ts
import { defineStackbitConfig } from "@stackbit/types";

export default defineStackbitConfig({
  stackbitVersion: "~0.6.0",
  ssgName: "gatsby"
});
# Install CLI
Install the Stackbit CLI for Netlify Create, which we’ll use to launch the local visual editor application.
npm install -g @stackbit/cli@latest
# Run visual editor
With the Gatsby development server still running, open a new terminal session to run the visual editor using the CLI's dev command.
stackbit dev --port 8000
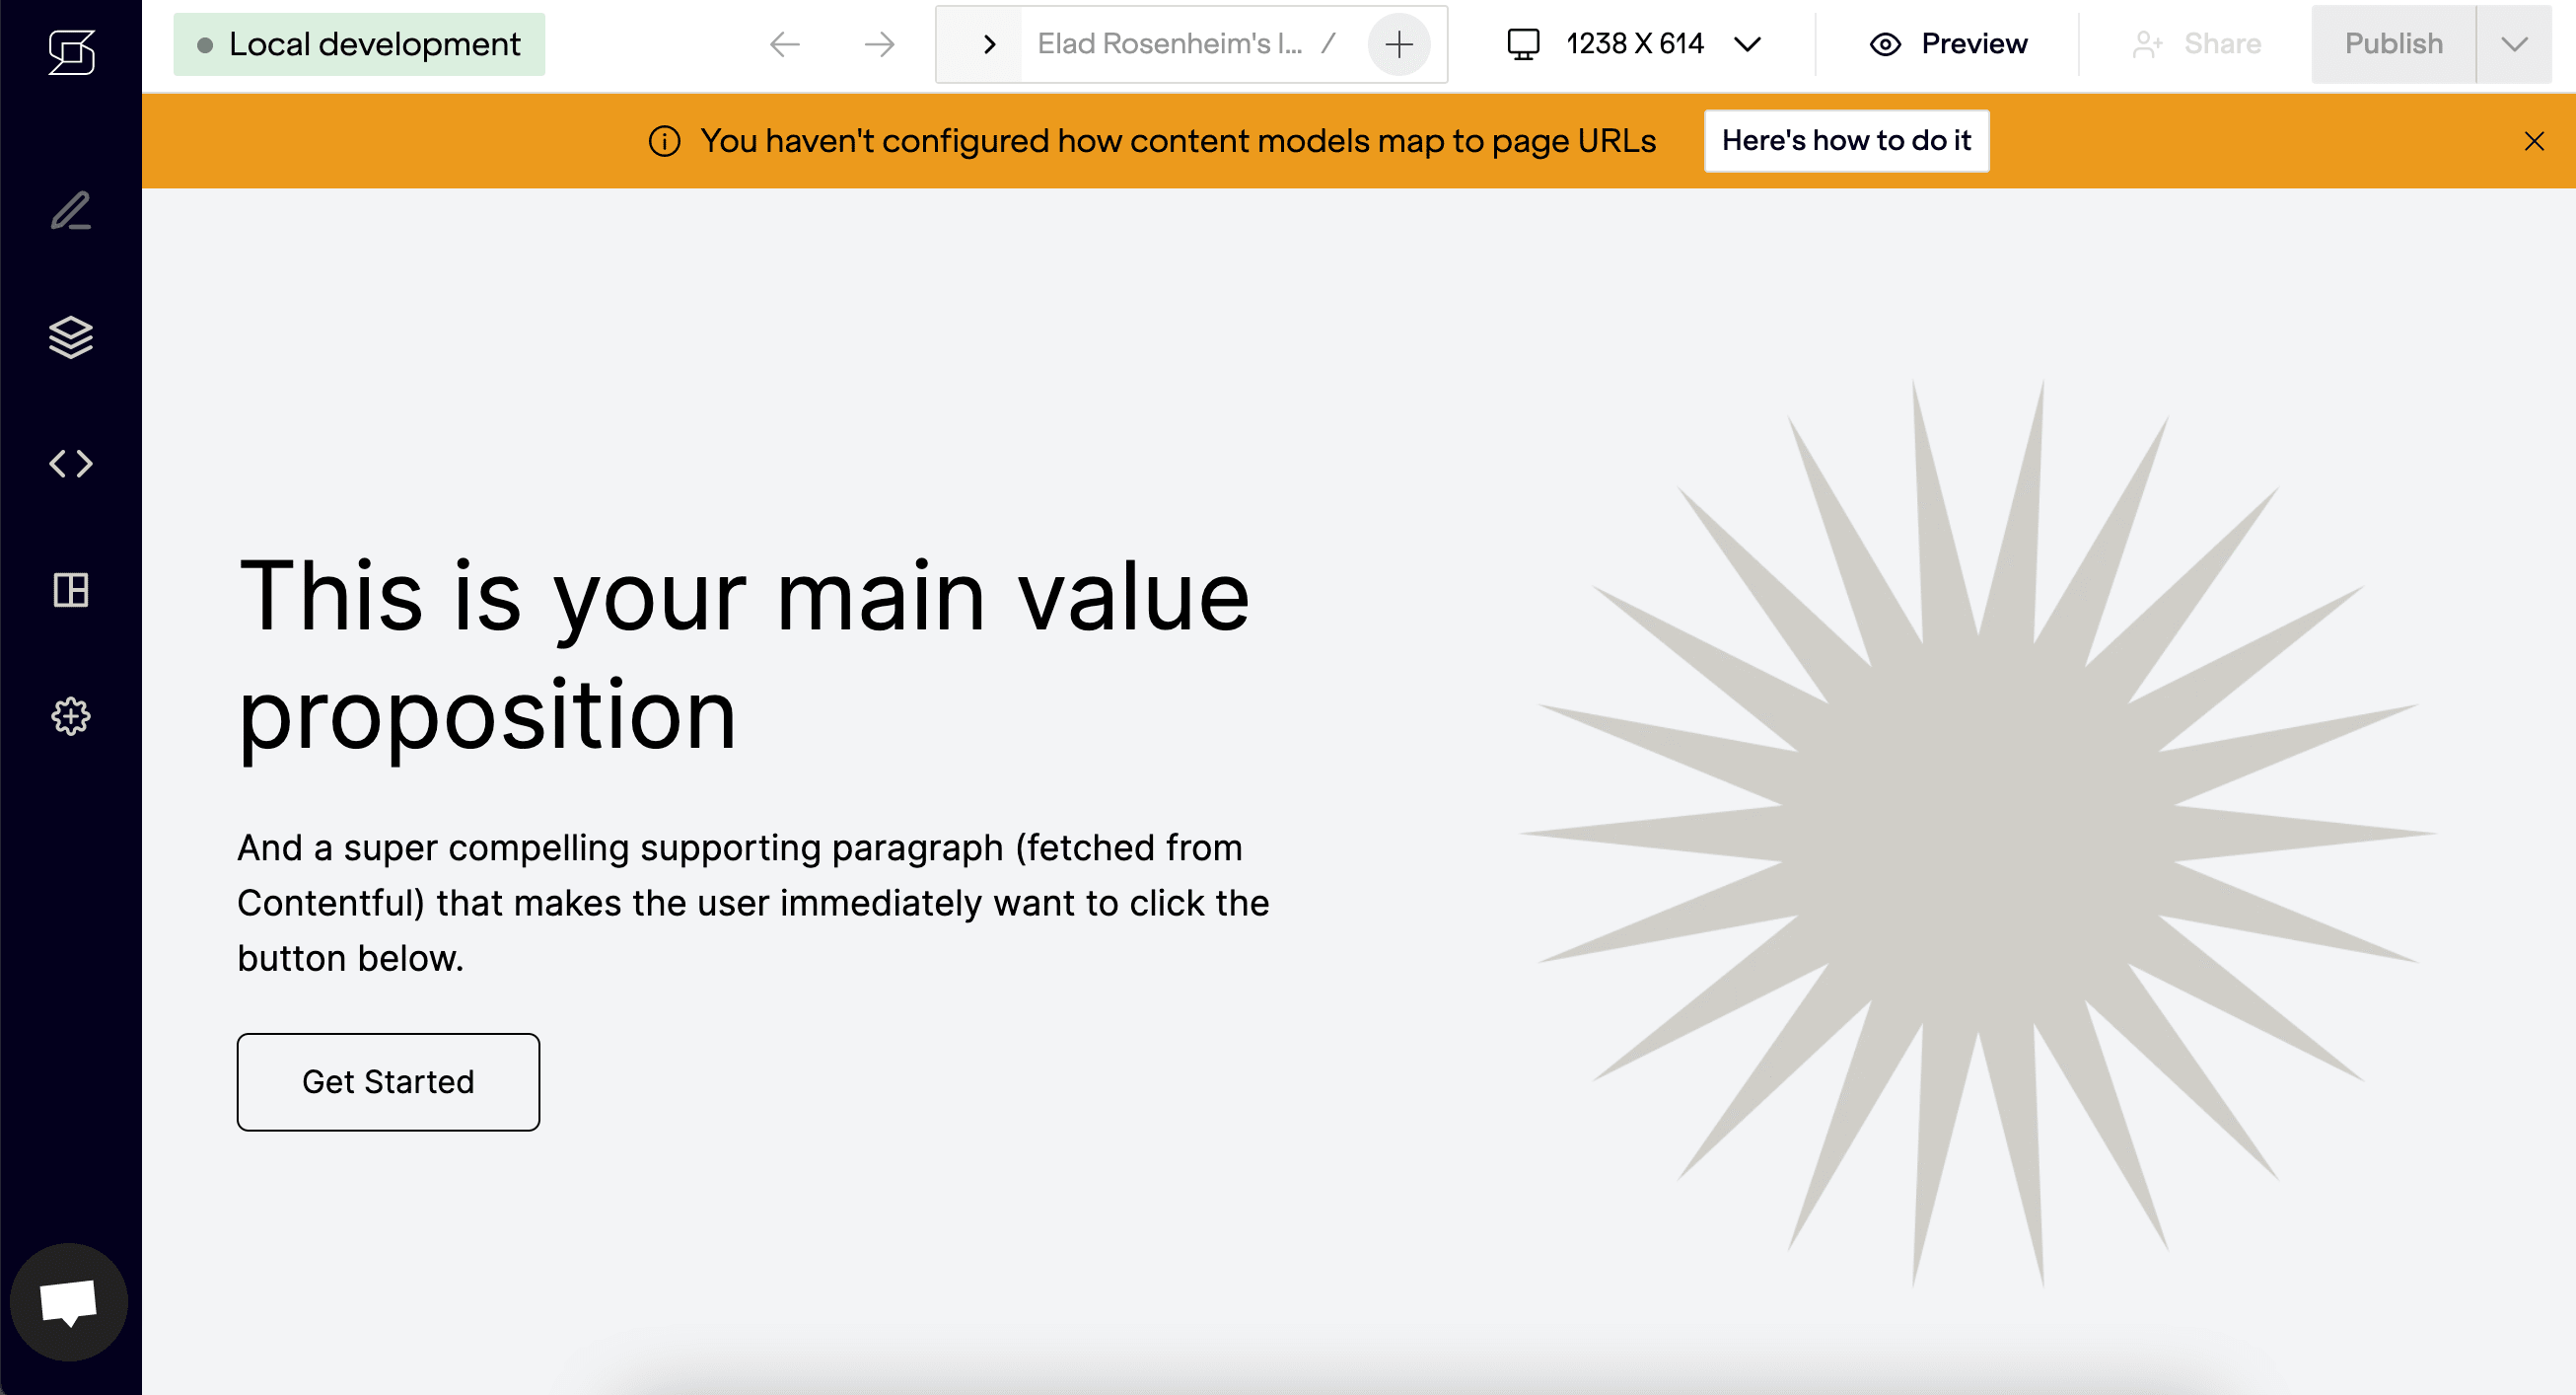
Now, if you visit localhost:8090, you'll see the Gatsby site that is also running on port 8000. The application running on port 8090 is a local Netlify Create application that proxies to the development server, and also contains a few assets and routes to facilitate visual editing.
# Register your project
One such route is /_stackbit. This will redirect to the authentication process that makes it possible to work with Netlify Create locally.
Open localhost:8090/_stackbit in your browser and create an account. You'll be redirected to a new URL that is unique to your local editing environment. The preview here is the application running on localhost:8090.
# Configure content source
Next, we have to add our configuration file to tell Netlify Create how content is stored. Let’s add our Contentful plugin as a development dependency.
npm install -D @stackbit/cms-contentful
Then you can configure the content source with the contentSources property.
// stackbit.config.ts
import { ContentfulContentSource } from "@stackbit/cms-contentful";
import { defineStackbitConfig } from "@stackbit/types";

export default defineStackbitConfig({
  stackbitVersion: "~0.6.0",
  ssgName: "gatsby",
  contentSources: [
    new ContentfulContentSource({
      spaceId: process.env.CONTENTFUL_SPACE_ID!,
      environment: process.env.CONTENTFUL_ENVIRONMENT || "master",
      previewToken: process.env.CONTENTFUL_PREVIEW_TOKEN!,
      accessToken: process.env.CONTENTFUL_MANAGEMENT_TOKEN!
    })
  ]
});
Note
Netlify Create automatically loads the content from .env into process.env.
# Basic content editing
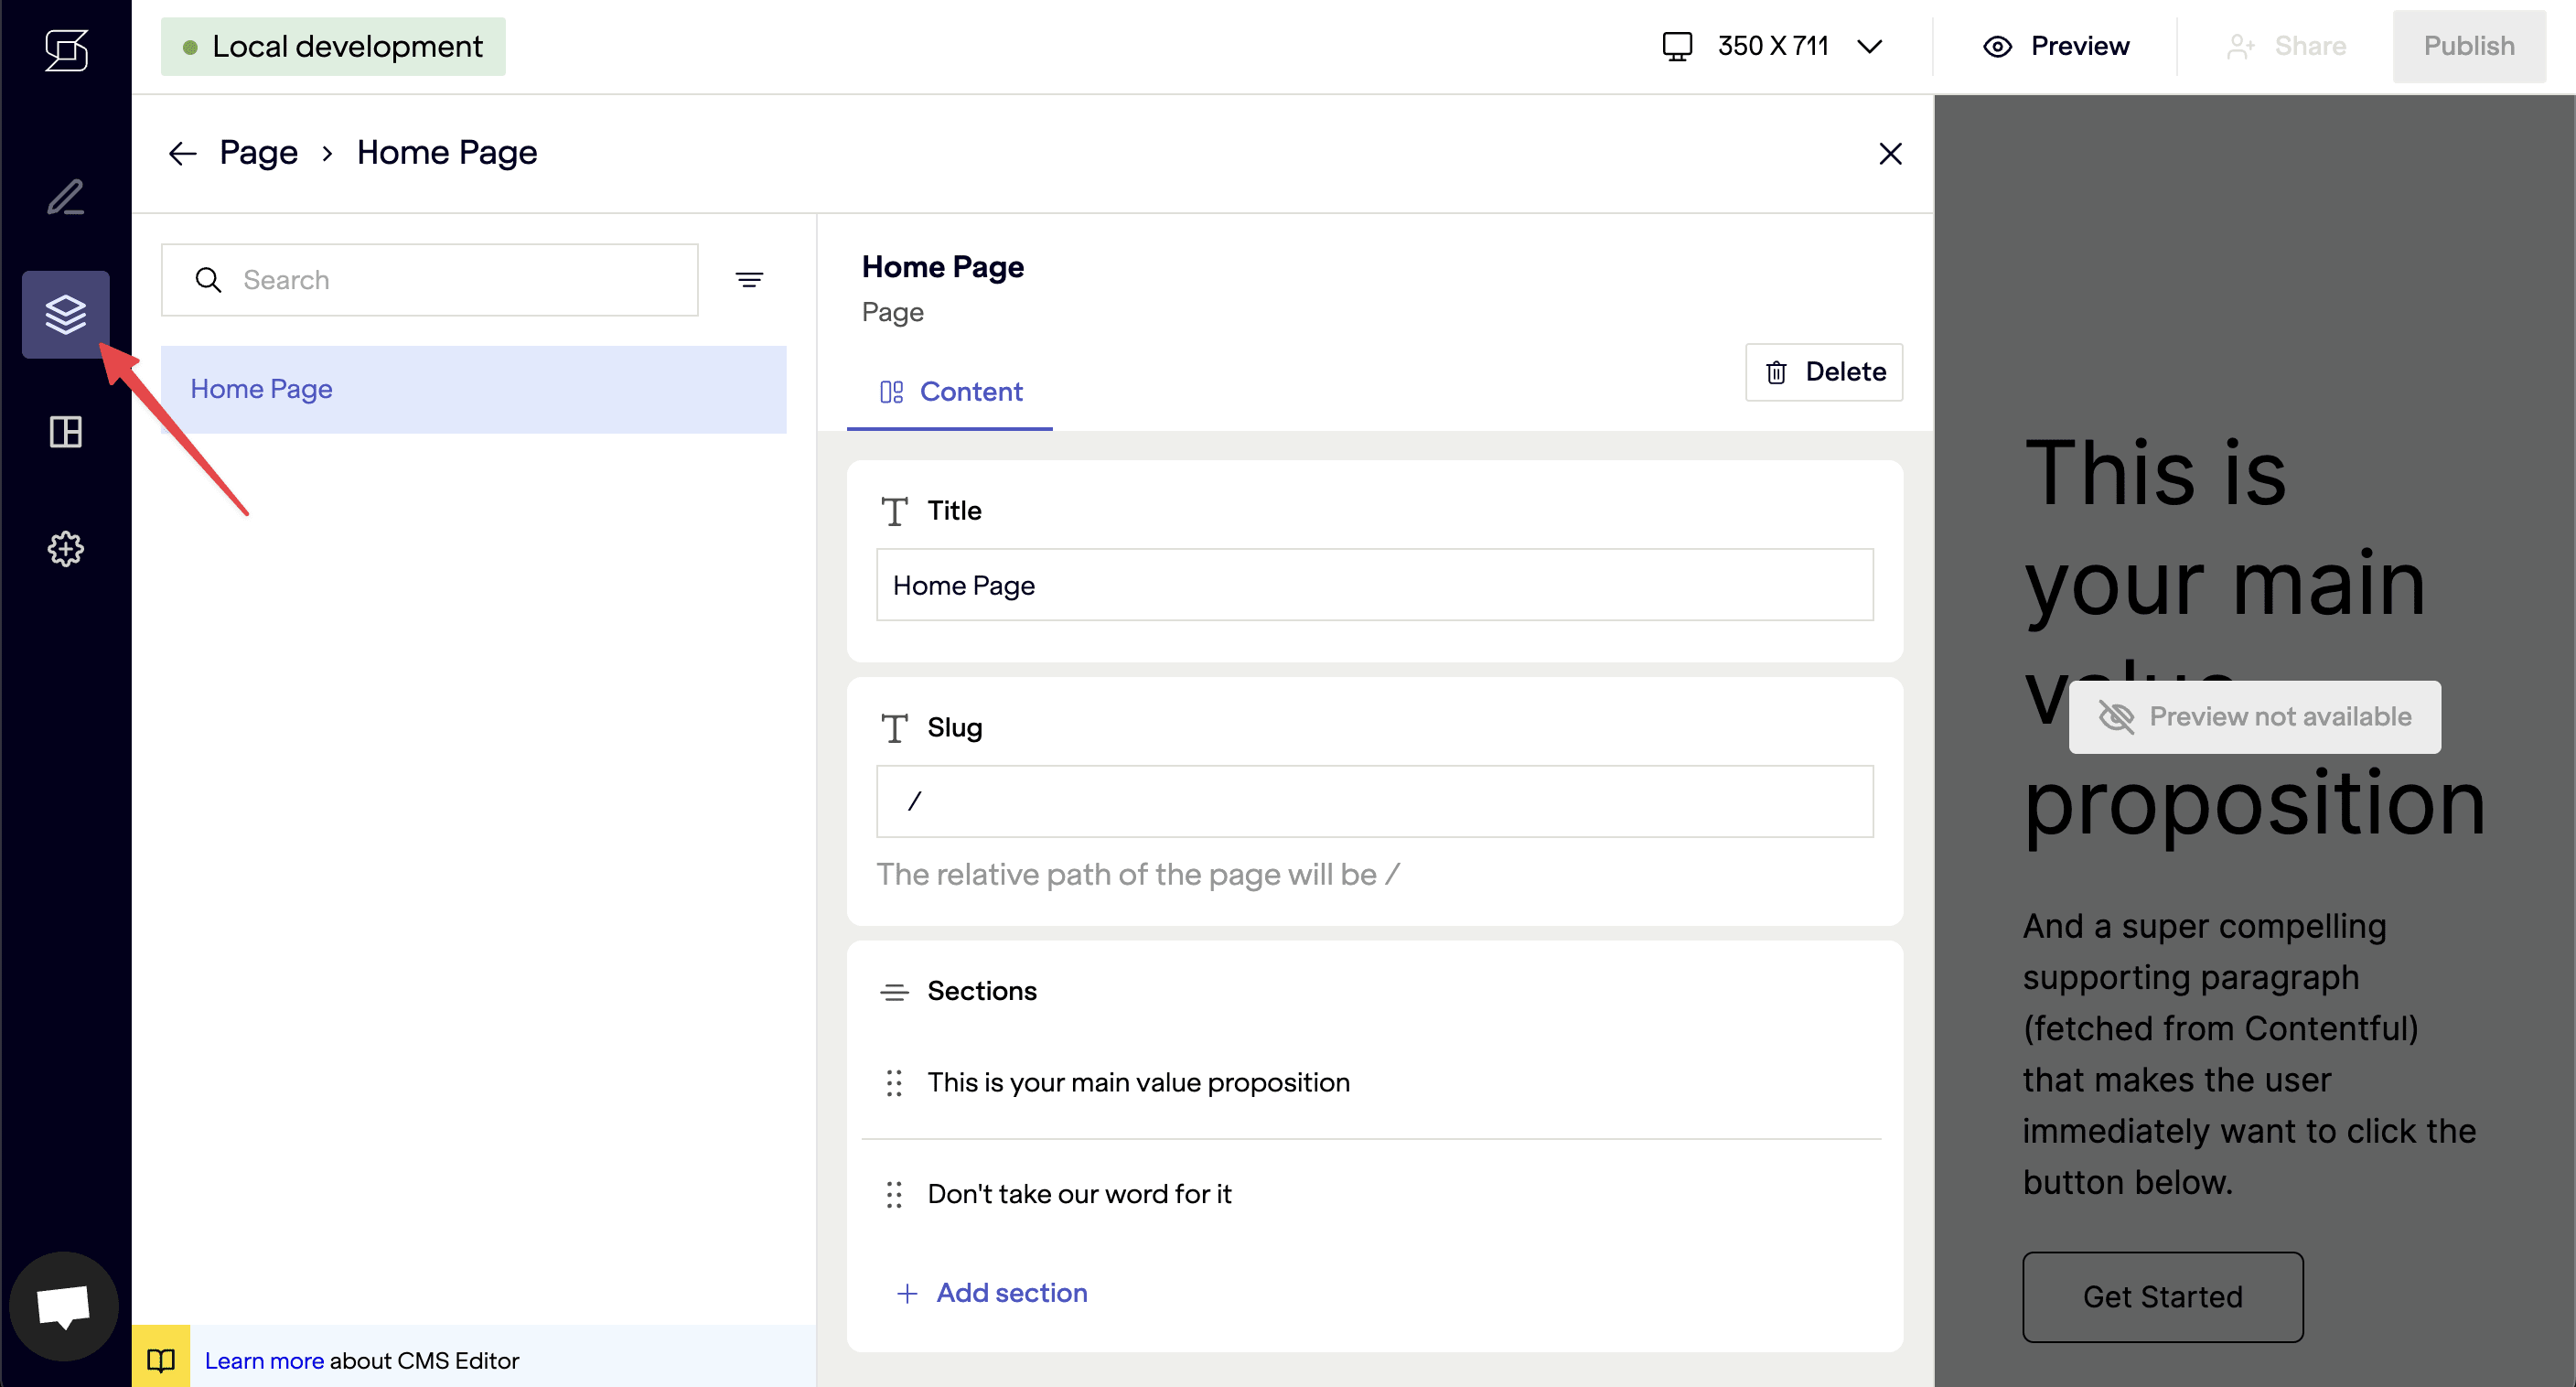
Notice that the content tab is populated with the content in your Contentful space. This is editable by a two-way content sync.
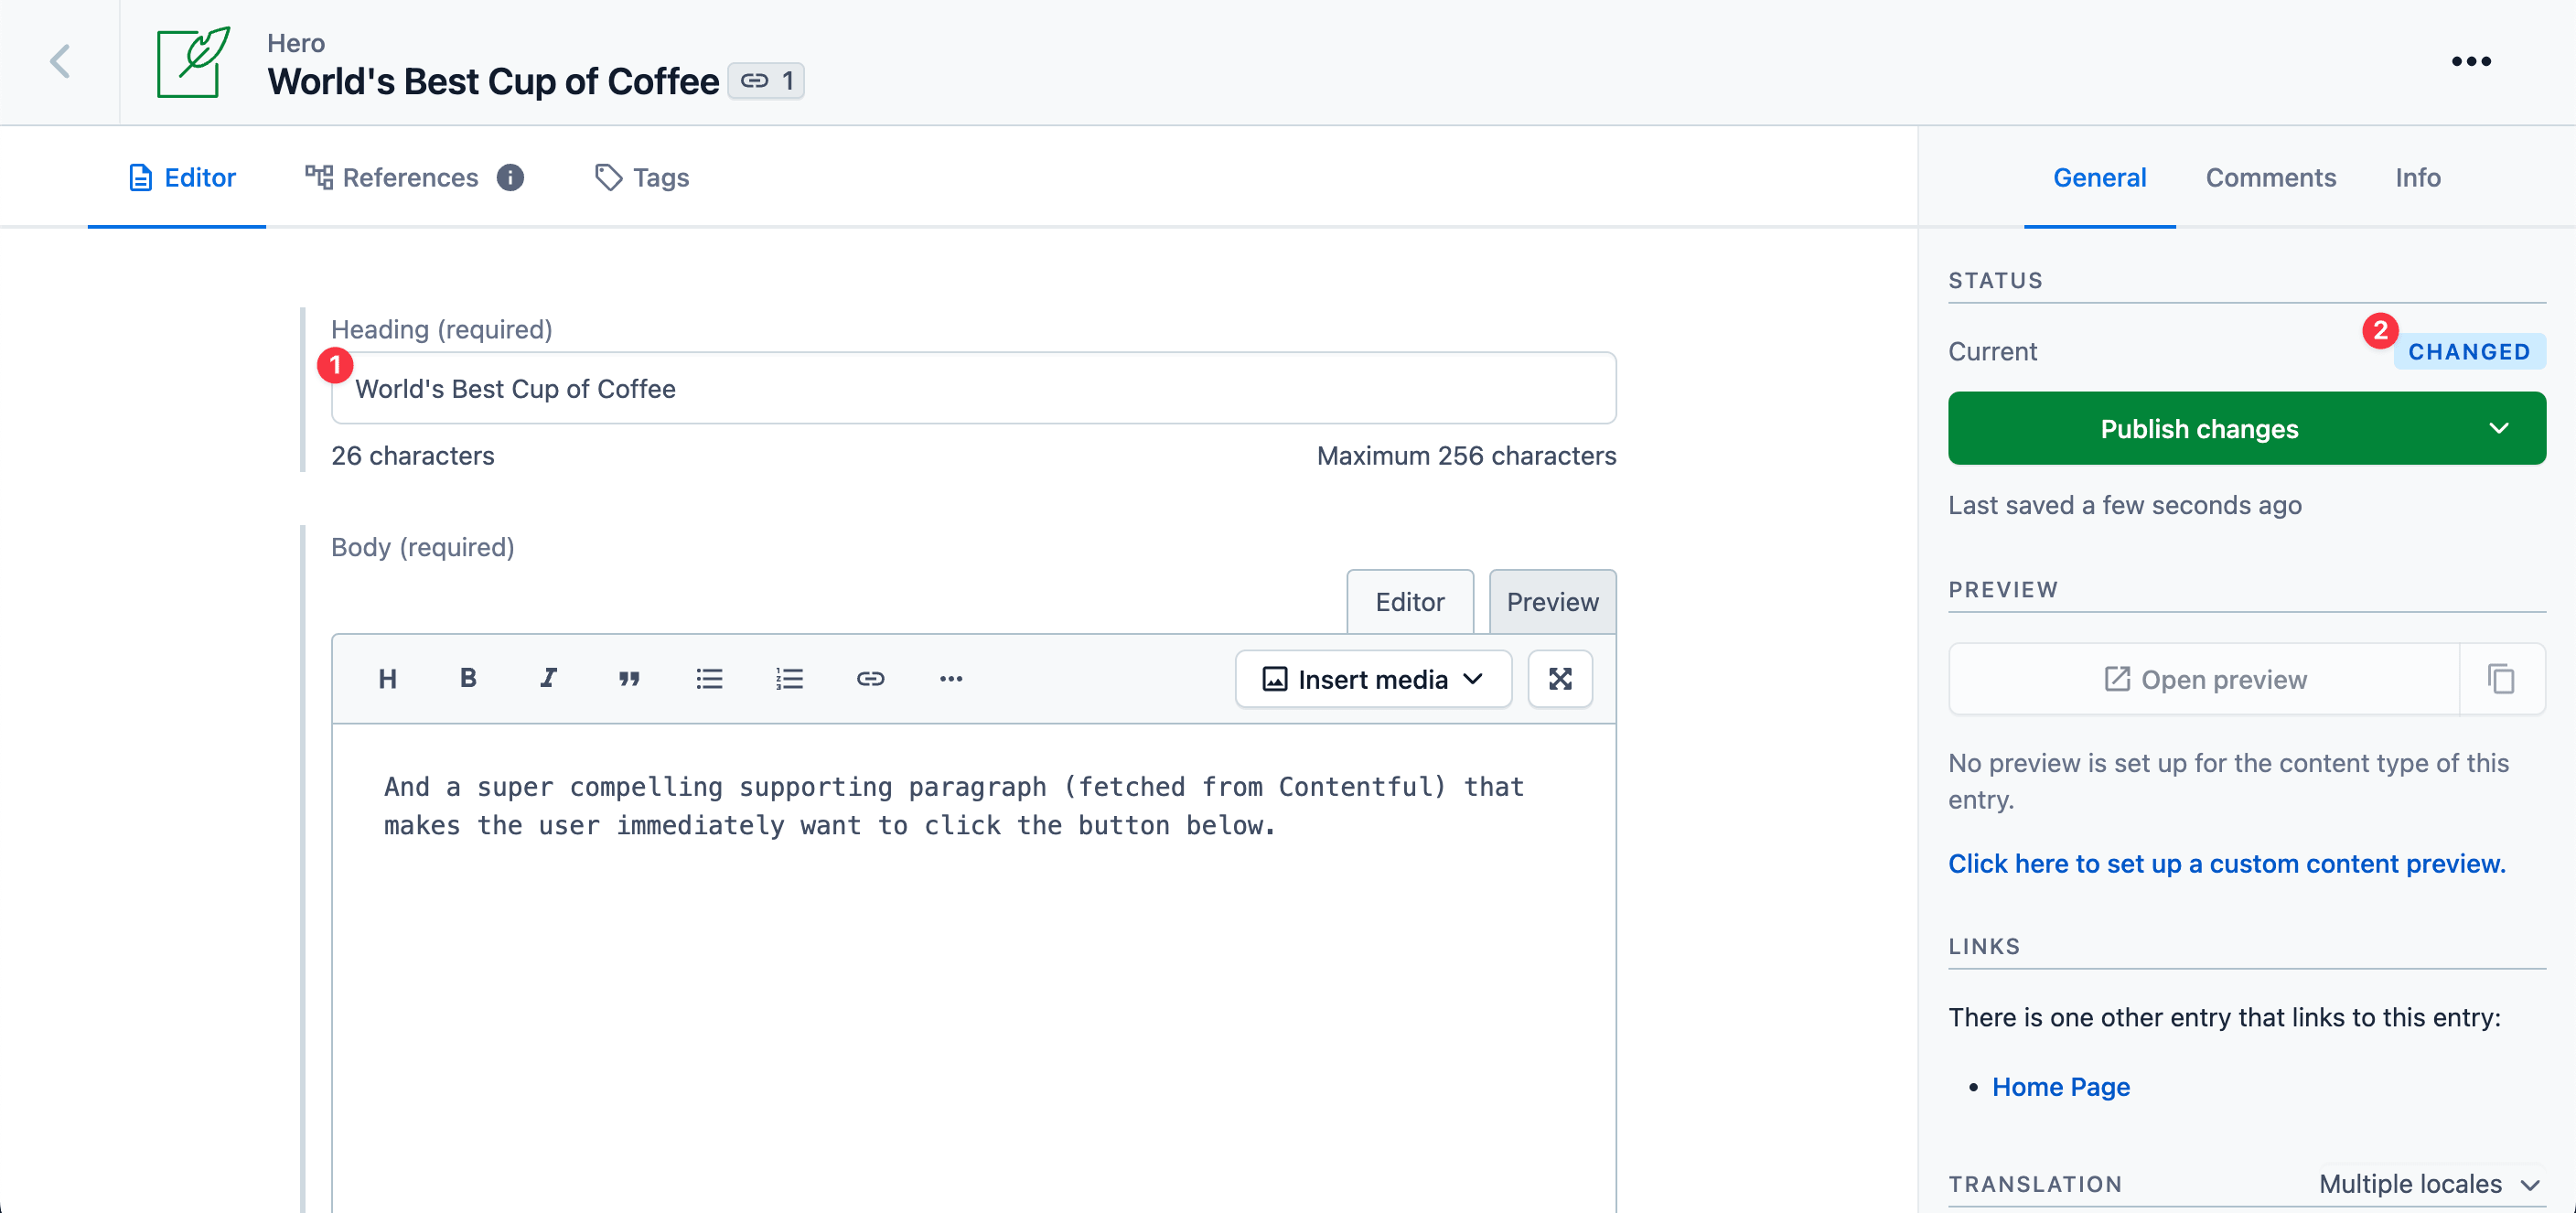
You can edit in Netlify Create and it will be saved in Contentful. Or you can edit in Contentful, and the new values will be pulled into Netlify Create automatically.
# Page editing
Pages are a type of model that represent a single URL path in your site.
When the proper configuration, Netlify Create can build a complete sitemap and show the proper content fields as editors navigate between pages in the application. This requires specifying which models represent pages and how each page maps to a URL path in the site.
# Specify page models
Open the stackbit.config.ts file and add a modelExtensions property to declare the page model as a page model.
// stackbit.config.ts
import { ContentfulContentSource } from "@stackbit/cms-contentful";
import { defineStackbitConfig } from "@stackbit/types";

export default defineStackbitConfig({
  stackbitVersion: "~0.6.0",
  ssgName: "gatsby",
  contentSources: [
    new ContentfulContentSource({
      // ...
    })
  ],
  modelExtensions: [{ name: "page", type: "page", urlPath: "/{slug}" }]
});
This tells Netlify Create to extend its knowledge about the Contentful model with an ID of page — to declare it with a page type, and to map its URLs paths using the slug field within the page model.
# Sitemap navigator
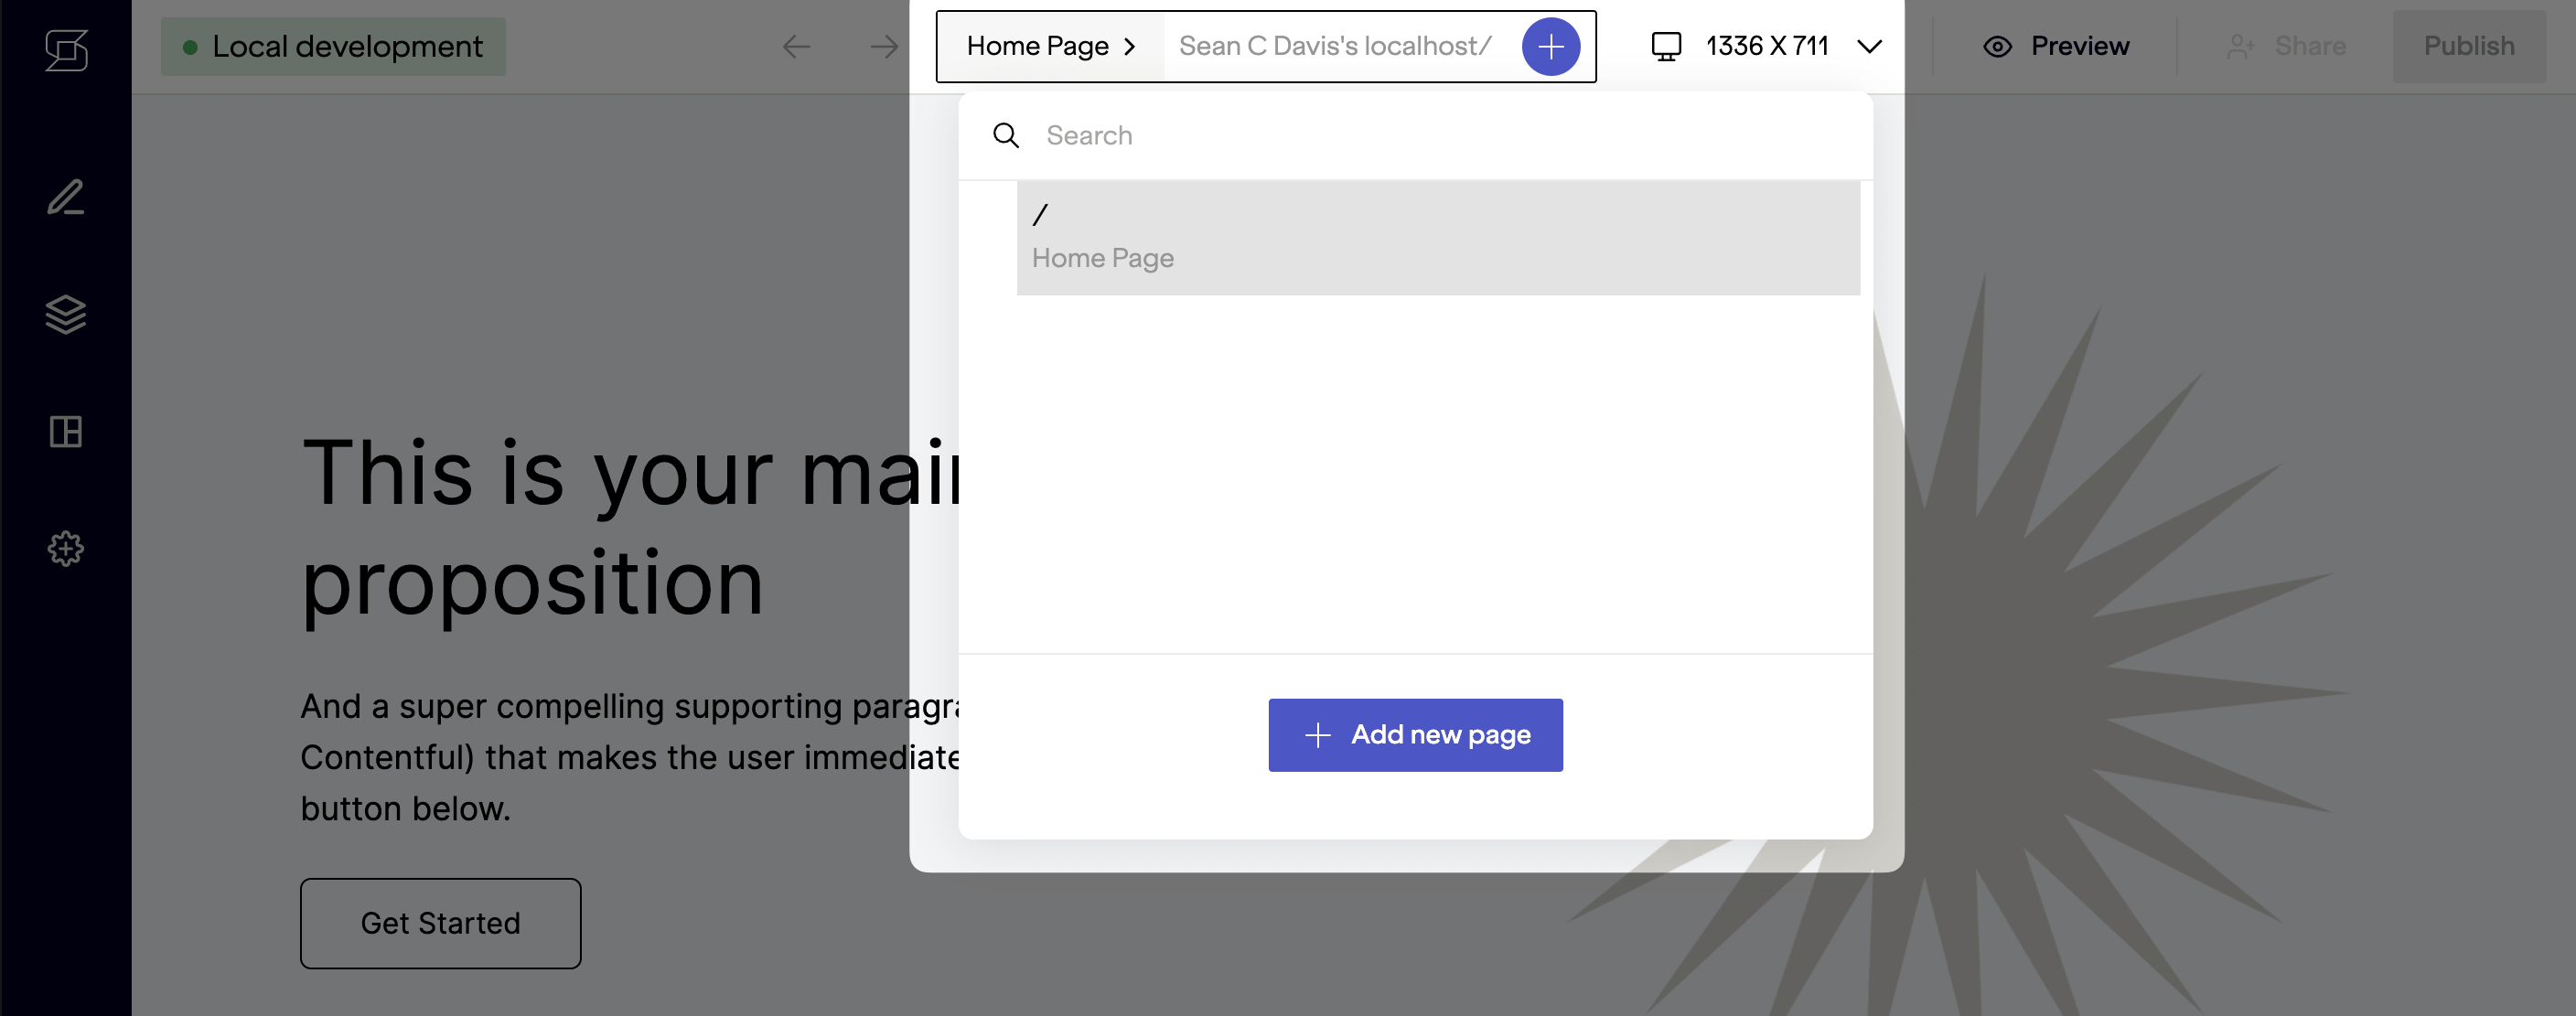
Going back to the Netlify Create editor, you should now find the sitemap populated with the home page entry, which was added to the CMS when importing content.
# Content reloading
Gatsby requires a bit more code to be able to refresh the page when content has changed. To do this, first add the ENABLE_GATSBY_REFRESH_ENDPOINT environment variable to your .env file if it's not already there.
ENABLE_GATSBY_REFRESH_ENDPOINT=true

# ...
After restarting your Gatsby development server, add an event listener to the composable page.
// src/templates/composable-page.tsx
import React, { useEffect } from "react";
import { graphql, PageProps } from "gatsby";

// ...

export default function ComposablePageTemplate({ data }: PageProps) {
  const page = (data as any).contentfulPage as ComposablePage;

  useEffect(() => {
    const handleContentChange = async (event: Event) => {
      event.preventDefault();
      await fetch("/__refresh", { method: "POST" });
    };

    window.addEventListener("stackbitObjectsChanged", handleContentChange);

    return () => {
      window.removeEventListener("stackbitObjectsChanged", handleContentChange);
    };
  }, []);

  // ...
}
# Contextual page editor
Specifying the page model also enabled the contextual page editor (pencil icon in left sidebar). Now that content reloading is in place, you can open this panel and see the fields and values for this page.
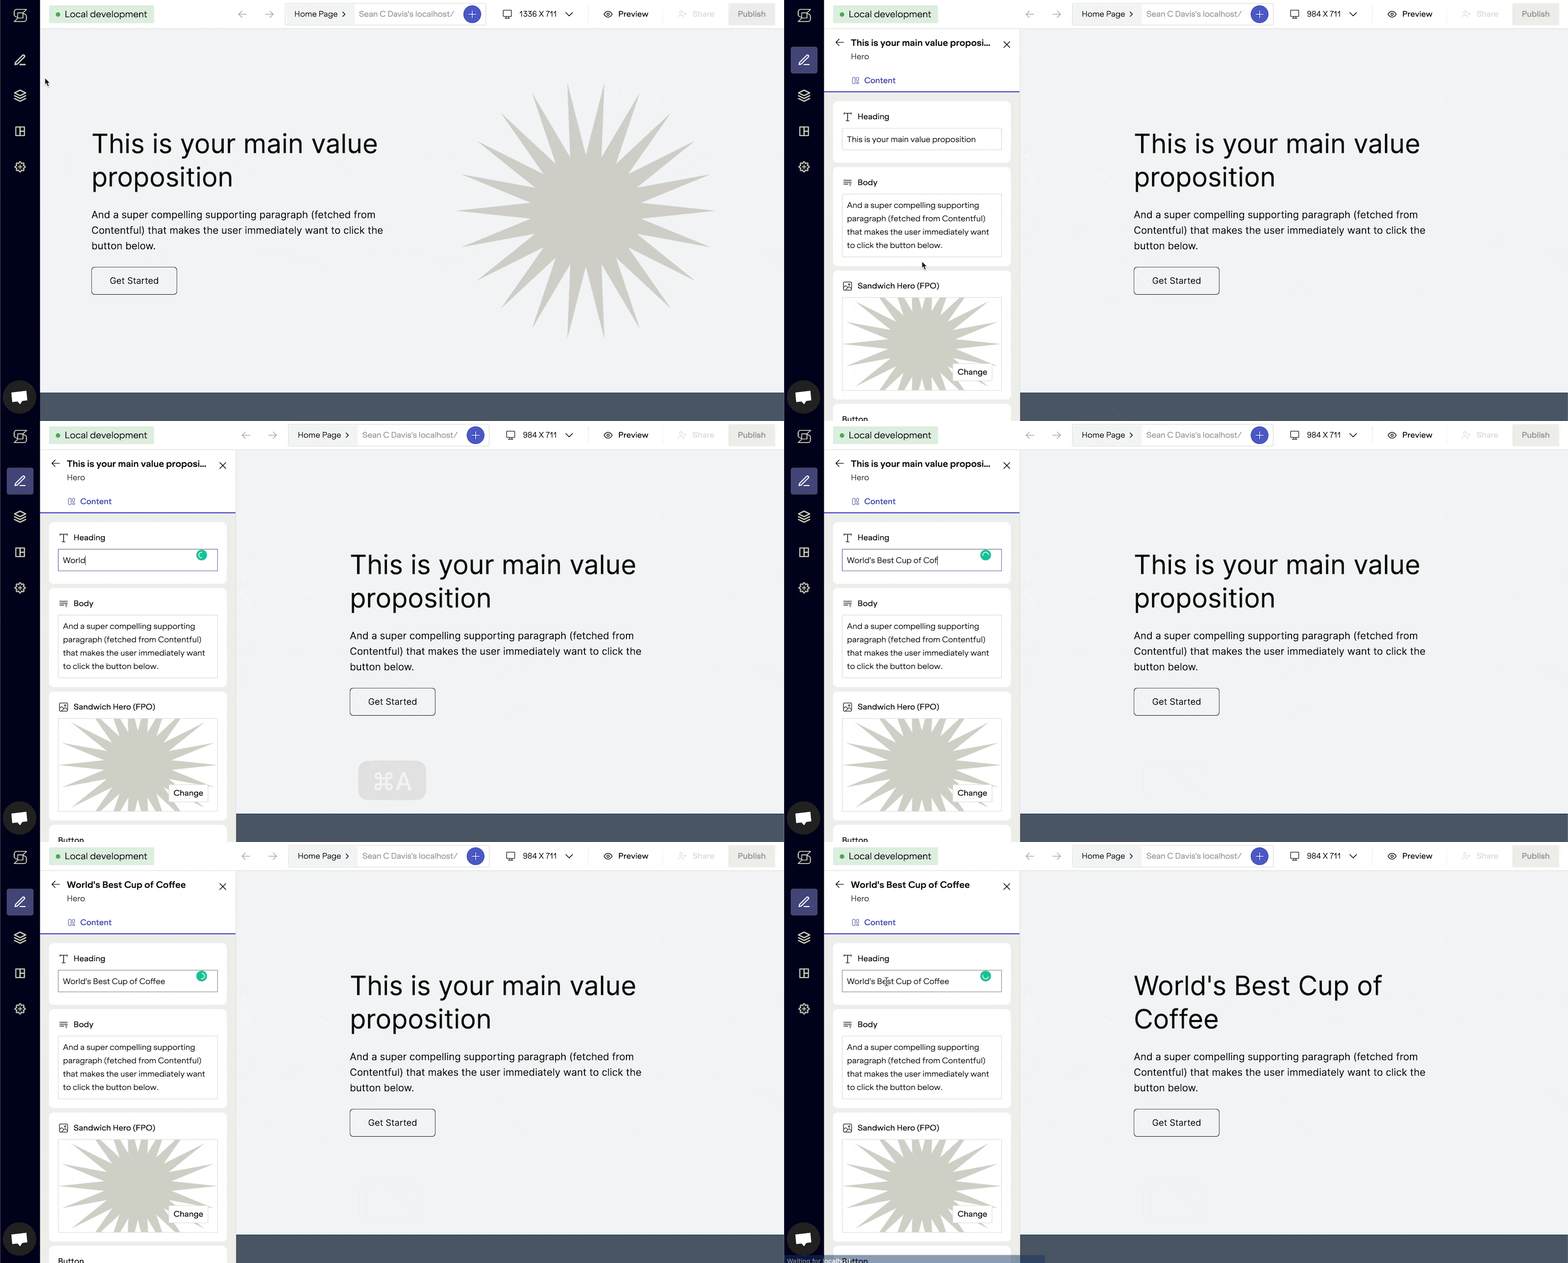
As with basic content editing, making changes here will update content in Contentful in an changed (unpublished) state.
# Inline editing
The most advanced (and productive) form of editing with Netlify Create is inline editing, which is made possible through the use of annotations.
These are simple HTML data attributes (data-sb-object-id and data-sb-field-path) that map content in Contentful to elements on the page. This enables editors to click directly in the preview, make a change, and see that change reflected in Contentful.
Here, we'll make the heading field in the hero component editable inline.
# Set the object ID
The first step is to declare the ID of the content object using a data-sb-object-id attribute. This points Netlify Create to the origin of the content on the screen.
In Contentful, every entry has an automatically assigned identifier stored in its sys.id property, delivered from the API.
In the tutorial's code, we're using Gatsby's GraphQL layer to bring this value in as contentful_id.
// src/templates/composable-page.tsx
// ...

export const query = graphql`
  query ComposablePageQuery($slug: String!) {
    contentfulPage(slug: { eq: $slug }) {
      title
      contentful_id
      slug
      sections {
        ... on ContentfulHero {
          __typename
          contentful_id
          id
          body {
            body
          }
          button {
            url
            theme
            contentful_id
            label
          }
          heading
          image {
            gatsbyImage(layout: FULL_WIDTH, width: 800)
            title
          }
        }
        ... on ContentfulStats {
          __typename
          contentful_id
          heading
          body {
            body
          }
          stats {
            contentful_id
            value
            label
          }
          theme
        }
      }
    }
  }
`;
Add the data-sb-object-id attribute to the top-level div of this component to set the object ID.
// src/components/Hero.tsx
export const Hero = (props: HeroProps) => {
  const image = props.image ? getImage(props.image) : null;

  return (
    <div
      className="bg-gray-100 px-12 py-24"
      data-sb-object-id={props.contentful_id}
    >
      ...
    </div>
  );
};
This annotation associates the top-level div of the Hero component, and all elements under it, with the ID of the Contentful entry (of type hero) that is passed to the component as props.
# Add the field path
Now that the component is annotated with the ID of the hero content object, we can use the data-sb-field-path data attribute to make fields within the component editable inline.
// src/components/Hero.tsx
export const Hero = (props: HeroProps) => {
  const image = props.image ? getImage(props.image) : null;

  return (
    <div
      className="bg-gray-100 px-12 py-24"
      data-sb-object-id={props.contentful_id}
    >
      ...
      <h1 className="mb-6 text-5xl leading-tight" data-sb-field-path="heading">
        {props.heading}
      </h1>
      ...
    </div>
  );
};
That's all you need to be able to edit the heading inline!
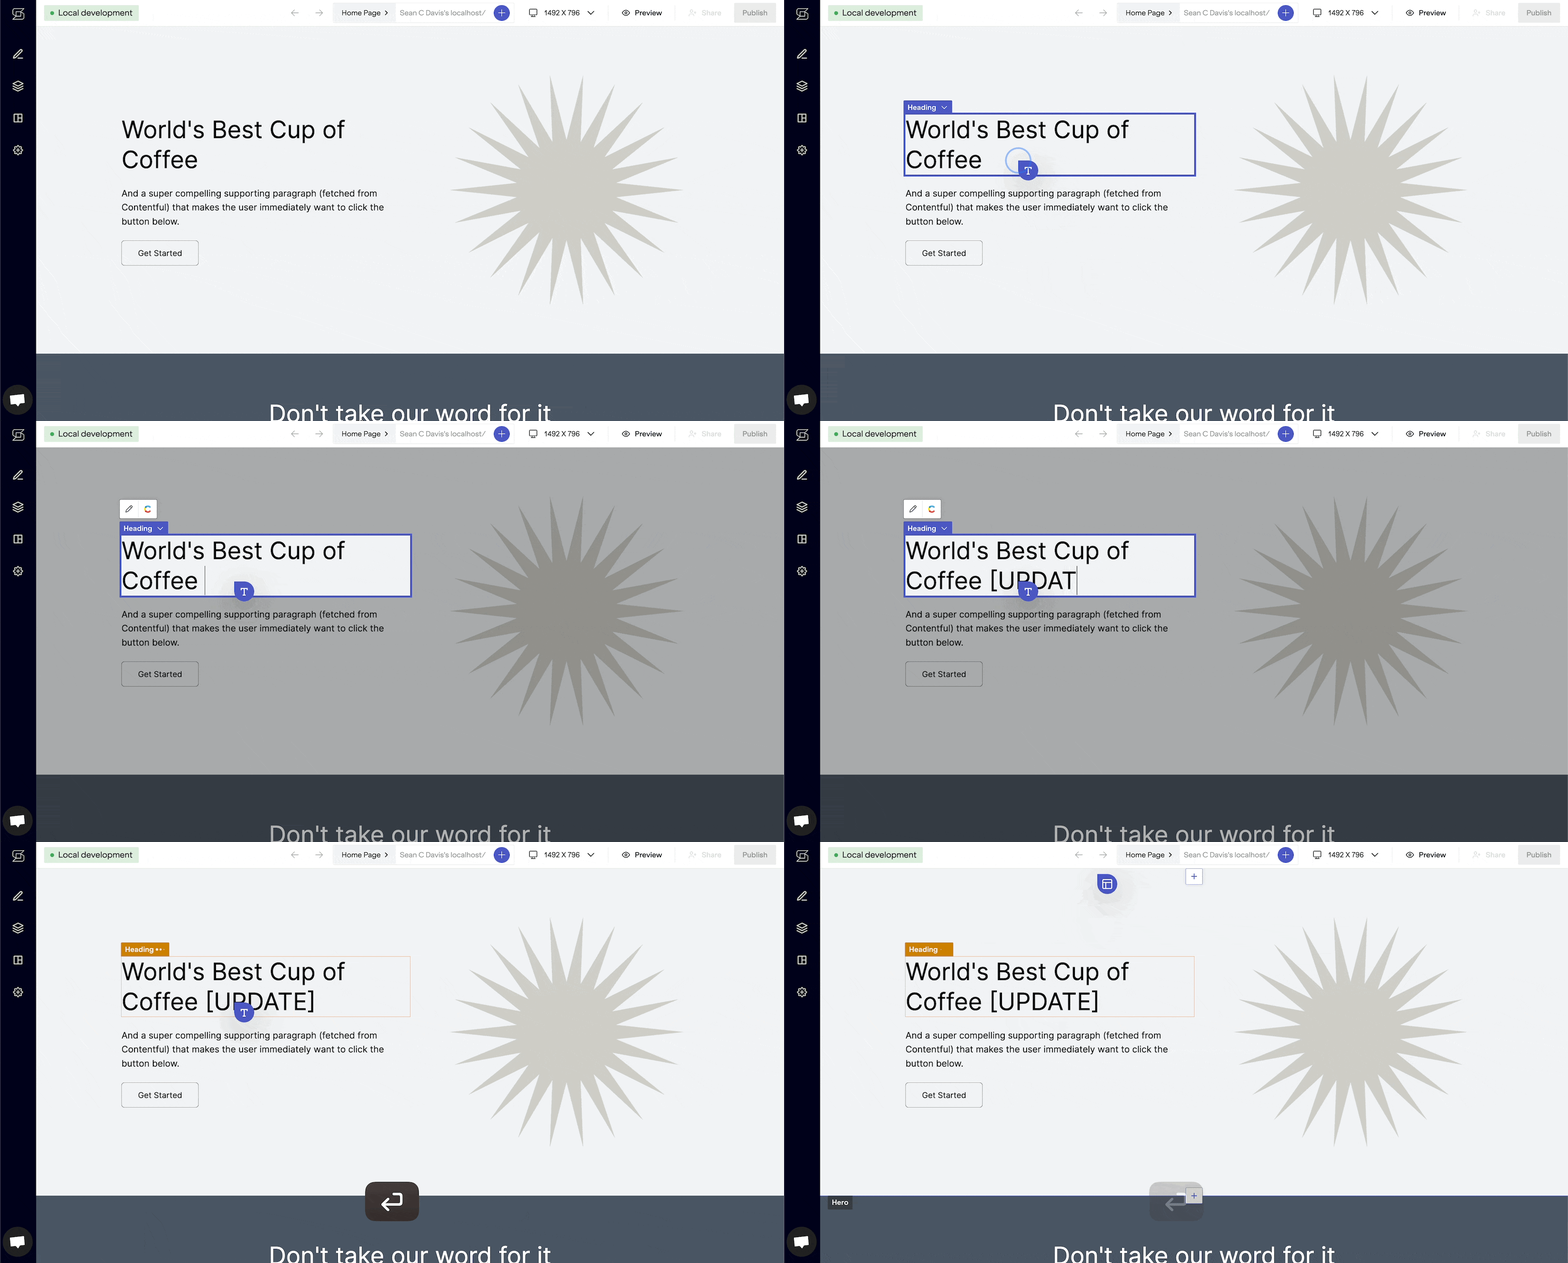
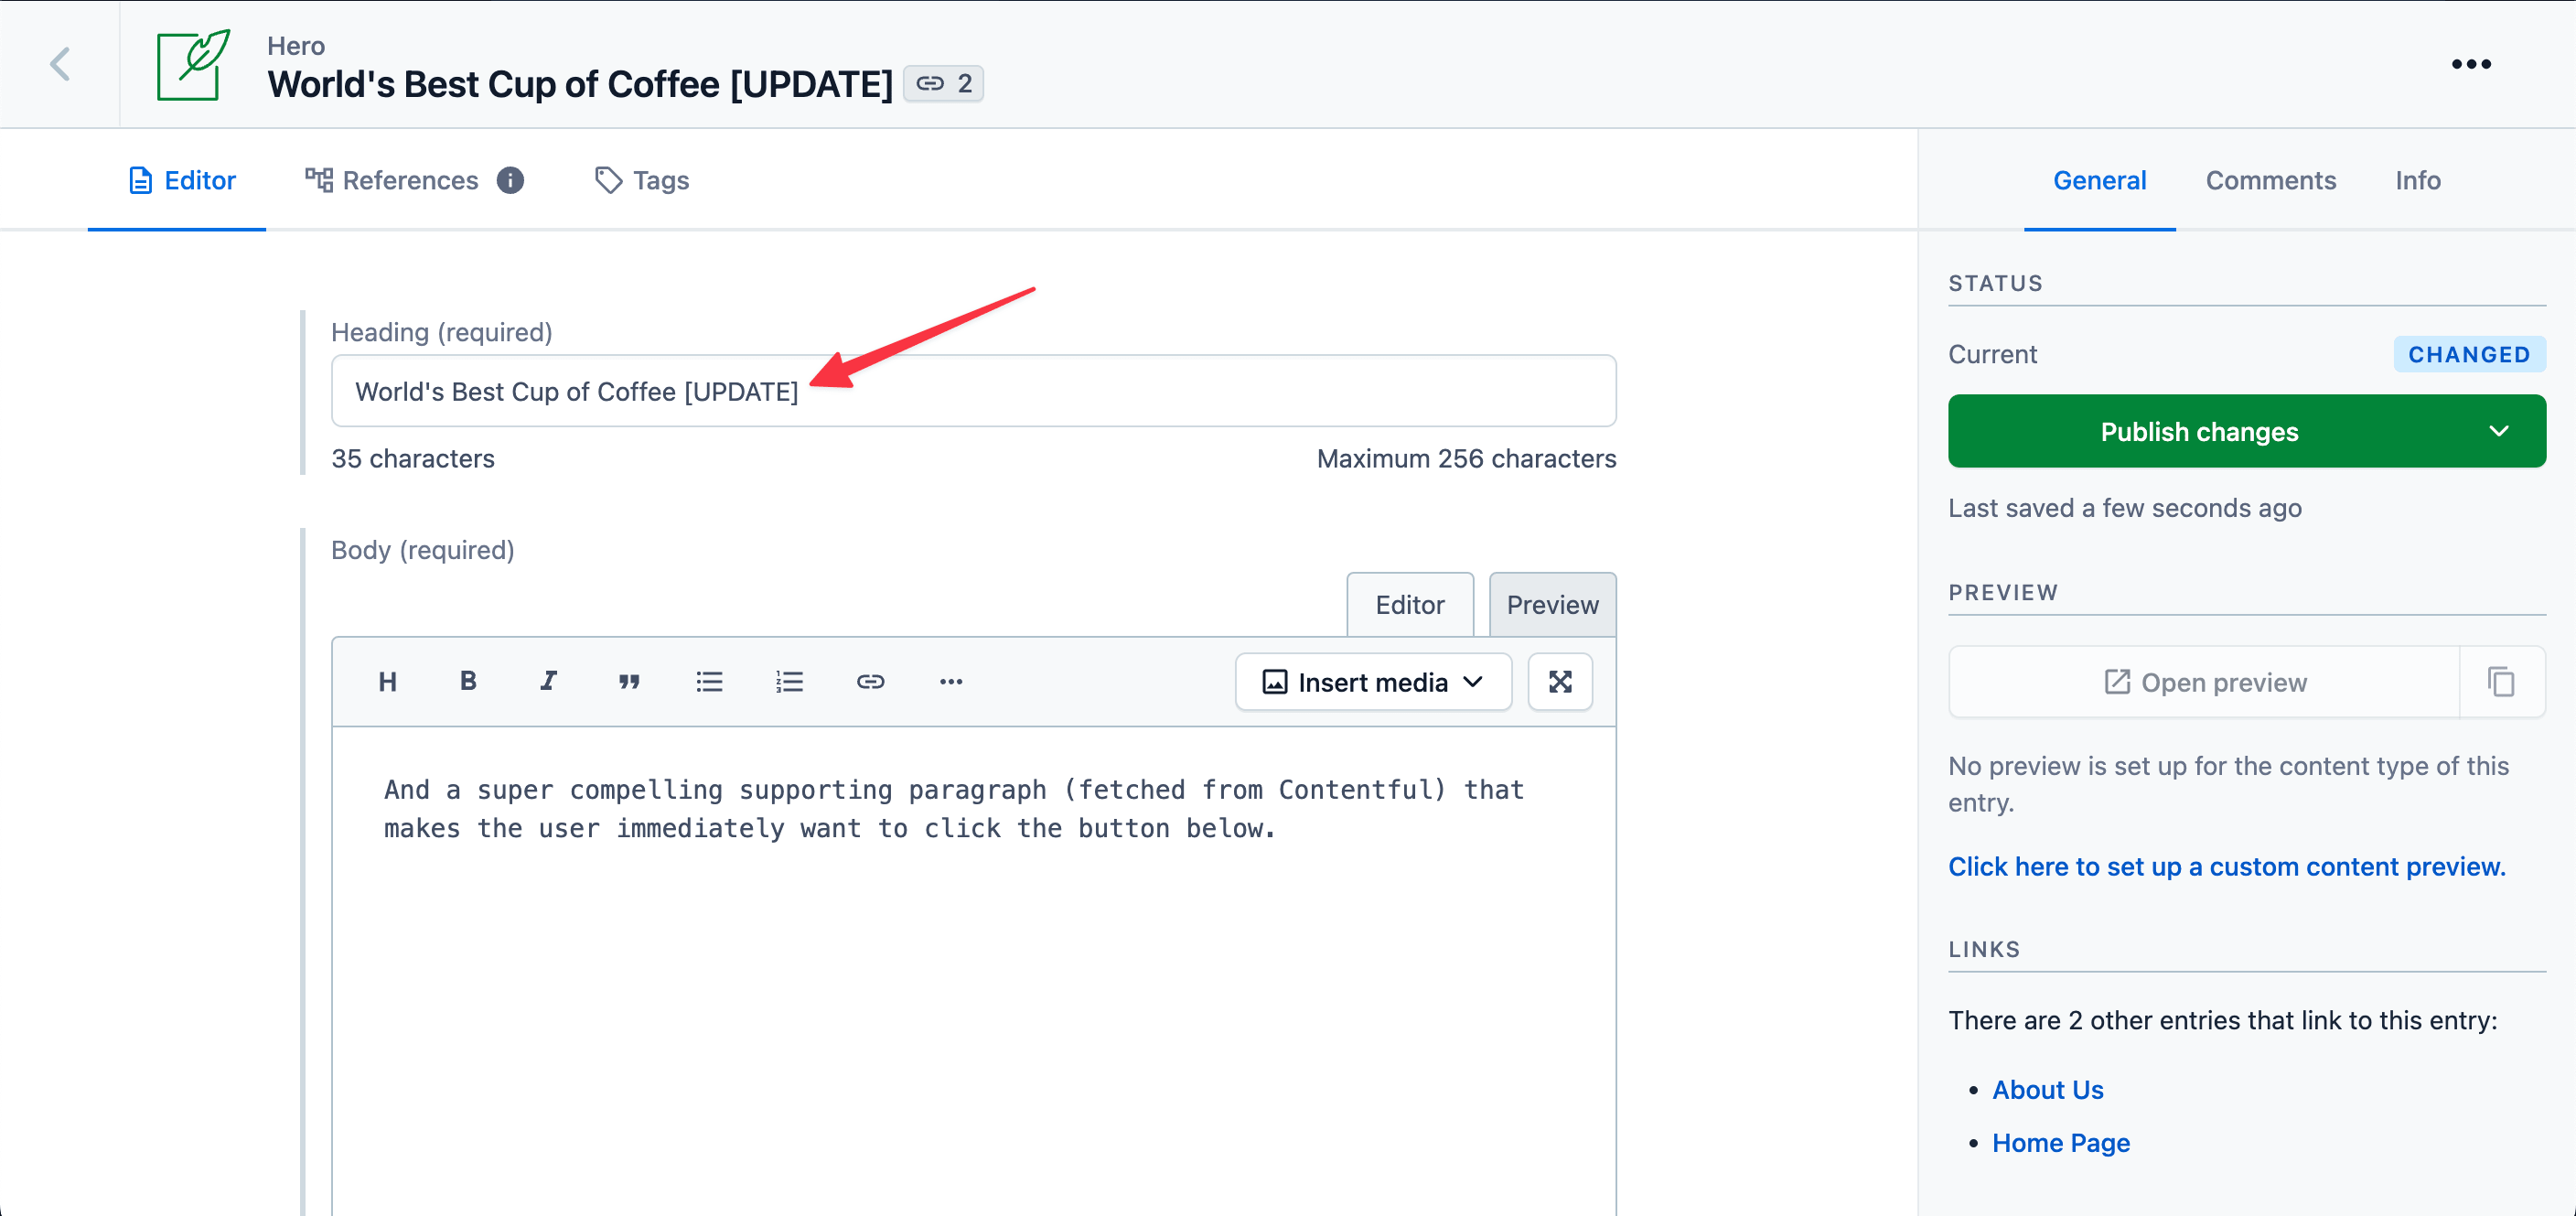
Like the previous two forms of editing, this will also update content in Contentful.
# Additional capabilities
You have now added visual editing to a Gatsby + Contentful site with Netlify Create! But this is just the beginning. You can expand on what you learned above, or explore additional ways to extend the visual editing experience for your site.
This is typically what developers explore next:
- Create content presets for more productive content editing
- Extend a field type with content modeling
And as you progress, there are more advanced features to consider:
- Localization
- When your ready to onboard your business users, create a cloud project to enable collaboration and publishing
- Control access to content, including managing editorial permissions
Did you find this doc useful?
Your feedback helps us improve our docs.