Learn how to create a new project from a prompt using an AI agent directly from your Netlify dashboard. When you start a new project this way, your project gets the best context and feedback loops for building and debugging custom experiences with features like forms, Blobs, Netlify Identity to manage access and authorization, and more.
Video walkthrough overview
Section titled “Video walkthrough overview”For a video walkthrough of this process, check out the following video:
Meet a new way to start projects on Netlify. Go to netlify.new, describe what you want to build, and choose an agent.
Netlify runs the agent, generates the project, and deploys it.
In minutes, you have a live site running on production infrastructure.
Everything you need to ship is there from the first prompt:
- Built-in identity for auth
- Storage to manage data assets and files
- Serverless functions for APIs
- AI gateway for model access
- and skills that help agents use Netlify primitives the right way.
Keep iterating with agent runners using your own prompt library or switch to code.
Prompts and code operate on the same project, the same infrastructure and the same workflow. Projects live in real repositories.
Changes are reviewable. Deployments follow the approval process you already use. Your next idea could be live in minutes.
Start building at netlify.new.
Create a new project steps
Section titled “Create a new project steps”To use this feature, you need a Credit-based pricing plan and must have enabled AI features.
To start a new project with an AI agent:
- Go to your Netlify Team dashboard.
- From your project dashboard, in the top left, choose Projects next to your project name.
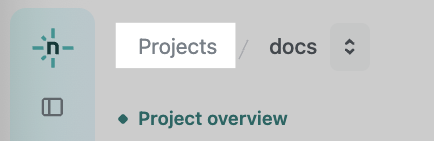
- From your project dashboard, in the top left, choose Projects next to your project name.
- Select Add new project.
- Enter your own prompt or select a starter prompt to use or edit. You can also dictate a prompt.

- Optionally, choose your AI agent and add any additional images or files.
- Start building with Build now.
Next steps
Section titled “Next steps”- Customize your project name
- Continue building with Agent Runners
- Add a custom domain
Did you find this doc useful?
Your feedback helps us improve our docs.