page for your team and select Add new data layer. For more information on the flow to add and configure a new data layer, refer to our get started with Netlify Connect doc.
A data source is an external system or service that contains your data, such as a content management system (CMS). Netlify Connect includes built-in support for a number of popular data source types such as Contentful and Sanity, but you can also build support for your custom data source using the Netlify SDK.
Team Owners and Collaborators can add, edit, or delete data sources connected to a data layer.
When you modify data source connections, Netlify re-syncs all connected data sources and updates the data layer’s GraphQL schema to reflect the change.
Already using the Contentful Integration on Netlify?
Netlify Connect is separate from the Contentful Integration, and we currently do not leverage that integration to sync data. To use your Contentful instance with Netlify Connect, you need to add it here as a data source.
Select Add a data source.
Enter a Name for this data source.
Select Contentful as the Data source type.
(Optional) Enter a Type prefix for this data source. The prefix must start with an uppercase letter, and can only consist of alphanumeric characters and underscores.
The prefix will be added to all data types synced from this data source in the GraphQL schema and you will use it when you query the GraphQL API. For example, ContentfulPost with the prefix Marketing becomes MarketingContentfulPost in the schema.
Note that Type prefix becomes a required field when you connect more than one Contentful instance to the same data layer.
Enter the Access token for your Contentful instance. To sync published content, enter the Content Delivery API access token. To sync preview content instead, enter the Content Preview API access token.
Enter the Space ID for your Contentful instance.
Enter the Content Management API access token for your Contentful instance. Netlify will use this token to automatically set up a webhook in your Contentful space that will notify Netlify Connect whenever data changes in your CMS.
(Optional) Enter the Host URL for your Contentful instance. The default is cdn.contentful.com. To use the Contentful Preview API, enter preview.contentful.com.
(Optional) Enter the Contentful Environment to sync data from. The default is master.
(Optional) Enter a Page limit to specify the number of entries to fetch per page when syncing data from Contentful. The default is 1000.
(Optional) Select Enable Contentful Tags if your Contentful instance uses the Contentful Tags feature. Note that if you enable this option, you cannot use the content type name tags at this time.
Select Save to add this data source.
Netlify will connect to this data source and start syncing data to your data layer.
To set up a connection to Contentstack, follow these steps on your Contentstack instance before you add it to your data layer:
In your Contentstack account, navigate to
Settings > API Tokens
for your stack, and generate a delivery token for the environment you want to sync. You’ll need to enter this token when you set up your Contentstack data source in the Netlify UI, and Netlify will use this token to access your data.
To enable automatic syncing to Netlify, add your data layer webhook to your Contentstack instance:
In your Contentstack account, navigate to
Settings > Webhooks
for your stack, and select New Webhook.
Add the following webhook to the URL To Notify field. Make sure to replace the placeholder with your data layer ID.
Under When, add a Condition for each content type and event that you wish to sync. At minimum, you should configure the webhook to trigger when the Entry type is Created, Updated, and Deleted. For more information on how to configure webhook conditions, refer to the Contentstack docs.
(Optional) Enter a Type prefix for this data source. The prefix must start with an uppercase letter, and can only consist of alphanumeric characters and underscores.
The prefix will be added to all data types synced from this data source in the GraphQL schema and you will use it when you query the GraphQL API. For example, ContentstackPost with the prefix Marketing becomes MarketingContentstackPost in the schema.
Note that Type prefix becomes a required field when you connect more than one Contentstack instance to the same data layer.
Enter the API key for your stack.
Enter the read-only Delivery token for your stack environment.
Enter the stack Environment to sync data from. For example, the production environment.
(Optional) Select the Region to sync data from. The default is AWS North America.
(Optional) Enter the Branch to sync data from. The default is main.
(Optional) Select Disable required fields to make all fields in the schema optional.
(Optional) Select Enable JSON-RTE to HTML to convert JSON Rich Text Editor (RTE) responses to HTML.
Select Save to add this data source.
Netlify will connect to this data source and start syncing data to your data layer.
Once you have prepared your Drupal instance, take the following steps in the Netlify UI to add it to your data layer:
Select Add a data source.
Enter a Name for this data source.
Select Drupal as the Data source type.
(Optional) Add a Type prefix for this data source. The prefix must start with an uppercase letter, and can only consist of alphanumeric characters and underscores.
The prefix will be added to all data types synced from this data source in the GraphQL schema and you will use it when you query the GraphQL API. For example, DrupalPost with the prefix Marketing becomes MarketingDrupalPost in the schema.
Note that Type prefix becomes a required field when you connect more than one Drupal instance to the same data layer.
Enter the Drupal URL for your Drupal site, including the trailing slash.
(Optional) If your Drupal instance has basic authentication enabled, enter the HTTP Basic Auth username and HTTP Basic Auth password.
(Optional) Enter the Gatsby Image CDN placeholder style name. The default is placeholder.
(Optional) Enter the JSON:API base to use as the relative path to the JSON:API root. The default is /jsonapi.
Select Save to add this data source.
Netlify will connect to this data source and start syncing data to your data layer.
To set up a connection to Sanity, follow these steps on your Sanity project before you add it to your data layer:
Deploy a Sanity GraphQL API for the project. To deploy a GraphQL API on Sanity, use the Sanity CLI to run sanity graphql deploy in the Sanity Studio project folder. Learn more about deploying GraphQL APIs on Sanity.
To enable automatic syncing to Netlify Connect, add your data layer webhook to the Sanity project.
Navigate to
API > Webhooks
in your project settings. Under GROQ-powered Webhooks, select Create webhook.
Enter a name for the webhook and then add the following webhook URL to the URL field. Make sure to replace the placeholder with your data layer ID.
Once you have prepared your Sanity project, take the following steps in the Netlify UI to add it to your data layer:
Select Add a data source.
Enter a Name for this data source.
Select Sanity as the Data source type.
(Optional) Enter a Type prefix for this data source. The prefix must start with an uppercase letter, and can only consist of alphanumeric characters and underscores.
The prefix will be added to all data types synced from this data source in the GraphQL schema and you will use it when you query the GraphQL API. For example, SanityPost with the prefix Marketing becomes MarketingSanityPost in the schema.
Note that Type prefix becomes a required field when you connect more than one Sanity project to the same data layer.
Enter the Project ID for your Sanity project.
Enter the name of the Dataset to sync.
(Optional) If you deployed the Sanity GraphQL API with a tag, enter the GraphQL tag name. For example, if you used --tag experiment for the deploy, enter experiment. The default is default.
(Optional) If your dataset is private, enter the API authentication token to use for syncing data. The token must have Viewer permissions.
Select Save to add this data source.
Netlify will connect to this data source and start syncing data to your data layer.
To add a Shopify data source to Netlify Connect, first you need to set up a custom Shopify app that we can use to access Shopify’s Admin API and sync data. You will need the Admin API access token to set up your Shopify data source in Netlify Connect.
Log in to your Shopify store as the store owner and search for Apps and sales channels.
Enable custom app development. To do this, select Develop apps, then Allow custom app development. After reading the warning and information provided, select Allow custom app development.
Create a custom app. From the App development section, select Create an app. Enter an app name and developer, then select Create app.
Set admin API scopes for the app. On the custom app page, select Configure Admin API scopes. Enable the read_products, read_product_listings, and read_files scopes, and then select Save.
Install the app and get the API access token. Select the API credentials tab and select Install app under Access tokens. Follow the prompts to install the app on your Shopify store.
Next, under the Admin API access token section, select Reveal token once to access the token. Store the token in a safe place as you will need it to set up the data source connection.
Once you have created a custom Shopify app, take the following steps in the Netlify UI to add your Shopify store to your data layer:
Select Add a data source.
Enter a Name for this data source.
Select Shopify as the Data source type.
(Optional) Add a Type prefix for this data source. The prefix must start with an uppercase letter, and can only consist of alphanumeric characters and underscores.
The prefix will be added to all data types synced from this data source in the GraphQL schema and you will use it when you query the GraphQL API. For example, ShopifyProduct with the prefix Marketing becomes MarketingShopifyProduct in the schema.
Note that Type prefix becomes a required field when you connect more than one Shopify store to the same data layer.
Enter the Store URL for your Shopify store. This is the myshopify.com URL, excluding https:// and the trailing slash.
Enter the Admin API access token. This is the access token for the custom Shopify app you created in the prepare to connect your store step. The token starts with shpat_.
Select Save to add this data source.
Netlify will connect to this data source and start syncing data to your data layer.
To set up a connection to Storyblok, follow these steps on your Storyblok instance before you add it to your data layer:
In your Storyblok space, navigate to
Settings > Access Tokens
, and generate a preview access token. You’ll need to enter this token when you set up your Storyblok data source in the Netlify UI, and Netlify will use this token to access your data.
To enable automatic syncing to Netlify, add your data layer webhook to your Storyblok instance:
In your Storyblok space, navigate to
Settings > Webhooks
, and select New Webhook.
Add the following webhook to the Endpoint URL field. Make sure to replace the placeholder with your data layer ID.
(Optional) Enter a Type prefix for this data source. The prefix must start with an uppercase letter, and can only consist of alphanumeric characters and underscores.
The prefix will be added to all data types synced from this data source in the GraphQL schema and you will use it when you query the GraphQL API. For example, StoryblokPost with the prefix Marketing becomes MarketingStoryblokPost in the schema.
Note that Type prefix becomes a required field when you connect more than one Storyblok instance to the same data layer.
Enter the Preview access token for your space.
Enter the content Version to sync — either draft or published.
(Optional) Select Include links to enable the ability to query links using allStoryblokLinkEntry.
(Optional) Enter a Timeout value. This is the time in milliseconds before requests to Storyblok will time out. The default is 3000.
Select Save to add this data source.
Netlify will connect to this data source and start syncing data to your data layer.
To set up a connection to WordPress, there are three steps to take on your WordPress instance before you add it to your data layer:
Install and activate the WPGraphQL WordPress plugin.
Install and activate the WPGatsby WordPress plugin.
Add the following webhook to your WPGatsby plugin settings to enable automatic syncing to Netlify Connect. Make sure to replace the placeholder with your data layer ID.
(Optional) Add a Type prefix for this data source. The prefix must start with an uppercase letter, and can only consist of alphanumeric characters and underscores.
The prefix will be added to all data types synced from this data source in the GraphQL schema and you will use it when you query the GraphQL API. For example, WpPost with the prefix Marketing becomes MarketingWpPost in the schema.
Note that Type prefix becomes a required field when you connect more than one WordPress instance to the same data layer.
Enter the full WPGraphQL API URL for your WordPress instance. For example, https://your-wordpress.xyz/graphql.
(Optional) Enter a Timeout value. This is the time in milliseconds before requests to WordPress will time out. The default is 3000.
(Optional) Enter a Per page value to specify the number of nodes to fetch per page when syncing data from WordPress. The default is 100.
(Optional) If your WordPress instance has basic authentication enabled, enter the HTTP Basic Auth username and HTTP Basic Auth password.
Select Save to add this data source.
Netlify will connect to this data source and start syncing data to your data layer.
To use a custom data source, an integration must already exist for it
If an integration doesn’t already exist for your custom data source type, create one with the Netlify SDK and develop a Connectors component that includes the data model and logic for syncing data from your custom data source. Once you publish the integration, you can start using it in Netlify Connect.
To enable automatic syncing to Netlify, you need to manually add a webhook to your custom data source instance. The exact instructions vary for each system but you need to do the following:
Log in to your data source and navigate to the webhook settings.
Follow the prompts to create a new webhook and add the following to the URL field. Make sure to replace the placeholder with your data layer ID.
If the options are available, select the data types and events that should trigger the webhook. We suggest including any create, edit, and delete events for all content types that you wish to store in your data layer.
Under Data source type, select the integration that you enabled.
Fill in the configuration fields with the values for your data source instance. For example, you may need to provide the API key for your CMS instance.
Select Save to add this data source.
Netlify will connect to this data source and start syncing data to your data layer.
When you delete a data source, Netlify will delete all data related to that source from the data layer and then update the data layer’s schema to reflect the change.
To delete a data source from your data layer:
Navigate to the
Connect
page for your team in the Netlify UI.
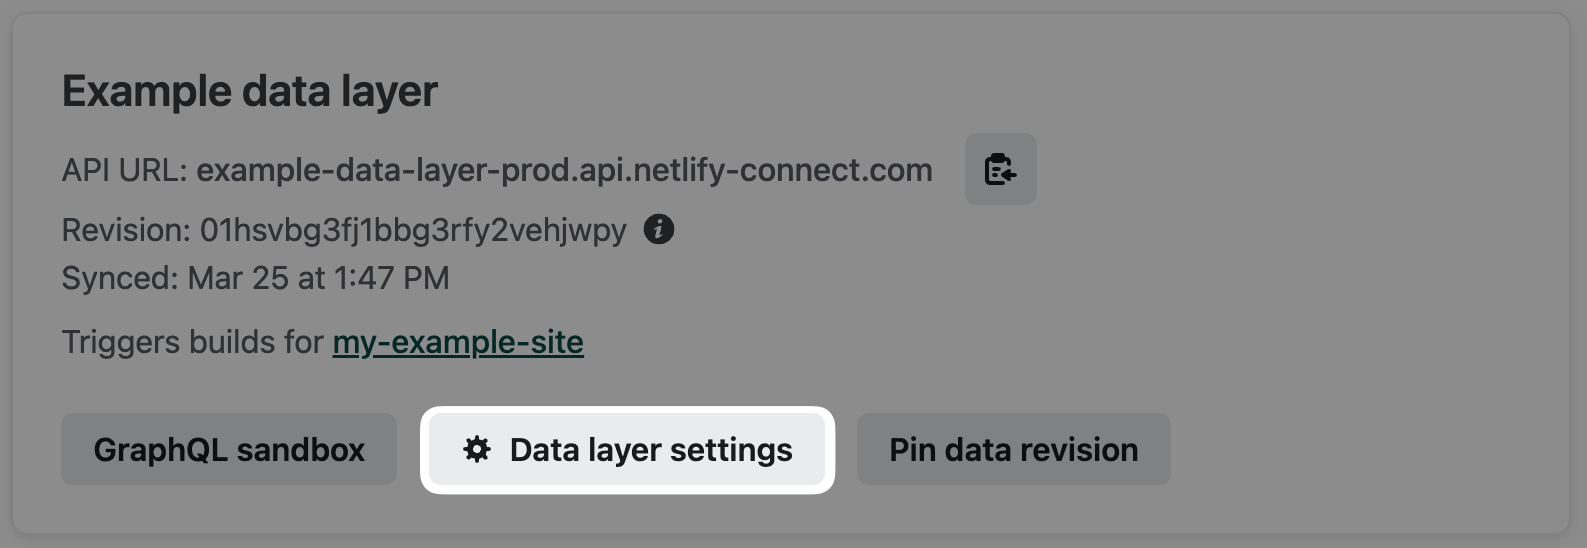
Select the data layer from the Data layers list, and then select Data layer settings.
On the data layer settings page, select Data sources.
Select the data source you want to delete.
Select Delete.
A confirmation prompt will appear. Enter the name of the data source to confirm.
Select Delete.
Once the sync events are complete, make sure you review the new schema and update any sites that make queries to the GraphQL API to reflect this change.
Connected sites are sites in your Netlify team that will automatically build and deploy when data changes.
We recommend that you connect any sites that use static site generation (SSG), cached server-side rendering (SSR), or edge functions with caching to ensure they always have access to the latest data. If your site uses server-side rendering (SSR) without caching or you plan to query the GraphQL API during runtime using functions or edge functions without caching, you don’t have to connect your site. Learn more about how to access data.
Team Owners and Collaborators can add or delete connected sites at any time.
Once you connect a site, the build hooks for the site will include a Netlify Connect - Data layer build hook with the data layer ID as the value. This provides a convenient way on the site level to check whether a site is connected to a data layer.
For Netlify to automatically build and deploy your site when data changes, your site must be linked to a Git repository to enable continuous deployment, and it must have active builds.
To connect a site to your data layer:
Navigate to the
Connect
page for your team in the Netlify UI.
Select the data layer from the Data layers list, and then select Data layer settings.
On the data layer settings page, select Connected sites.
Select Search by site name or domain and start entering the name or domain of the site you want to connect.
When the site appears in the results list, select the site to connect it.
Note that when you disconnect a site, Netlify will no longer automatically build and deploy the site whenever data changes. This may result in inconsistent content.
You can’t disconnect a site by manually deleting the build hooks on the site level. You can only disconnect a site by editing the data layer.
To disconnect a site from your data layer:
Navigate to the
Connect
page for your team in the Netlify UI.
Select the data layer from the Data layers list, and then select Data layer settings.
On the data layer settings page, select Connected sites.
Find the site you would like to disconnect in the Connected sites list and select Disconnect.
A confirmation prompt will appear. Review the details and then select Disconnect.
Custom webhooks are external webhooks that you can connect to a data layer. Once connected, Netlify will notify these external services whenever data changes in your data layer. For example, you may want to add a webhook to notify a Slack channel when your data layer updates.
Team Owners and Collaborators can add or delete custom webhooks at any time.
To generate an authentication token for your data layer:
Navigate to the
Connect
page for your team in the Netlify UI.
Select the data layer from the Data layers list, and then select Data layer settings.
On the data layer settings page, select API tokens.
Select Add an API token.
Enter a name for the token and then select Generate token. Netlify will generate a token for you.
Select the clipboard icon to copy your token and then store it in a safe place. To protect your data, you won’t be able to reveal this token again.
Make sure to include the authentication token in the authorization header for all API requests: Authorization: Bearer <YOUR_AUTH_TOKEN>
Keep your authentication token secure
To keep your authentication token secure, we recommend that you store it in an environment variable on Netlify instead of in your repository. You can also avoid revealing the token in the browser by using a Netlify Function or Edge Function to access the variable and query the GraphQL API during runtime.
You can revoke individual tokens for your data layer in the Netlify UI.
Once you revoke an authentication token, any client applications or scripts that use that token will no longer be able to access the data layer’s GraphQL API.
This action cannot be reversed.
To revoke an authentication token:
Navigate to the
Connect
page for your team in the Netlify UI.
Select the data layer from the Data layers list, and then select Data layer settings.
On the data layer settings page, select API tokens.
Find the token you want to revoke and select Revoke.
A confirmation prompt will appear. Review the details and then select Revoke to confirm.
When you delete a data layer, everything connected to it is deleted — the GraphQL API and all data, data sources, site connections, and webhooks. Note that if you have submitted a support request related to the data layer, it will be difficult for us to help if you delete it.
When you delete a data layer, the GraphQL API will be deleted also
When you delete a data layer, the GraphQL API for that data layer will no longer be available. Remember to remove or adjust any code that uses the data layer’s GraphQL API to avoid any errors.
As this action cannot be reversed, only team Owners can delete a data layer.
To delete a data layer:
Navigate to the
Connect
page for your team in the Netlify UI.
Select the data layer from the Data layers list, and then select Data layer settings.
On the data layer settings page, select Danger zone.
Select Delete this data layer.
A confirmation prompt will appear. Review the details and then enter the name of the data layer you want to delete.