By default, Identity user registration is Open, meaning any visitor can sign up using a form you add to your project. You can also set your registration to Invite only, which means that people must be invited to sign up for the project.
Set registration preferences
Section titled “Set registration preferences”To switch between Open and Invite only Identity user registration, select Project configuration Identity Registration Registration preferences, then select Configure.
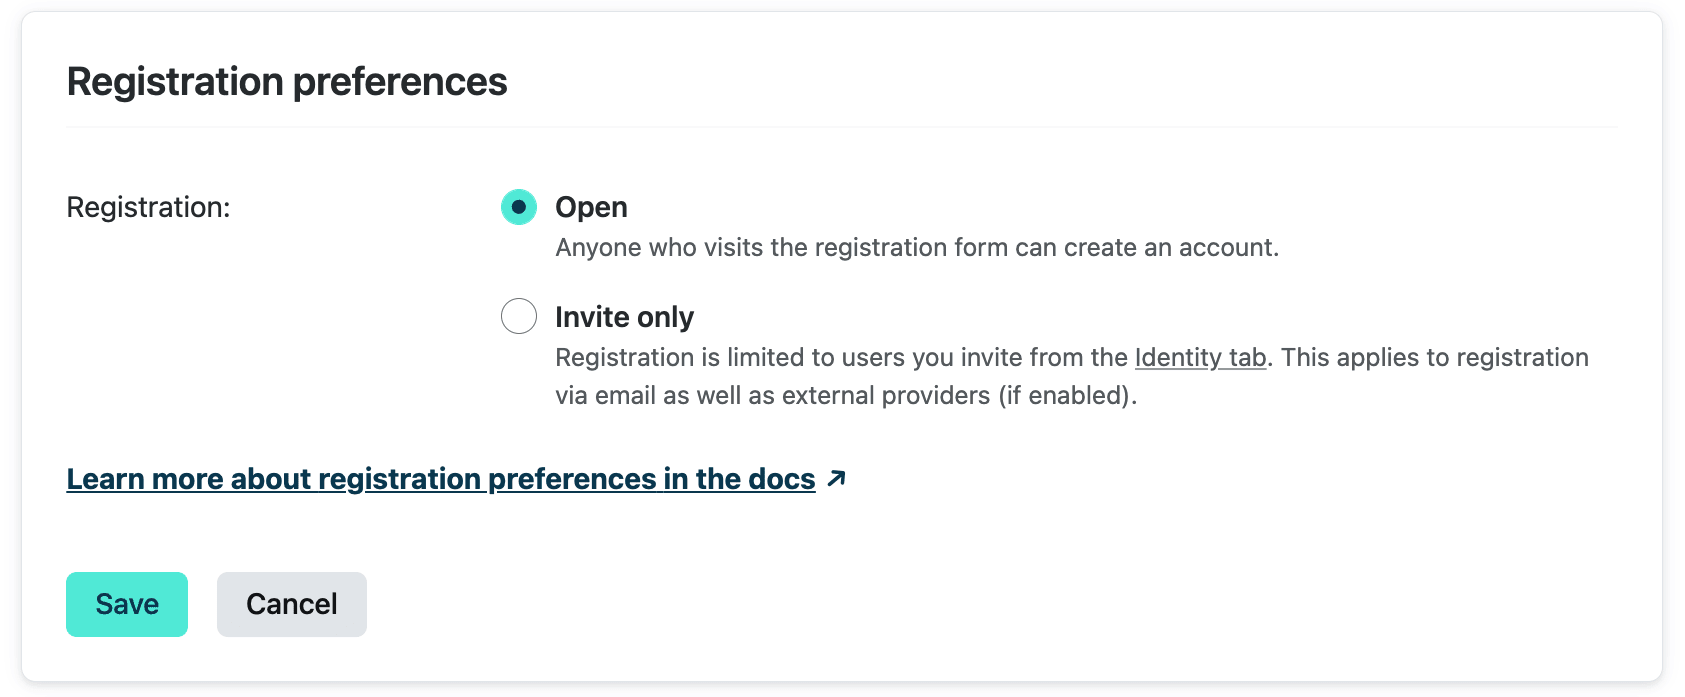
When Invite only is selected, all new Identity users, including those logging in with external providers, will need to be invited before they can register for your project.
Add Identity users
Section titled “Add Identity users”You can use the tools below to add new Identity users to your project.
Registration forms
Section titled “Registration forms”You can allow users to register for your project by building a registration form using @netlify/identity. Call signup() to create a new user. Note that if your registration preferences are set to Invite only, users must be invited before they can register.
When an Identity user registers for your project, the registration will trigger an email requesting that the user confirm their address (using the template described in the Identity-generated emails doc). If you would like to skip this confirmation step, go to Project configuration Identity Emails Confirmation template, then select Configure. Check the box to allow Identity users to sign up without verifying their email address.
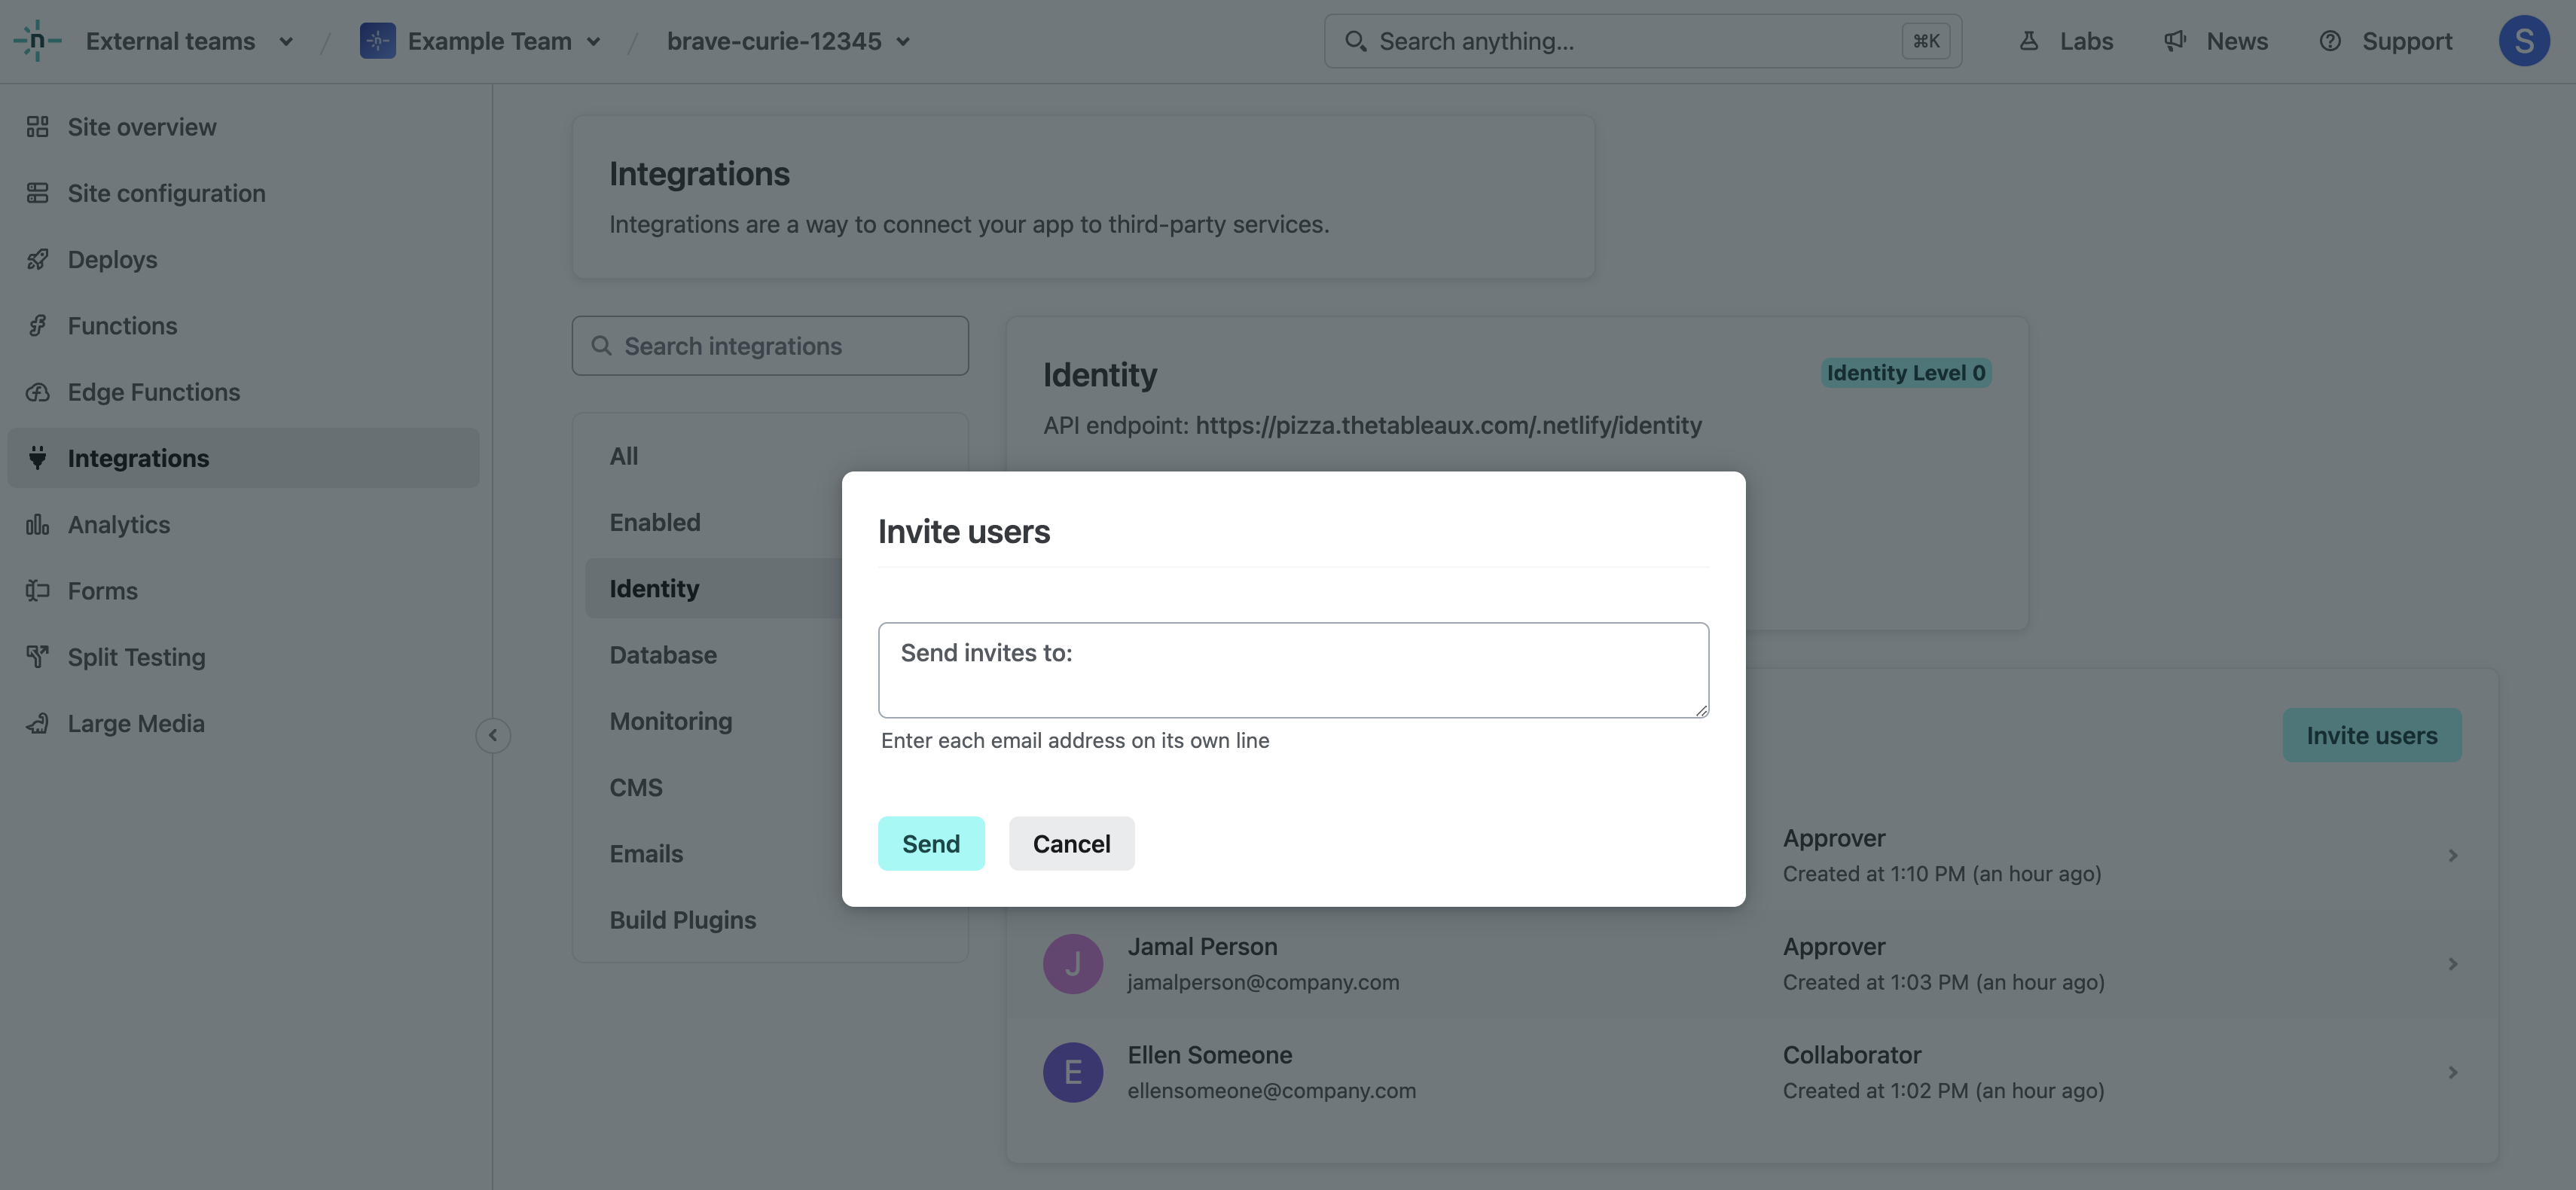
Invitations
Section titled “Invitations”Whether your registration preference is set to Open or Invite only, you can always invite new Identity users to your project by navigating to Project configuration Identity Users. Inviting new users will send email invitations (using the template described in the Identity-generated emails doc) to the addresses you enter. Netlify users on your team with any role can invite new Identity users.
The confirmation link in the email will direct to your project, with an invite_token appended. If you use @netlify/identity, call handleAuthCallback() on your landing page to process invite tokens automatically, or use acceptInvite() directly.
External provider authentication
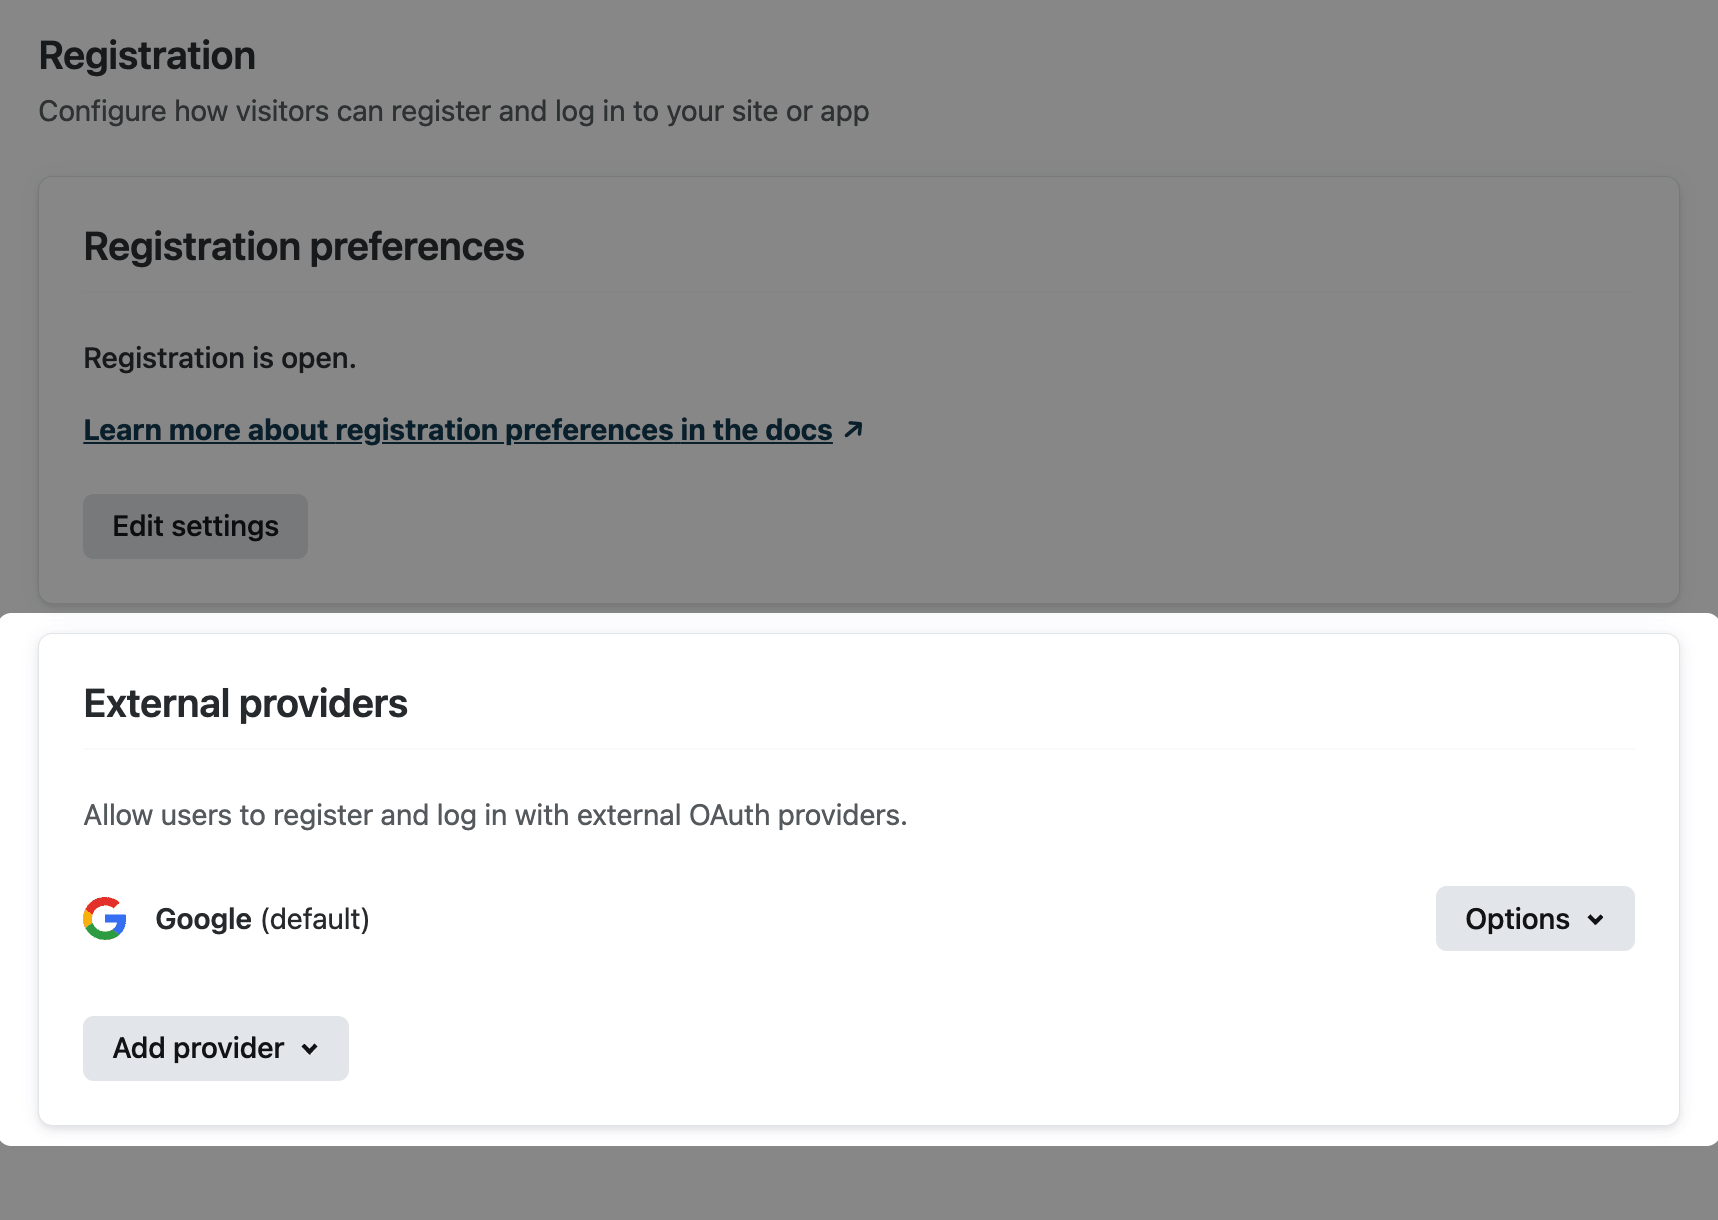
Section titled “External provider authentication”You can allow your Identity users to register and log in to your project using an account with another service provider, like Google, GitHub, GitLab, or Bitbucket. Go to Project configuration Identity Registration External providers, then select Add provider.
If you use @netlify/identity, call oauthLogin() with the provider name to start the OAuth flow. When an Identity user registers using an external provider, no email confirmation is required. However, if you’ve set your registration preference to Invite only, you will need to invite them before they can register.
Branded external OAuth integration
Section titled “Branded external OAuth integration”By default, we use our own Netlify Identity app to request authorization from external OAuth providers. This means that when your project visitors use their external account to log in, they find Netlify Identity as the app requesting authorization.
Alternatively, you can set up your own authentication credentials so that your app name will show as the app requesting authorization. To do this, you’ll need to register your app with the external service and get a client ID and client secret to enter into your settings on Netlify.
Instructions for registering your app can be found in the documentation for the external providers we currently support:
Trigger functions on Identity events
Section titled “Trigger functions on Identity events”You can trigger serverless functions automatically when users sign up, log in, attempt to register, or when an admin deletes or updates a user. Use this to assign roles, block signups, sync to external systems, and more. For details and code examples, refer to Identity event functions.
Did you find this doc useful?
Your feedback helps us improve our docs.