

For the complete Netlify documentation index, see llms.txt. Markdown versions of any documentation page are available by appending .md to its URL. Here’s how to manage apps, versions, privacy, and domainsdomainsThe web address people use to visit your site, such as yoursite.com. in the new Netlify experience.
Manage apps across your team
Section titled “Manage apps across your team”To manage apps across your team, select your team workspace name to open up a menu of admin options:
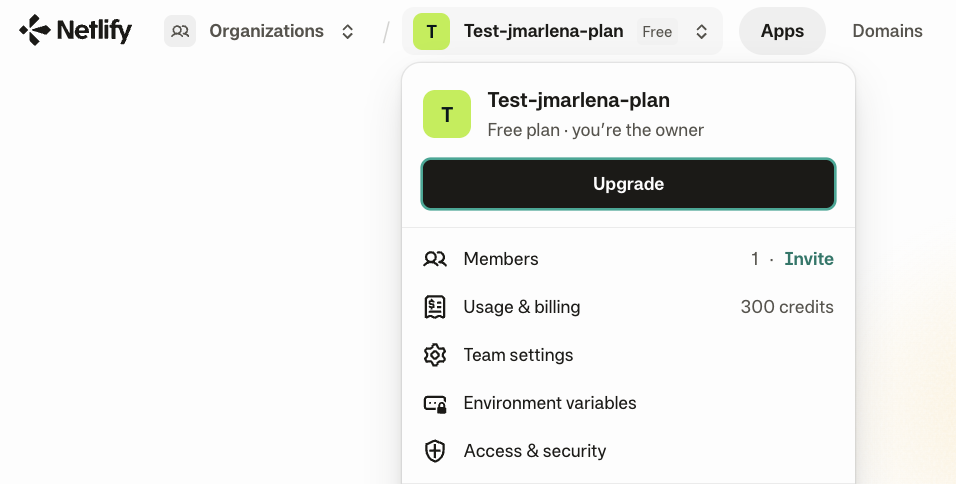
From this menu you can access these settings:
- Members: View and manage who’s on your team, invite new members, and update roles.
- Usage & billing: Check your current plan, usage, and billing details.
- Team settings: Update your team workspace name and other settings across your apps and team.
- Environment variablesEnvironment variablesNamed values stored outside your code that your site can read at build time or runtime.: Set environment variables that apply across all apps on your team.
- Access & security: Manage advanced access and security for all apps in your team workspace, including SSO, two-factor authenticationauthenticationThe process of verifying who someone is before letting them access your site., and other security settings for your team.
Find a setting
Section titled “Find a setting”The new Netlify experience has reworked how you navigate settings.
App settings
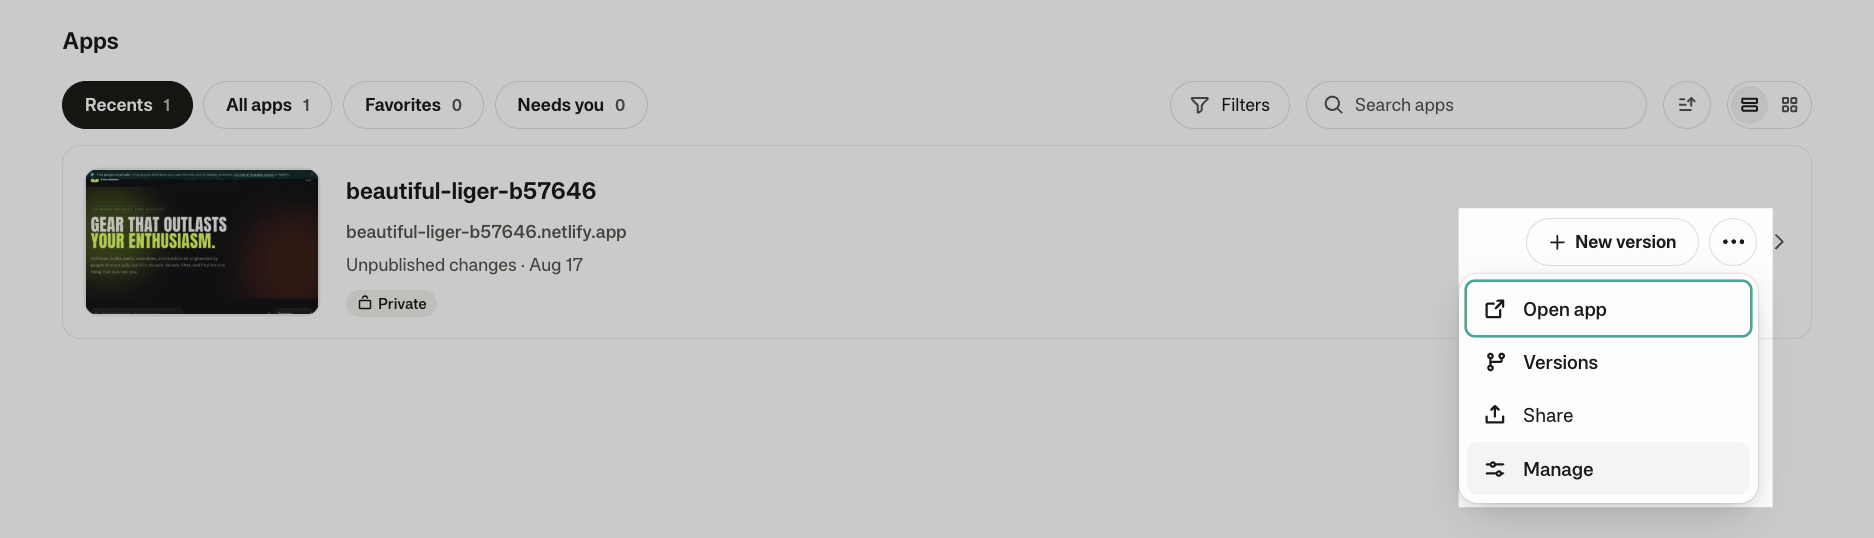
Section titled “App settings”To find an app setting, select your app and choose Manage. You’ll find a search box just for searching your app settings.

Settings across apps
Section titled “Settings across apps”For a settings menu that applies across apps, check the top of your Netlify dashboard.
Check activity or analytics for your app
Section titled “Check activity or analytics for your app”Check analytics to learn how many people visit, where they come from, and how the app is running.
Check activity to review a timeline of updates to your app, or go deeper with the deploy view, which shows build logs and technical details useful for in-depth troubleshooting or custom publishing workflows.
To check activity or analytics for an app:
- Select or find your app under Apps or Search apps.
- In the top right, choose Activity or Analytics.
Share and manage your app
Section titled “Share and manage your app”- Select or find your app under Apps or Search apps.
- Share or manage your app by selecting the three-dot menu next to your app name.
Manage versions of your app
Section titled “Manage versions of your app”Netlify takes care of versioning for you so that you can safely experiment and review changes before going live.
Netlify’s versioning is also designed to help teams work on the same app and incorporate changes safely.
Versioning basics
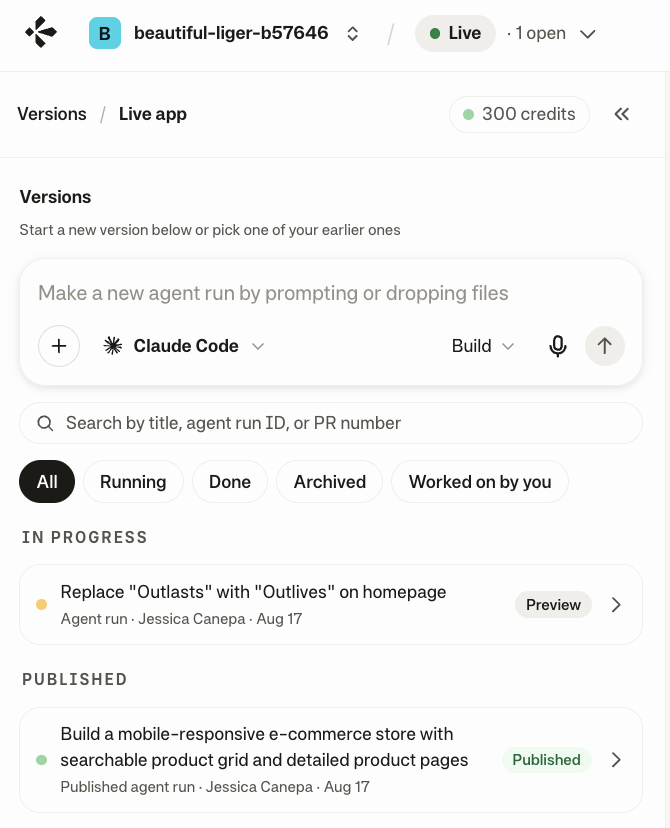
Section titled “Versioning basics”When you make changes to your app, Netlify automatically creates a working preview of those changes for you, which you can review, dismiss and archive, or publish to become the next live version of your app.
Generally speaking, there are three types of versions of your app:
- The live app version: The most recently published version of your app that is live at your domain on the web for anyone to visit. Note that you can also put your live app behind a login or require a password so it’s private.
- In-progress versions: Draft versions of your app that are not yet published. You can review and archive these or publish them.
- Published versions: Versions of your app that have been published but are not the current live version. Think of these as past production versions.
Find your versions
Section titled “Find your versions”- Under Apps, select your app.
- You’ll get a view of all the different versions of your app.
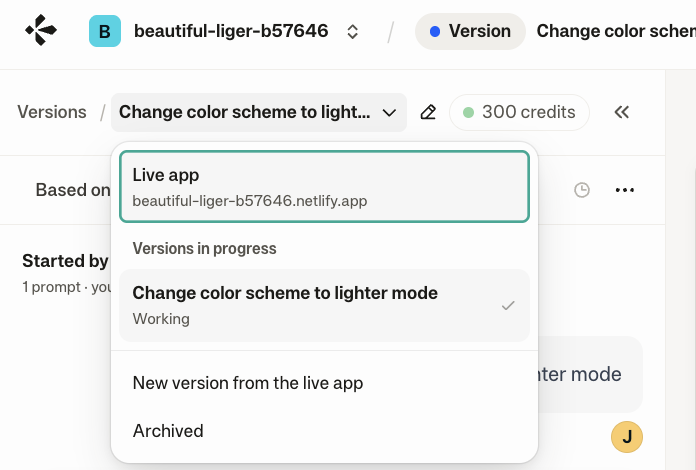
If you’re working on a prompt, you can quickly navigate to other versions of your app using the versions dropdown menu.
Manage app privacy and visibility
Section titled “Manage app privacy and visibility”To keep the app private, go to Manage > Your app > Who can see it to review your options to add a shared password or require a Netlify team login to access your app.
To manage privacy of all apps in your team workspace, select the Netlify icon (in the top left), select your team workspace name, and choose Access & security for advanced options.
Add a domain
Section titled “Add a domain”To give your app a real web address, you can buy a domain on Netlify or bring an existing one. From your dashboard, go to Domains and follow the prompts. Or for your app go to Manage > Your app > Name and address.
We handle HTTPSHTTPSThe secure protocol, enabled by SSL, that encrypts data transferred between a browser and your site. automatically, and Netlify DNSDNSThe system that translates a domain name like yoursite.com into the address computers use to find your site. simplifies domain management for you.
Have more questions?
Section titled “Have more questions?”You can use Ask Netlify to ask questions, although some of our docs still reference the previous app experience. You can also leave feedback on these docs by scrolling to the bottom of each docs page.
Finally, know that Netlify Support is here for you too. You don’t need a paid plan to get help from Netlify Support.
You can also join our Netlify Builders community to share your app and learn and grow with other builders.
Did you find this doc useful?
Your feedback helps us improve our docs.