

For the complete Netlify documentation index, see llms.txt. Markdown versions of any documentation page are available by appending .md to its URL. Netlify DropNetlify DropThe simplest way to publish a site: drag and drop a folder of files and it goes live instantly, no account required. is the fastest way to get a project live on the web and one of Netlify’s first product launches. Drag and drop your project folder or zip file to the Netlify Drop zone and get a live URL in seconds.
Netlify Drop is a popular choice for publishing projects from AI code generation tools or when your files are stored locally on your computer. No Git repository is needed.
You don’t have to build your project before dropping it. As long as you’re logged in, you can drop a web project that still needs a build step, and Netlify will detect your framework and run the build for you before publishing. Dropping a pre-built output folder works too.
Publish with Drag and Drop
Section titled “Publish with Drag and Drop”Publish your site or app to the web by dragging and dropping your project’s folder with your site files to the Netlify Drop zone. Note that your project folder may be called public.
-
If you haven’t already, log in to your Netlify account at https://app.netlify.com/login. Make sure you’re signed in to the Netlify team where you want to manage your project. If you don’t sign in, you can deploy first and claim it by signing up later.
-
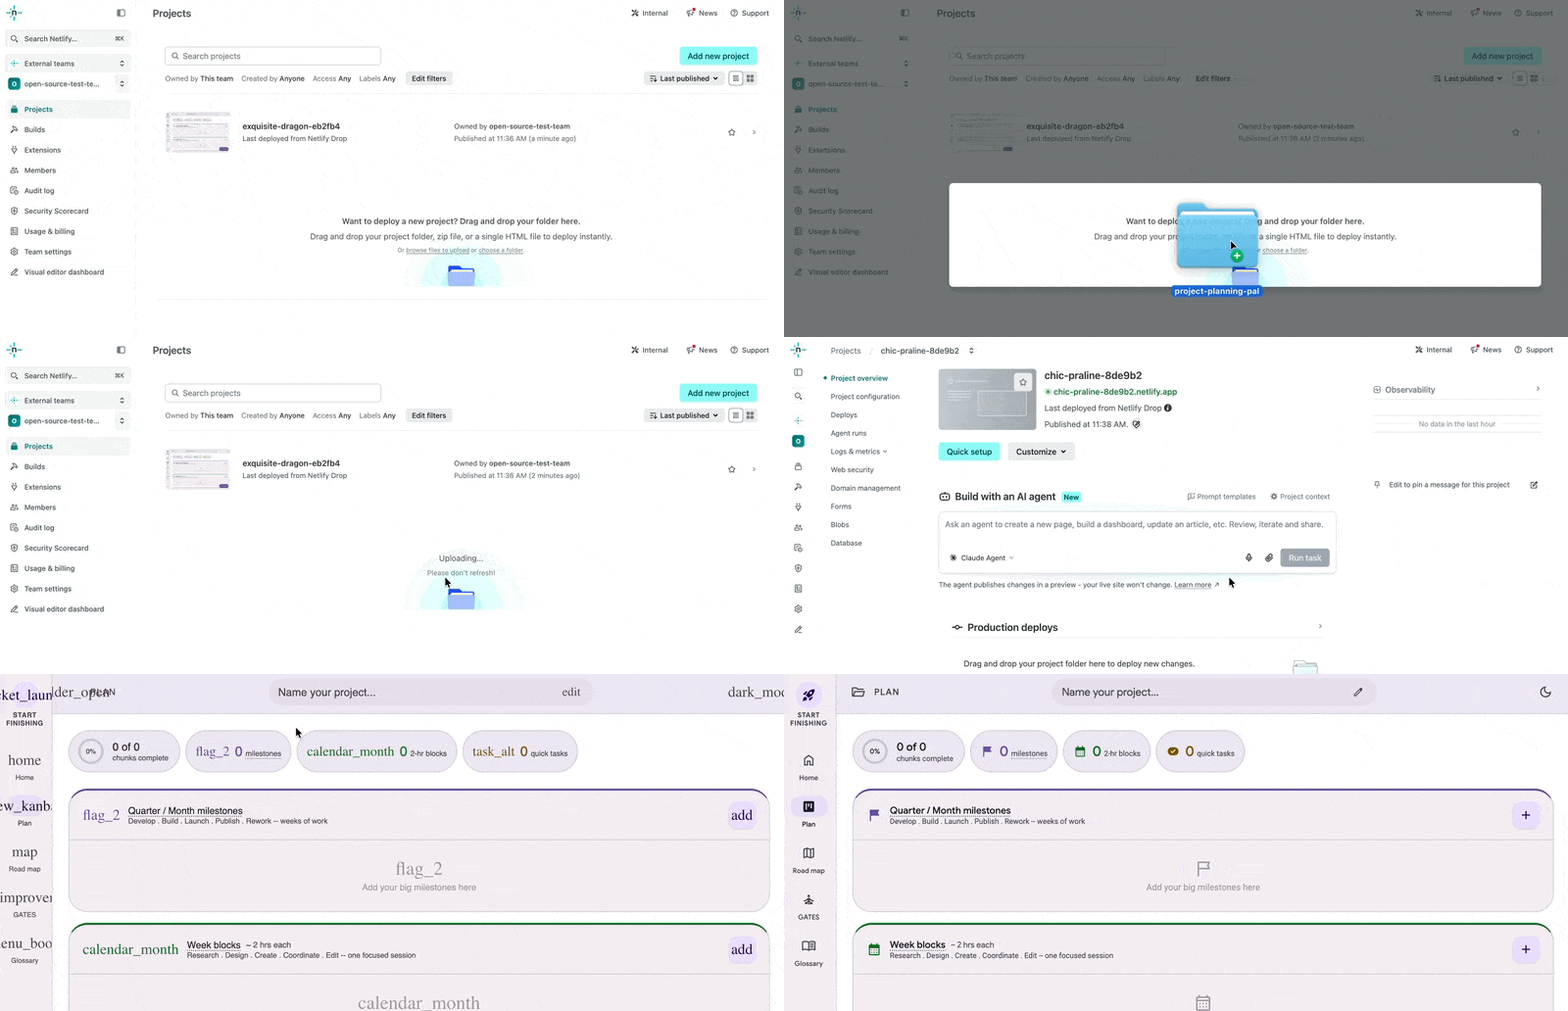
Go to https://app.netlify.com/drop or scroll to the bottom of your team dashboard where all your team-owned projects will be listed.
-
Drag and drop your folder to the Drop zone in the Netlify UI.
-
Find your site at the Preview URL ending in
netlify.app. It should now be live. 🎉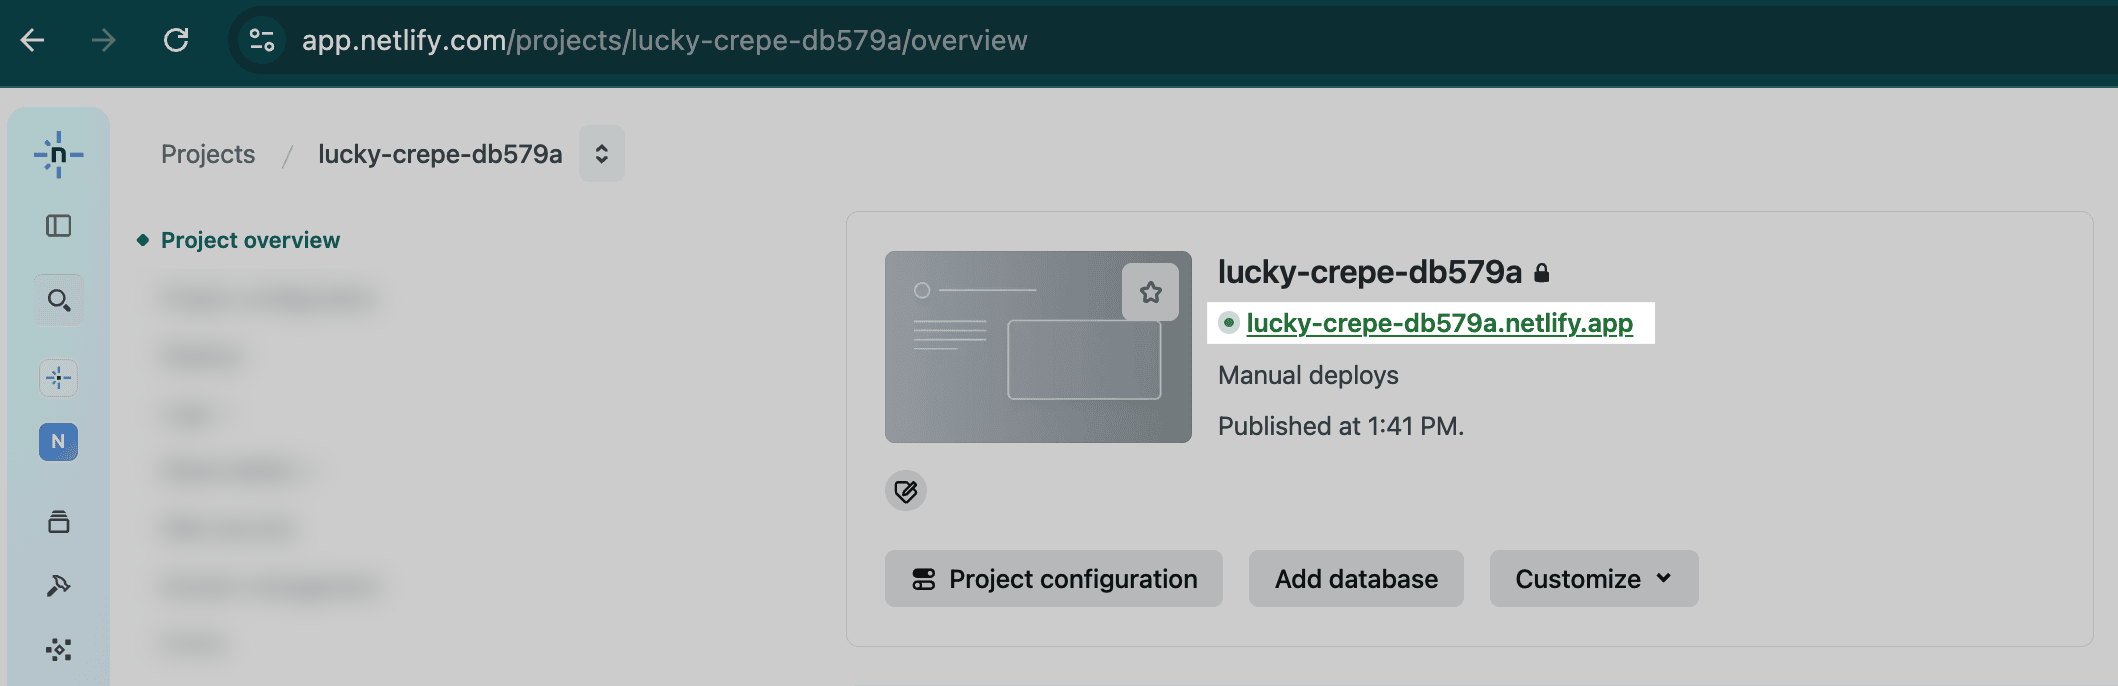
Is your project public?
Section titled “Is your project public?”Whether your dropped project is publicly visible depends on your plan and whether you were signed in when you dropped it.
If you drop without signing in, your project URL is protected with a temporary password until you claim it. After you claim it by logging in or signing up, the outcome depends on your plan.
On Credit-based plans (Free, Personal, Pro): if your team has private by default enabled, your project stays private until you make it public. When a project is private, only you and your team can view it, including preview and production versions. Whether this default is automatically on without a Team Owner setting it depends on when your team was created; see set default project visibility for your team.
On Legacy plans (not Credit-based): your project is public once claimed or logged in. Anyone with the URL can view it unless you set up Password Protection (a shared password or team login) or add authenticationauthenticationThe process of verifying who someone is before letting them access your site. in your project’s code.
Make changes to a project published with Netlify Drop
Section titled “Make changes to a project published with Netlify Drop”You can update a project deployed using Netlify Drop in two ways:
- Option A: Use Agent RunnersAgent RunnersAn AI coding tool that makes changes to your site on your behalf, right from the Netlify dashboard. to update your project in a testing environment before publishing live to the production live version of your site. You can review changes in a Deploy PreviewDeploy PreviewA type of deploy that lets you preview and share changes for feedback before they go live. before publishing them to the live production version of your project. Requires a Credit-based plan.
- Option B: Drag and drop an updated folder to the drop zone to update your project. Your folder’s changes are automatically published to production and become the latest live version of your site in production.
Option A: Use Agent Runners to update your project
Section titled “Option A: Use Agent Runners to update your project”If you have a Credit-based plan, you can iterate on your project using Agent Runners directly from your Netlify dashboard and preview changes before publishing your project’s latest changes to the live production version.
- From your project dashboard, in the left sidebar, select Agent runsAgent runsA single task or batch of tasks you or a team member prompted an AI agent to complete..
- Enter your prompt, choose an AI agent model, and optionally add more context by uploading files or saving project context. Netlify skills are automatically used but you can also reference your own skills files.
- Start the agent run with Run.
- Preview your changes in the preview environment.
- When you’re ready to deploy to production, select Publish.
Option B: Drag and drop to update your project
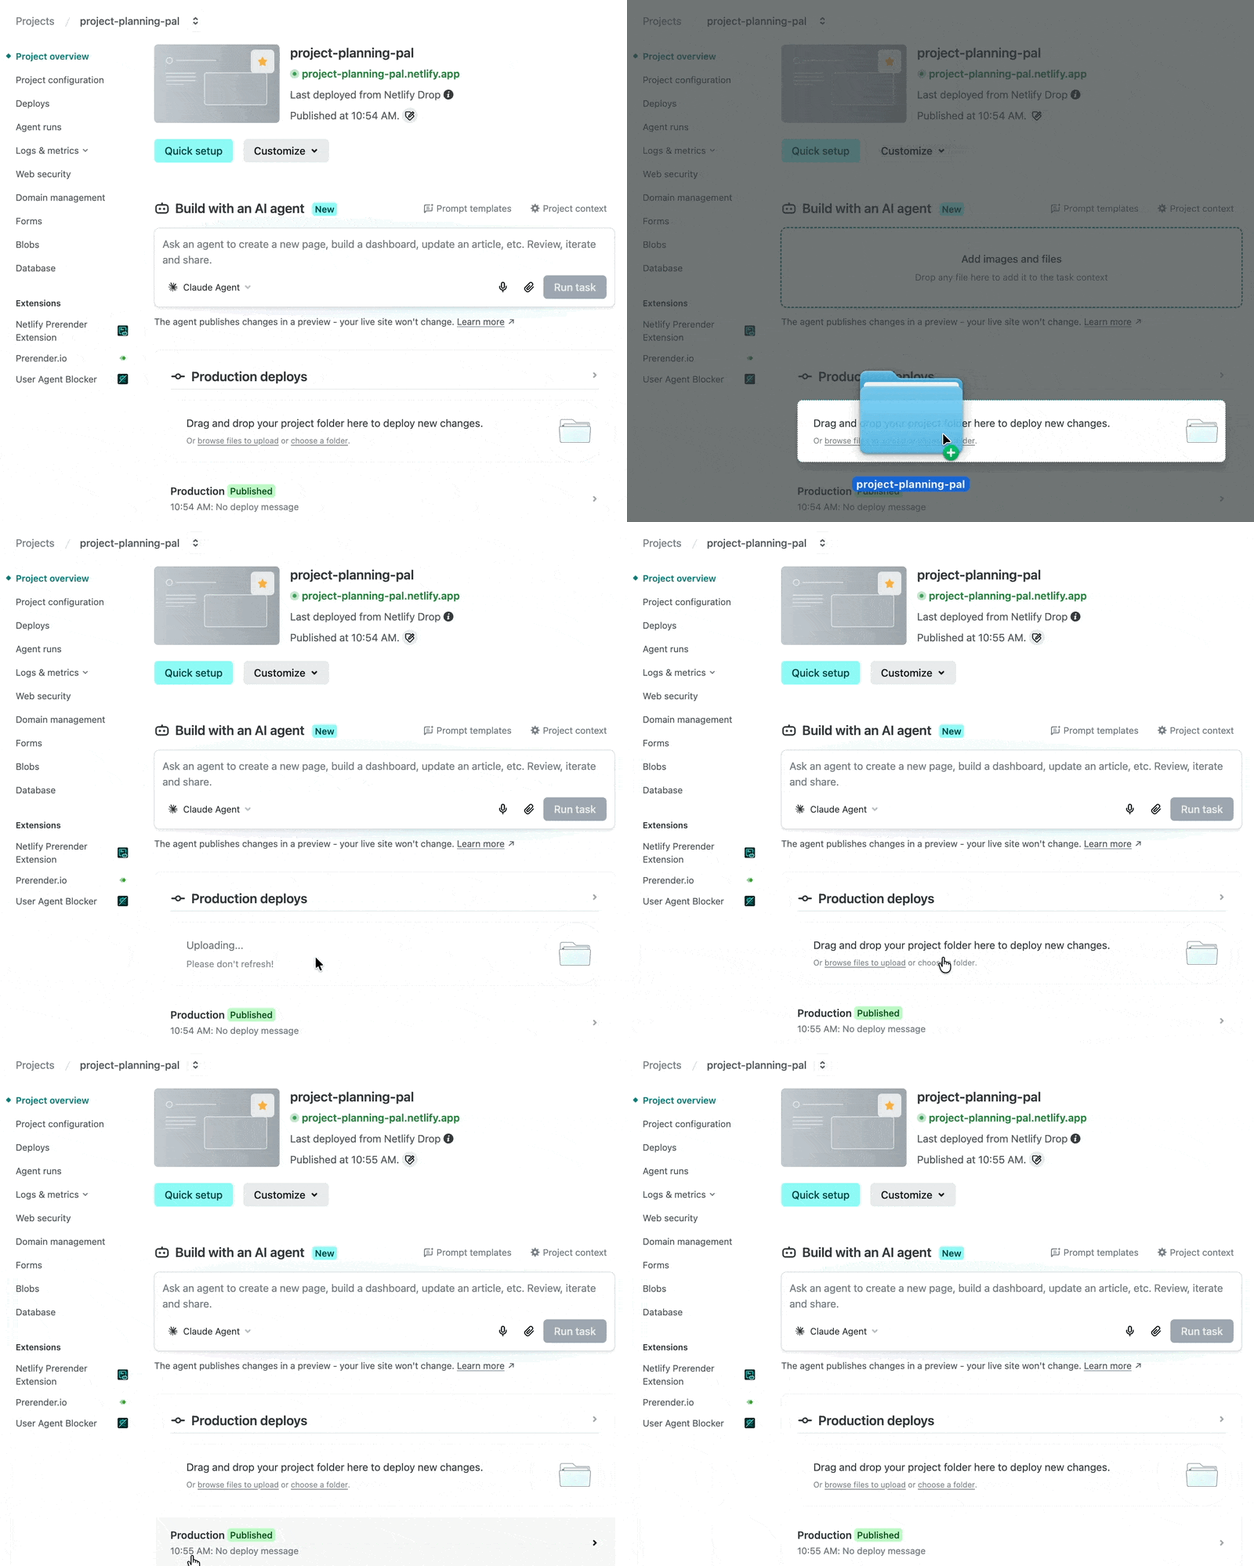
Section titled “Option B: Drag and drop to update your project”If you prefer to iterate on your project using another tool outside of Netlify, you update your project folder with your changes, then drag and drop your updated folder to the publishing drop zone on Netlify.
- Go to your Netlify project dashboard.
- Under Production deploys, drag and drop your updated project folder with any updated files to the drag and drop area.
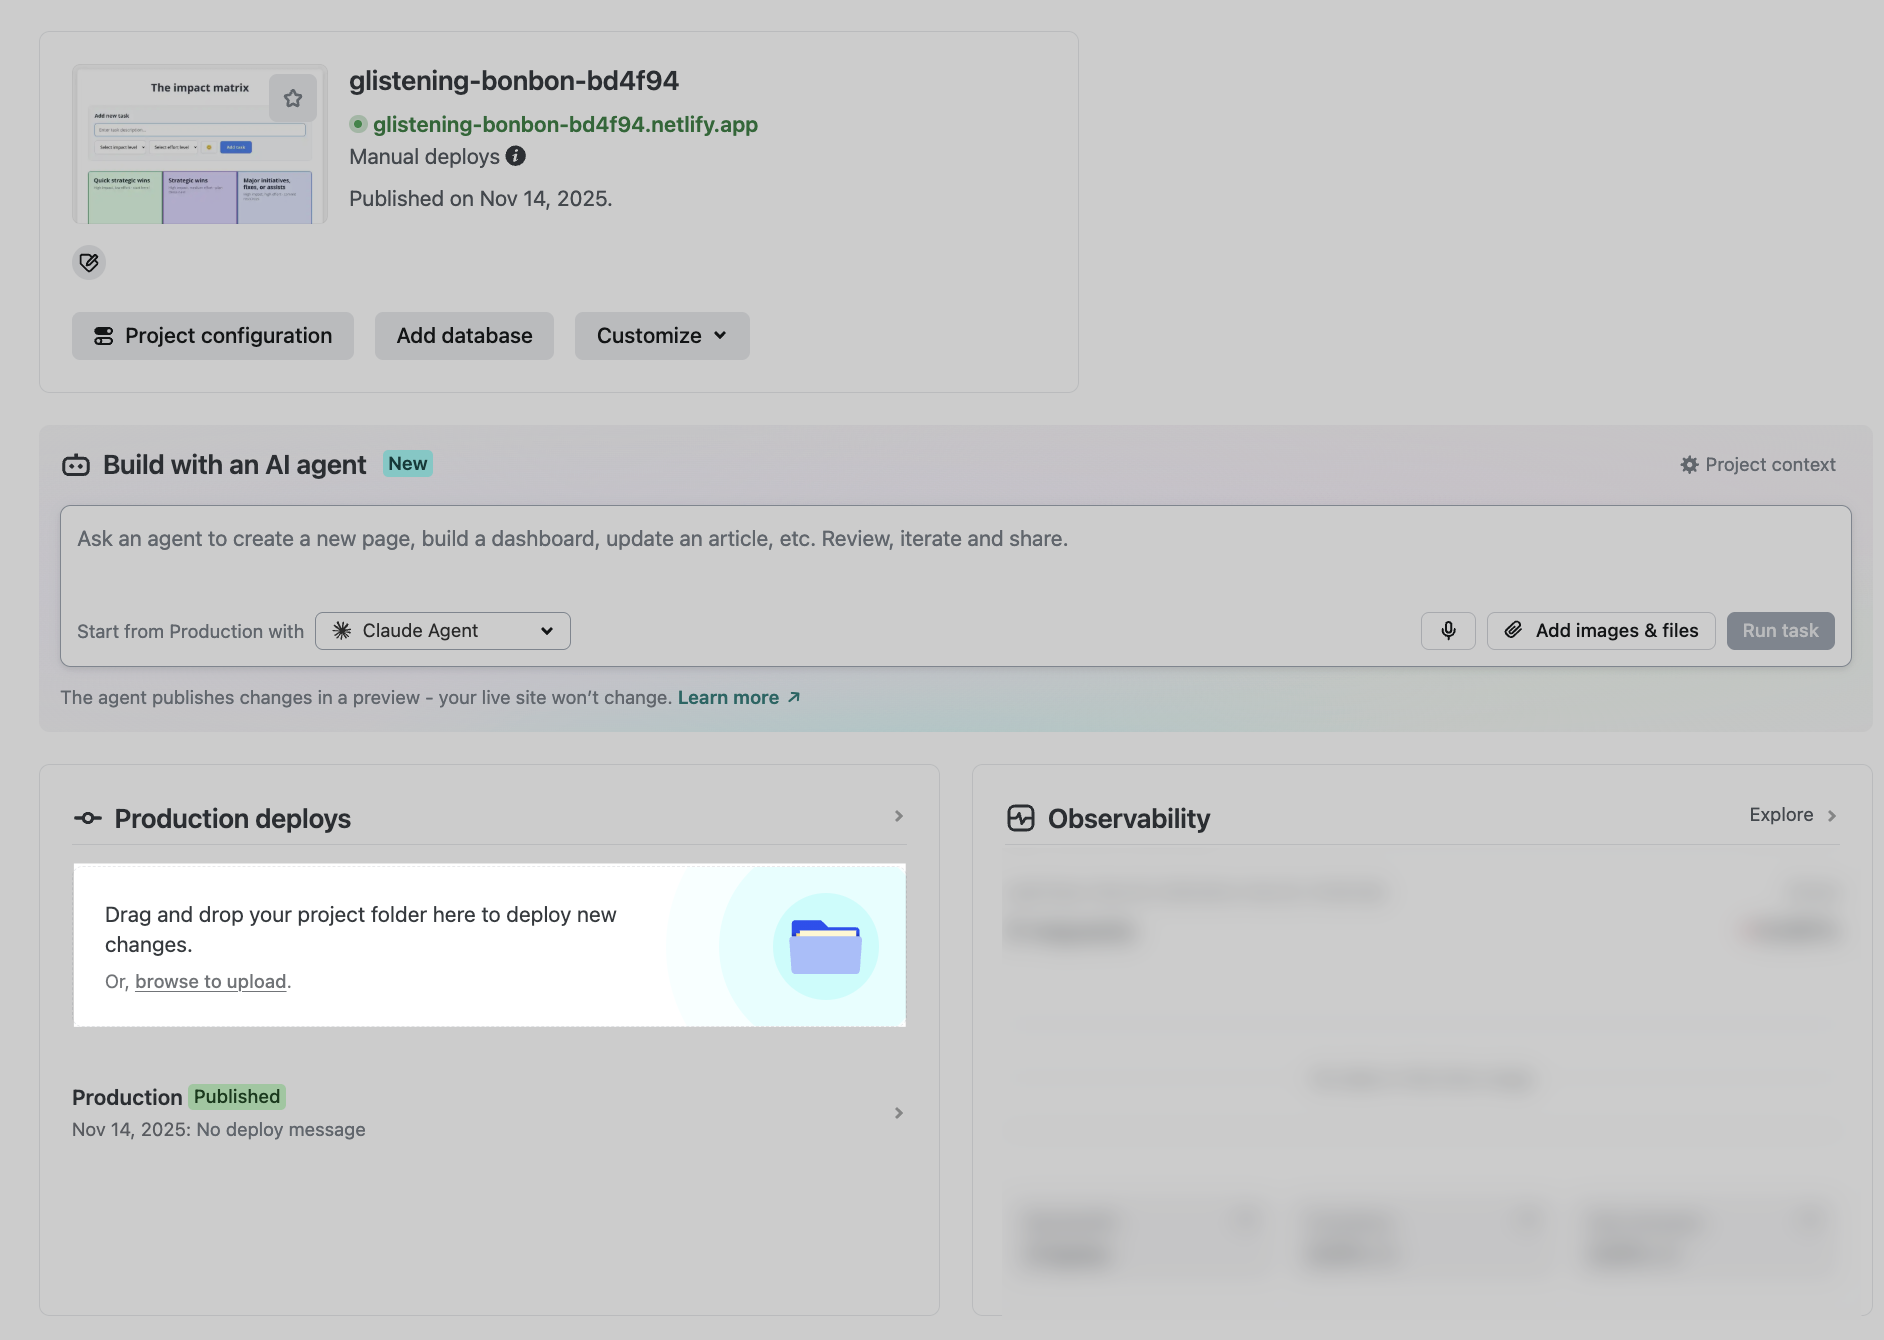
If your project files are in working order, your updates should automatically publish to a new live production version of your site or app. If you’re getting an error, check out the Troubleshooting tips.
Troubleshooting tips
Section titled “Troubleshooting tips”- What if my project isn’t working?
- Make sure your project folder isn’t too large. Deploys under 50MB work best, and individual files over 10MB may cause your deploy to get stuck. For larger projects, use the Netlify CLI.
- Check that you have a reliable network connection (network hiccups can cause a deploy to stall).
- Use the latest version of a Chromium-based browser.
- Make sure your computer has sufficient free memory; roughly 4x your uncompressed project size is a good baseline.
- Ask an AI assistant to help troubleshoot. We recommend sharing Netlify context for agents with your AI tool or connecting the Netlify MCP server to help it understand how to build and deploy your project. You can also search errors using Ask Netlify or the Netlify CLI.
- If you dropped a project that needs a build step, make sure you’re logged in — Netlify only builds your project for you when you’re signed in. Otherwise your files are published as-is. You can also build your project locally and drop the resulting output folder instead.
- Try running your project locally to confirm it works and to generate the build output folder.
- What if I update my project?
You can drag and drop your updated project folder into the Drop zone to deploy your latest changes. For steps, check out Make changes to a project published with Netlify Drop.
Did you find this doc useful?
Your feedback helps us improve our docs.