Team Owners can allow, and optionally require, team members to log in to Netlify through their company’s SAML single sign-on (SSO) provider.
Team Owners can configure SSO through an identity provider for one team at a time. If you want to set up SAML SSO for all teams in an organization, then we recommend you check out Organization SAML single sign-on.
We also generally recommend Organization SAML single sign-on for more streamlined setup and because it can offer a better experience for managing Netlify user access control in the visual editor.
Users who log in with Team SSO must have an email address that matches their user ID in your identity provider. For example, a Netlify user with the email address jane@company.com must also have this exact email address in your identity provider.
Configure SSO for your team
Section titled “Configure SSO for your team”First, you’ll need to configure a SAML SSO app or integration for Netlify within your identity provider. Next, you must complete your SAML SSO setup in Netlify. Finally, choose whether to require your users to log in to Netlify with SSO through your identity provider.
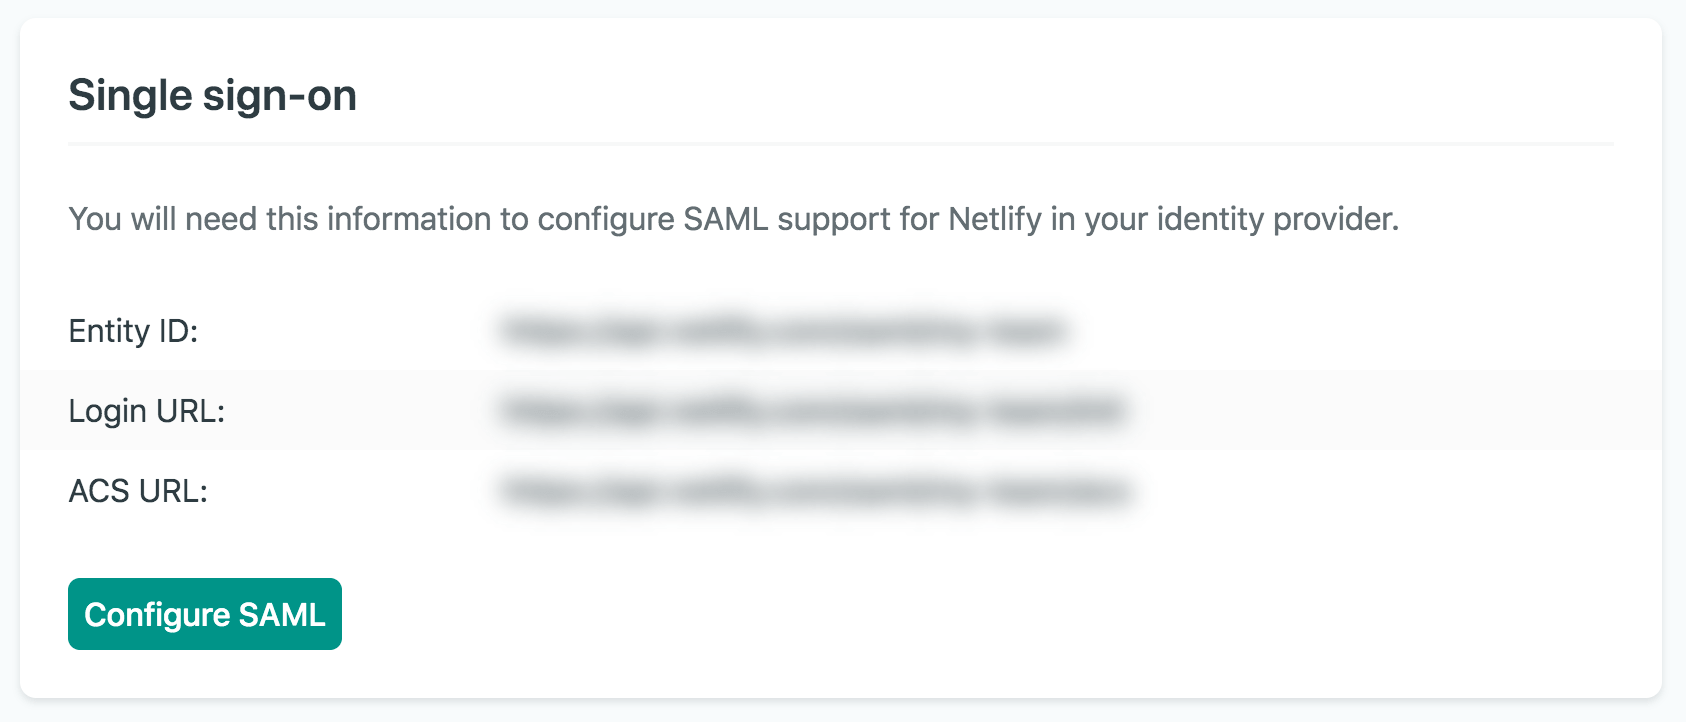
Before configuring SAML SSO in your identity provider, we recommend you log in to Netlify to easily access the URLs you will need for your identity provider setup. To preview these URLs on Netlify, go to Team settings Access & security Authentication Single sign-on so you can copy the required Netlify setup URLs when needed.
1. Set up a Netlify SAML integration or app in your identity provider
Section titled “1. Set up a Netlify SAML integration or app in your identity provider”Choose an identity provider below for specific guidance on setting up a SAML SSO login for your Netlify team.
To configure Netlify SAML SSO with Okta:
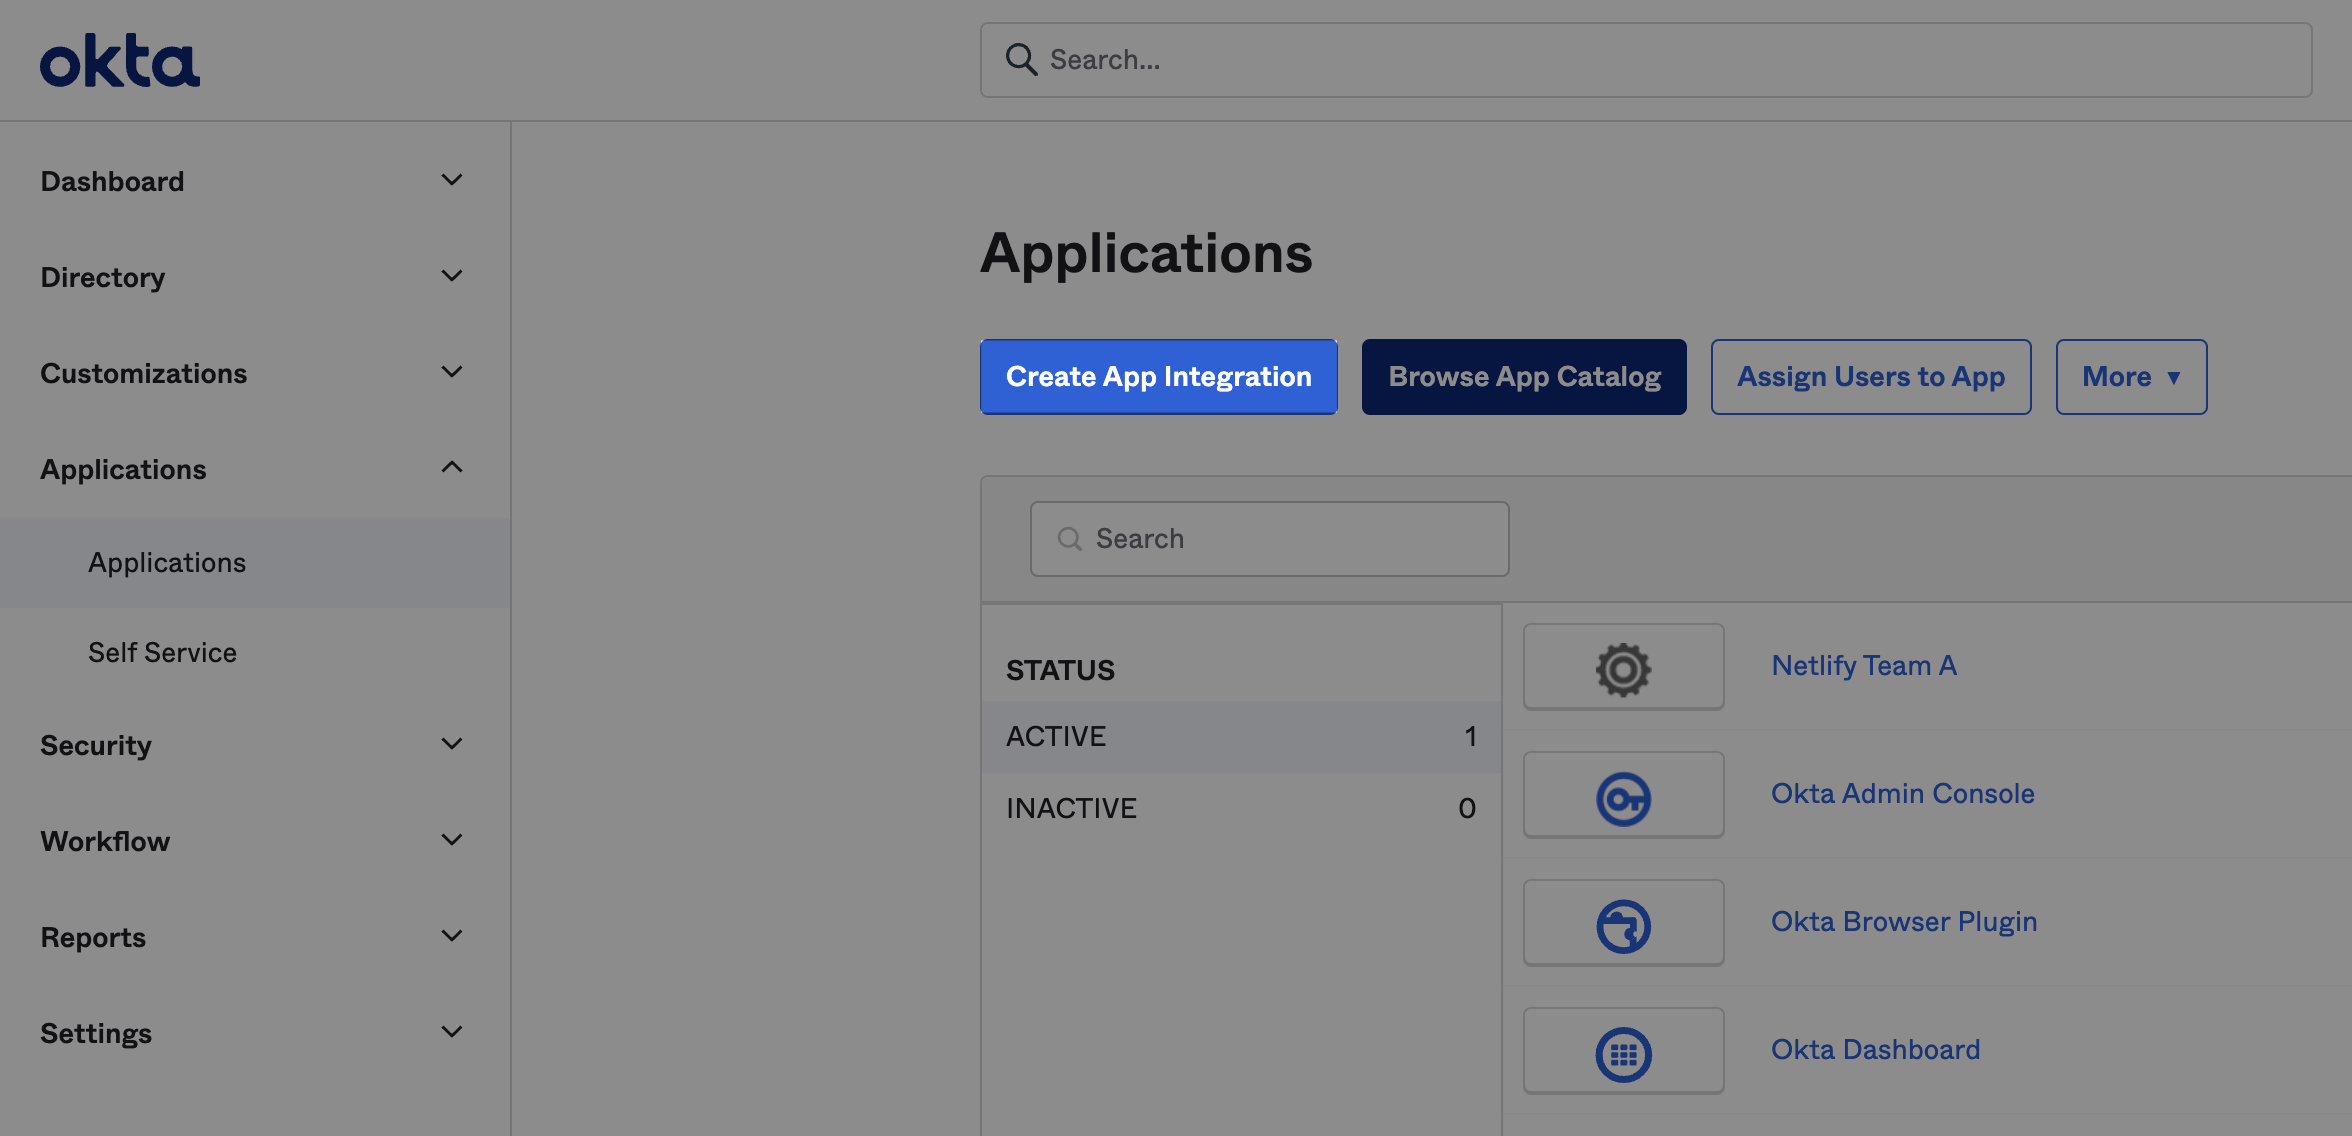
- In your Okta Admin portal, go to Applications and select Create App Integration.
- For Sign-in method, select SAML 2.0 and then Next.
- Next to App name, enter a name for your Netlify integration. If you plan to use more than one team with Netlify, you may choose to include “Netlify” and your Netlify team name. Optionally, include the Netlify app logo. Then, select Next.
- To configure your SAML integration, copy and paste your Netlify SAML SSO URLs into Okta. To access these URLs on Netlify, go to Team settings Access & security Authentication Single sign-on.
- Copy the required Netlify URLs into Okta.
- In Netlify, copy the ACS URL and paste this URL in Okta next to Single sign-on URL. Select Use this for Recipient URL and Destination URL.
- In Netlify, copy the Entity ID and paste this URL in Okta next to Audience URI (SP Entity ID).
- In Okta, under Attribute Statements, add mappings for your users manually.
- To complete the Okta SAML SSO app integration setup wizard steps, share feedback on the type of Okta Support you may need for this integration.
- Select I’m an Okta customer adding an internal app.
- For App type, select This is an internal app that we have created.
- Select Finish.
- To copy your integration’s Metadata XML and Metadata URL for the setup steps in Netlify, scroll to the bottom of your new Netlify Team SSO app integration page in Okta and select View SAML setup instructions.

You may want to keep this Okta setup page open for the next steps in Netlify to copy the Metadata URL and XML.
For more help with setting up your Netlify integration with Okta, check out these Okta SAML app integration docs.
To configure Netlify SAML SSO for your team using Google as your identity provider:
- Check out this legacy Google SAML help doc originally created by Netlify Support
- Check out the official Google SAML docs
We are working to improve the SSO SAML setup experience with identity providers. If you need additional help, please reach out to Netlify Support.
To configure Netlify SAML SSO for your team using OneLogin as your identity provider:
- Check out this legacy OneLogin SAML help doc originally created by Netlify Support
- Check out the official OneLogin SAML docs
We are working to improve the SSO SAML setup experience with identity providers. If you need additional help, please reach out to Netlify Support.
To configure Netlify SAML SSO for your team using Ping Identity PingOne as your identity provider:
- Check out this legacy Ping Identity PingOne SAML help doc originally created by Netlify Support
- Check out the official Ping Identity PingOne SAML docs
We are working to improve the SSO SAML setup experience with identity providers. If you need additional help, please reach out to Netlify Support.
To configure Netlify SAML SSO for your team using Azure Active Directory as your identity provider:
- Check out this legacy Azure Active Directory SAML help doc originally created by Netlify Support
- Check out the official Azure AD SSO docs
We are working to improve the SSO SAML setup experience with identity providers. If you need additional help, please reach out to Netlify Support.
Most SAML 2.0 compliant identity providers require the same information from a service provider, such as Netlify.
To set up SAML SSO with a different identity provider, follow your identity provider’s docs and enter the Netlify-specific values from your Netlify team settings at Team settings Access & security Authentication Single sign-on.
Your identity provider may use slightly different language for these values. Here’s how the Netlify URLs/ID may match your identity provider configuration.
| Identity Provider UI | Netlify UI |
|---|---|
| ACS/SSO URL | ACS URL |
| Entity ID/Audience | Entity ID |
| Login/Start URL | Login URL |
We are working to improve the SSO SAML setup experience with identity providers. If you need additional help, please reach out to Netlify Support.
2. Complete SAML SSO setup in Netlify
Section titled “2. Complete SAML SSO setup in Netlify”After configuring your SAML Netlify app/integration in your identity provider and copying your app’s Metadata URL and Metadata XML, you can complete your SSO set up in Netlify.
-
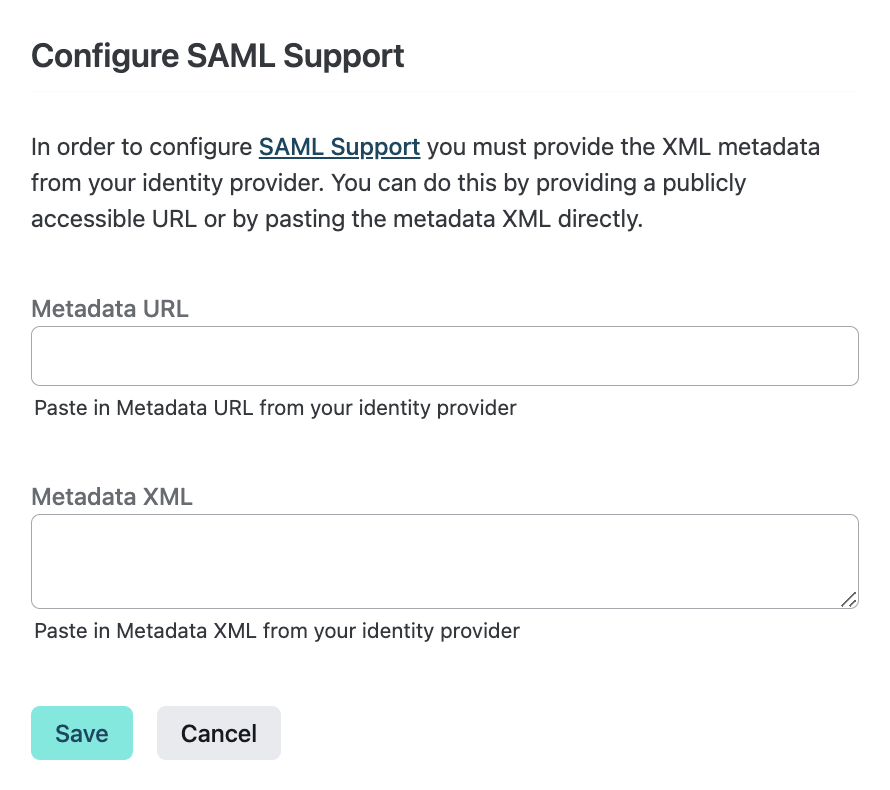
On Netlify, go to Team settings Access & security Authentication Single sign-on and select Configure SAML.
-
Paste the Metadata URL and Metadata XML that you copied from your identity provider. Confirm with Save.
Now team members should be able to optionally log in to your team using SSO through your identity provider. Note that before a team member first logs in to Netlify using your team’s SSO setup, they must go to their email inbox to verify their email address through an email we send. This applies even if the team member already had access to your team.

3. Choose whether to require SSO login through your identity provider
Section titled “3. Choose whether to require SSO login through your identity provider”By default, once you complete SAML SSO configuration for your team, SSO login through your identity provider is optional for all Netlify team members. If you want to require SSO login, you must change your Team SSO settings.
As a final setup step, choose how you want your team members to log in to the Netlify app with these options:
- Enforce SSO login for all. Require all Netlify team members (except Git Contributors) to log in using SSO through your identity provider to access your Netlify app. In the Netlify UI, this option is Only SSO allowed (strict). Learn more about the strict SSO login type.
- Enforce SSO login with Team Owners exception. Require all Netlify team members (except Team Owners and Git Contributors) to log in using SSO through your identity provider with an exception for Netlify Team Owners in case they lose access to the identity provider. In the Netlify UI, this option is Only SSO allowed (with Owner fallback). Learn more about this Owner fallback login type.
- Optional SSO login through your identity provider. Team members can choose to log in to Netlify using their email, GitHub, GitLab, or Bitbucket login. In the Netlify UI, this option is All login types allowed. Learn more about this login type.
For more detailed instructions, check out Manage Team SSO login types.
Manage Team SSO login types
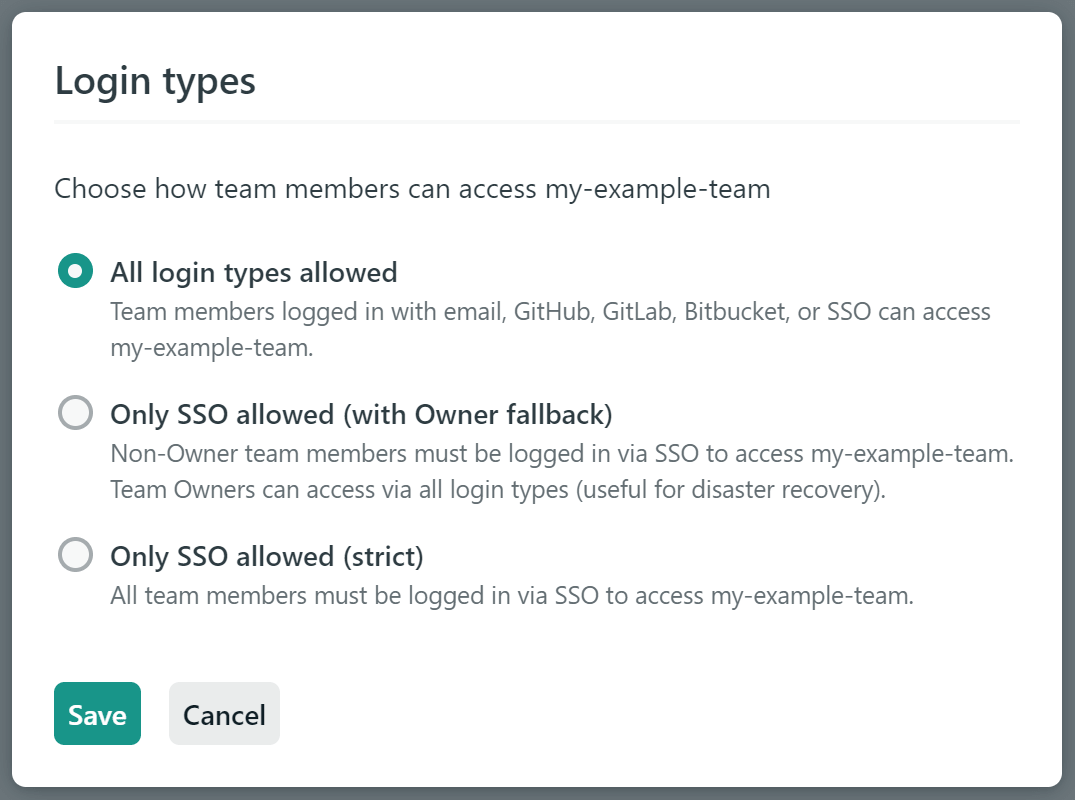
Section titled “Manage Team SSO login types”By default, teams with single sign-on enabled allow but do not require team members to log in using SSO. Team Owners can change the allowed login types to require that team members be logged in using SSO in order to access the team. To do this, go to Team settings Access & security Authentication Single sign-on and select Edit login types.
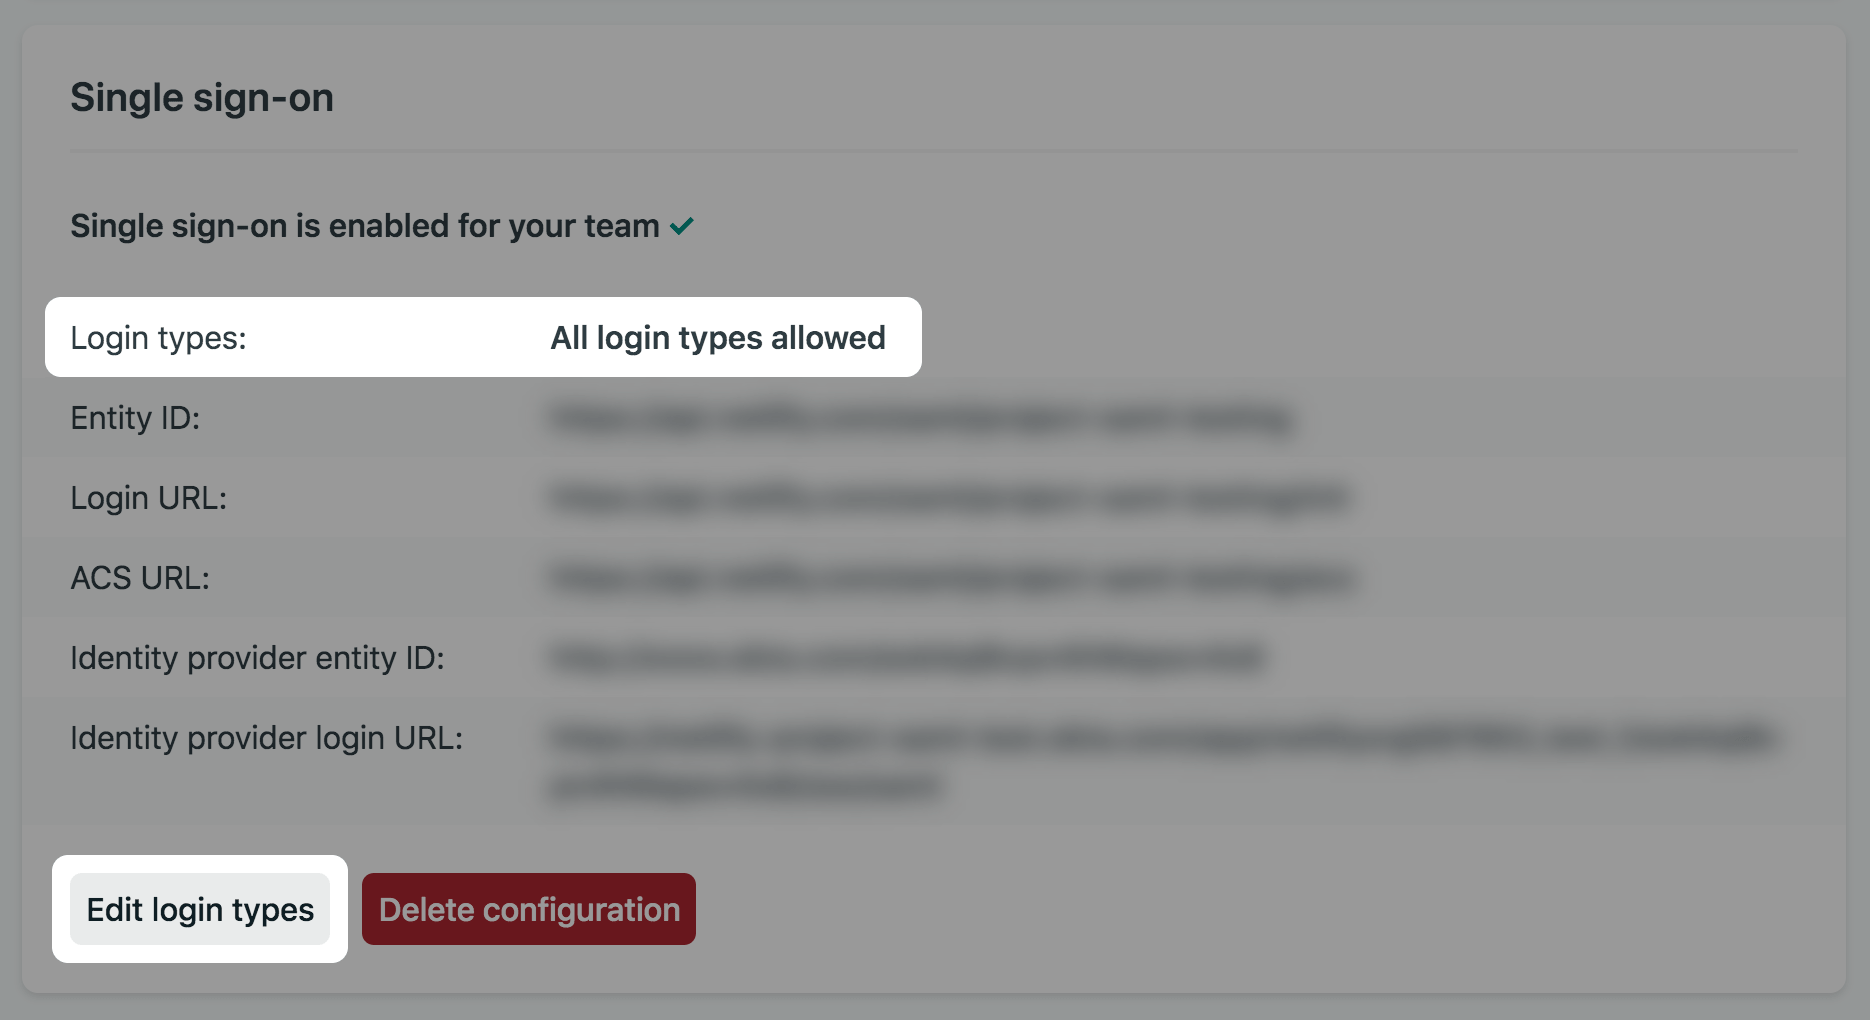
Then choose how team members can access your team. You can select All login types allowed, Only SSO allowed (with Owner fallback), or Only SSO allowed (strict).
All login types allowed
Section titled “All login types allowed”When all login types are allowed, team members will still be able to access your team when logged in with email, GitHub, GitLab, or Bitbucket. SSO becomes a new login option, but it is not required. You might have team members accessing your team with their personal users rather than with users that have company email addresses that you provision using your identity provider.
Only SSO allowed
Section titled “Only SSO allowed”The Only SSO allowed option includes two variants for different scopes of enforcement based on team member roles.
- Only SSO allowed (with Owner fallback): all team members except Owners will be required to log in using SSO to access your team. Team Owners will still be able to log in with email, GitHub, GitLab, or Bitbucket, in case your identity provider has an outage or other issue.
- Only SSO allowed (strict): all team members, including Owners, will be required to log in using SSO to access your team.
When you set Login types to either of the options above, several things (as outlined below) will happen to ensure that your team can be accessed by only the users you’ve provisioned with your identity provider. To facilitate this you’ll need to enter your company email domain in the form of @corp.com.
In the points below, “affected team members” refers to all non-Owner team members when selecting enforcement with Owner fallback, and to all team members when selecting strict enforcement.
- Affected team members with email addresses outside of the company email domain will be removed from this team. Before saving this setting you may want to check the email addresses in your team member list and ask team members to ensure their email address is on the company email domain.
- Remaining affected team members who logged in with email, GitHub, GitLab, or Bitbucket will be denied access to the team until they sign out and then log back in using SSO. You may want to let your team members know to expect this, especially if they are a member of other teams where all login types are allowed.
- API calls using access tokens generated by affected team members will be denied access by default. This applies to both personal access tokens and tokens from authorized applications. You may want to let your team members know to expect this, especially if they generated tokens in the past. If your team needs to use access tokens, there are a couple options:
- You can select enforcement with Owner fallback which won’t affect access tokens generated by Team Owners.
- Affected team members can generate new tokens and grant SAML access to those tokens.
- All team members (including Owners) will no longer be able to save changes to their email address or password in their user settings. These changes will need to be made using your identity provider.
Did you find this doc useful?
Your feedback helps us improve our docs.