For the complete Netlify documentation index, see llms.txt. Markdown versions of this page are available by appending .md to the URL. Learn different ways to set up Claude Desktop for use with Netlify.
This setup guide includes:
- several ways to set up your Claude Desktop agent for success
- how to use the Netlify connector and Netlify agent skills
Before you begin
Section titled “Before you begin”- Claude Desktop installed.
- A Claude account.
- A Netlify personal account or team workspace.
We recommend you have a project to test deploying. This can be an existing project or a new project.
Quick setup with netlify.ai
Section titled “Quick setup with netlify.ai”Equip your agent with the latest Netlify context, including agent skills:
fetch https://netlify.ai to help me deploy and build with Netlify using the latest agent skillsConnect to the Netlify connector
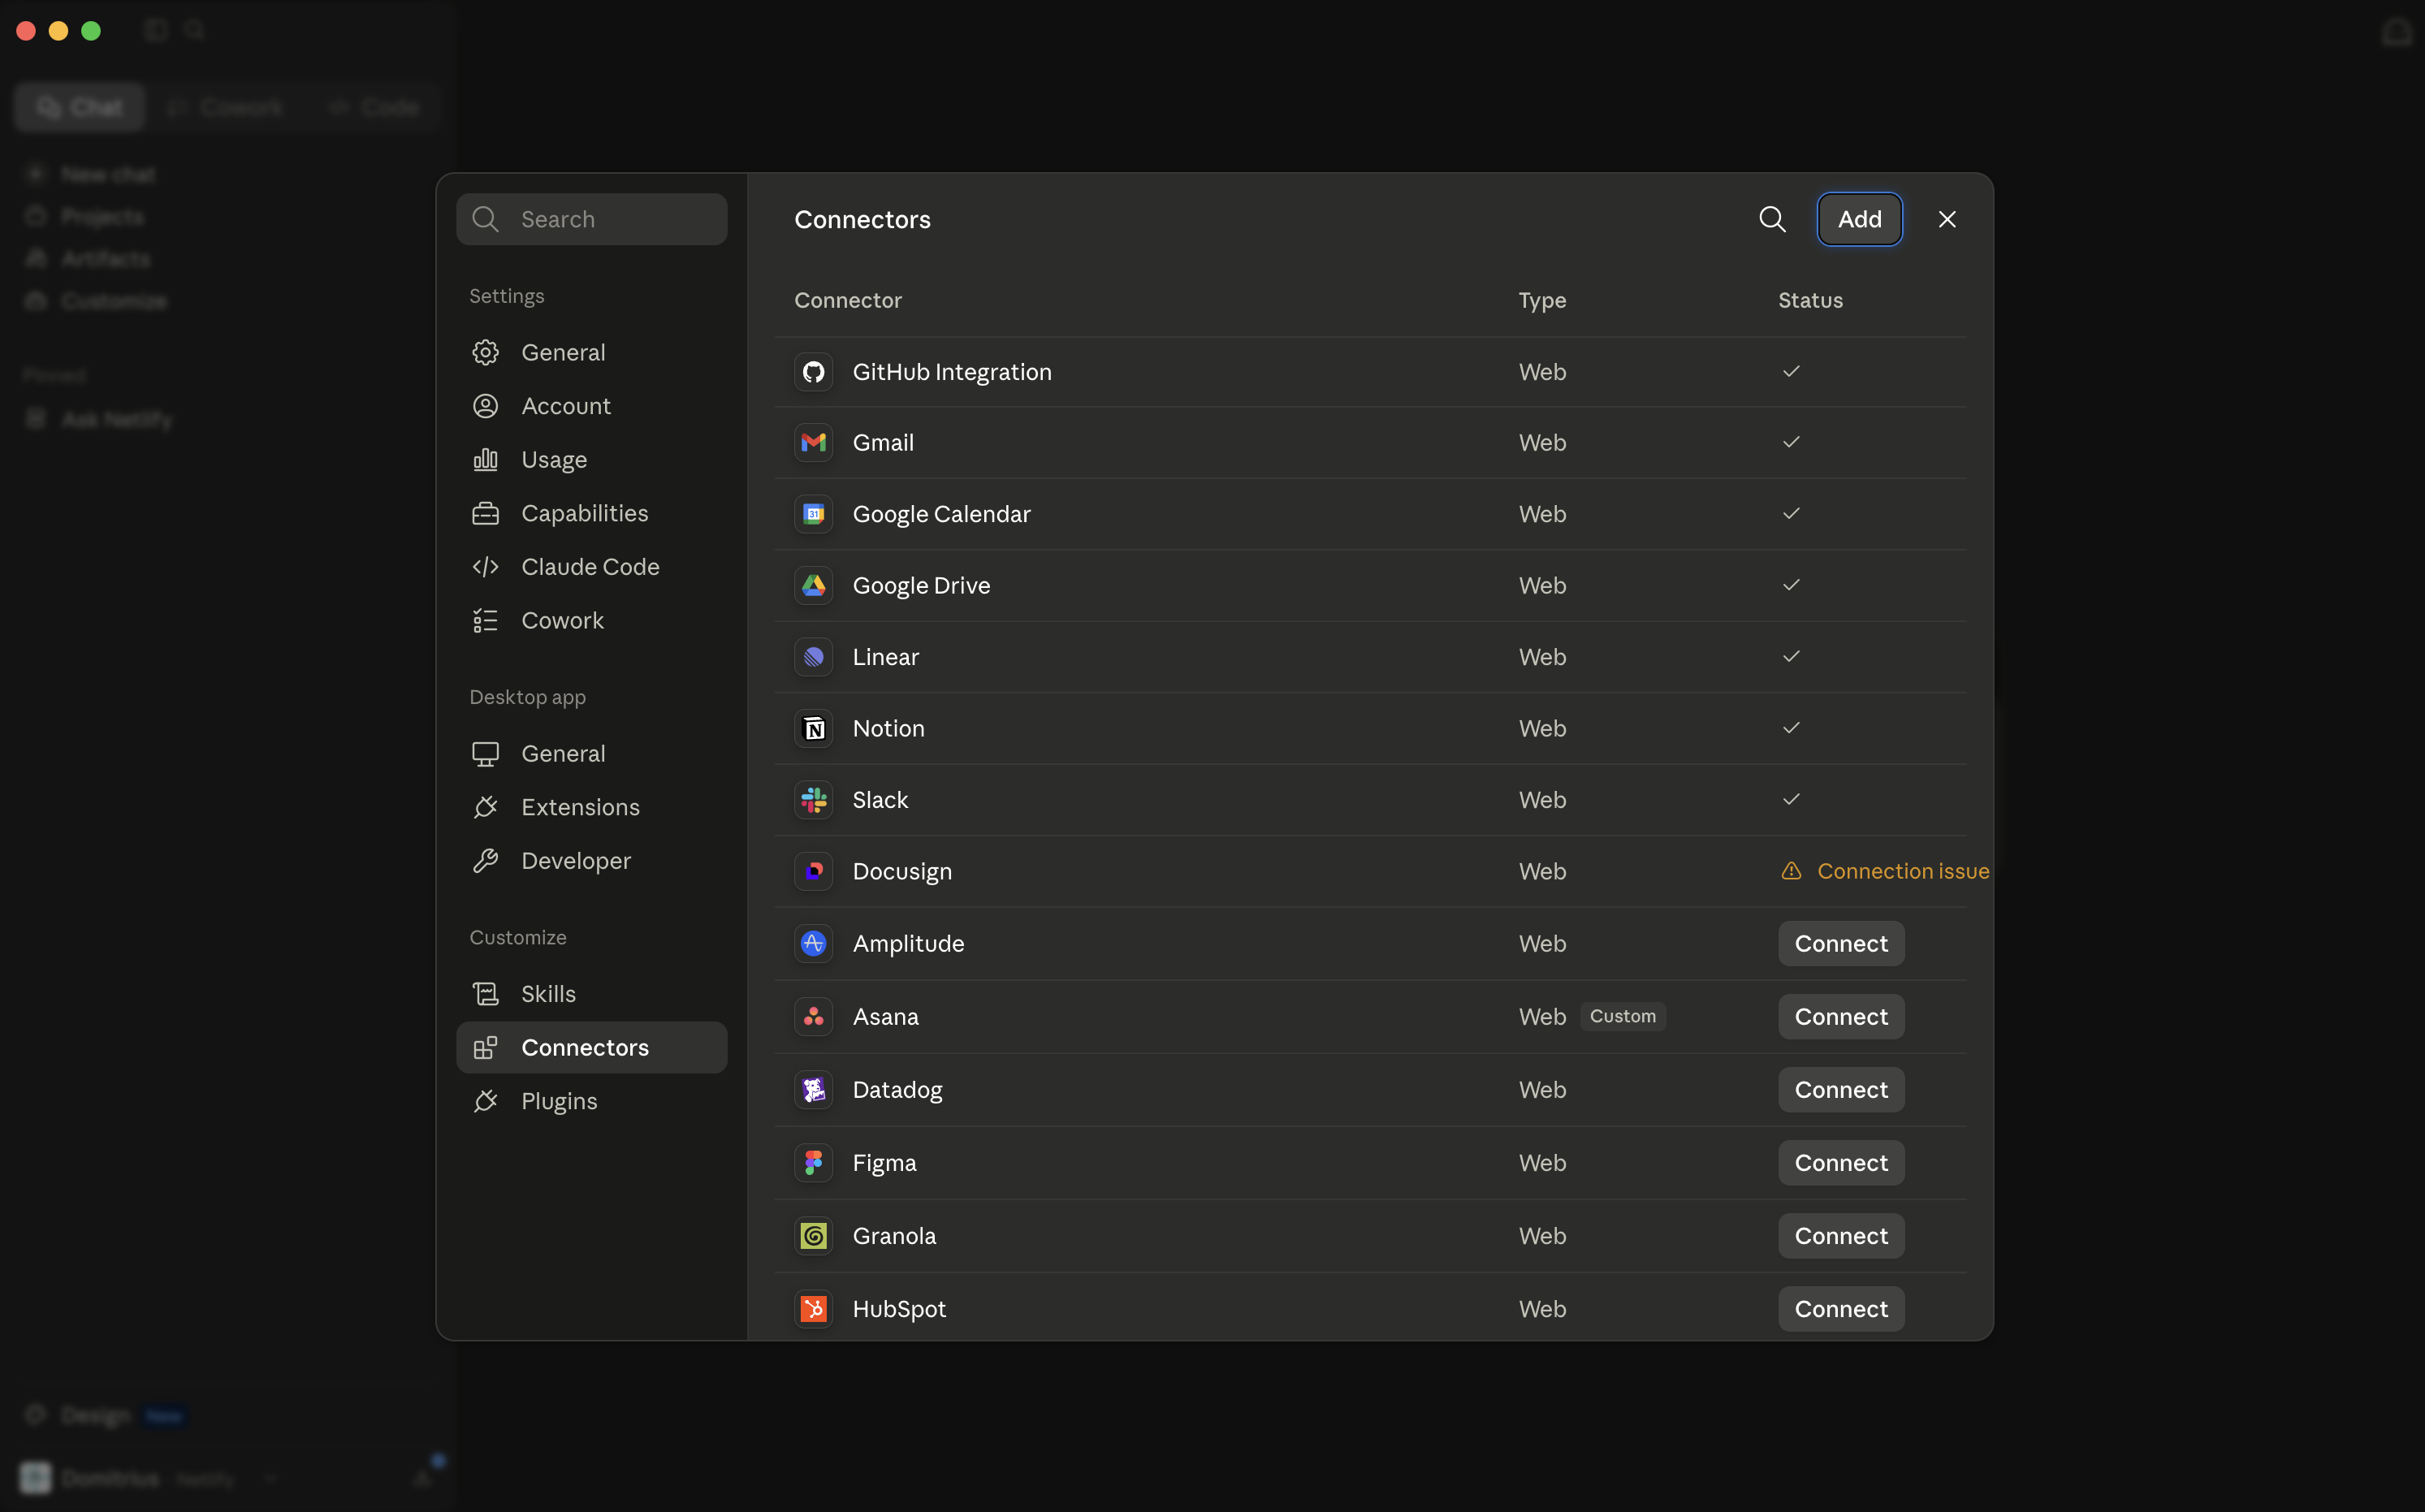
Section titled “Connect to the Netlify connector”To connect to the Netlify Connector for Claude:
-
From Claude Desktop, go to Settings, then select Connectors.
-
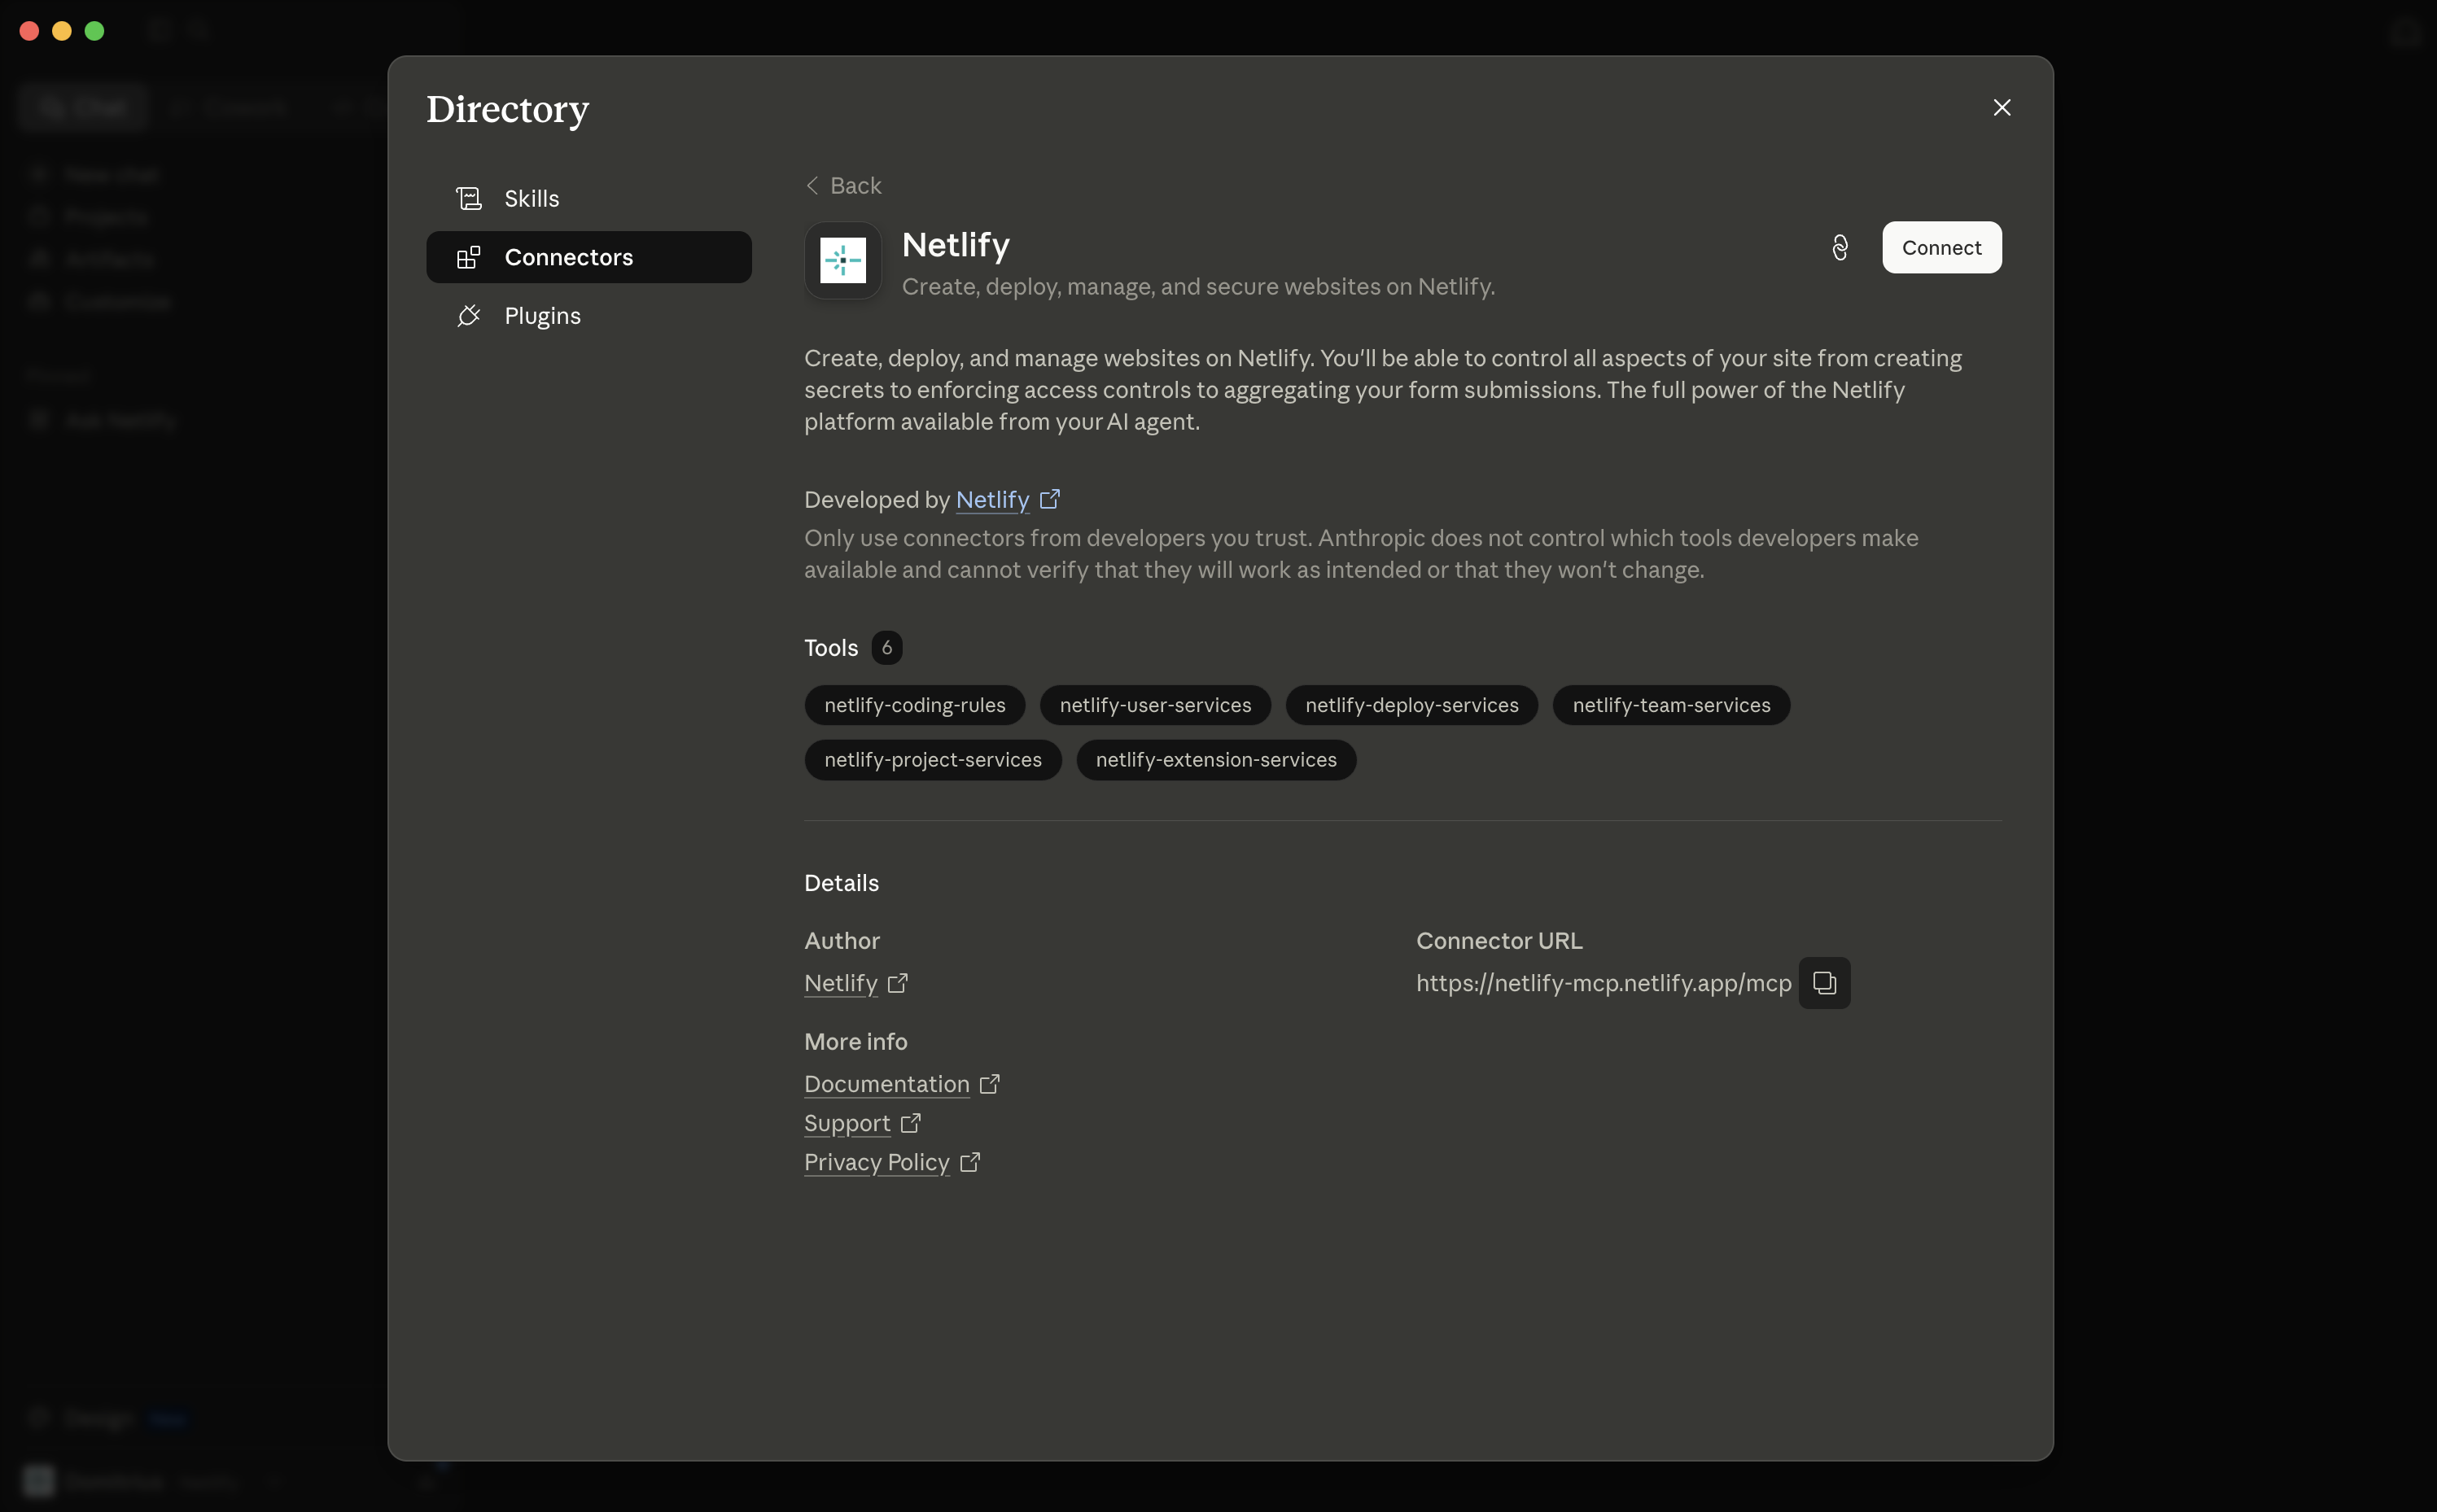
Select Add, search for Netlify, then select Netlify.
-
Select Connect and follow the authorization flow to connect your Netlify account.
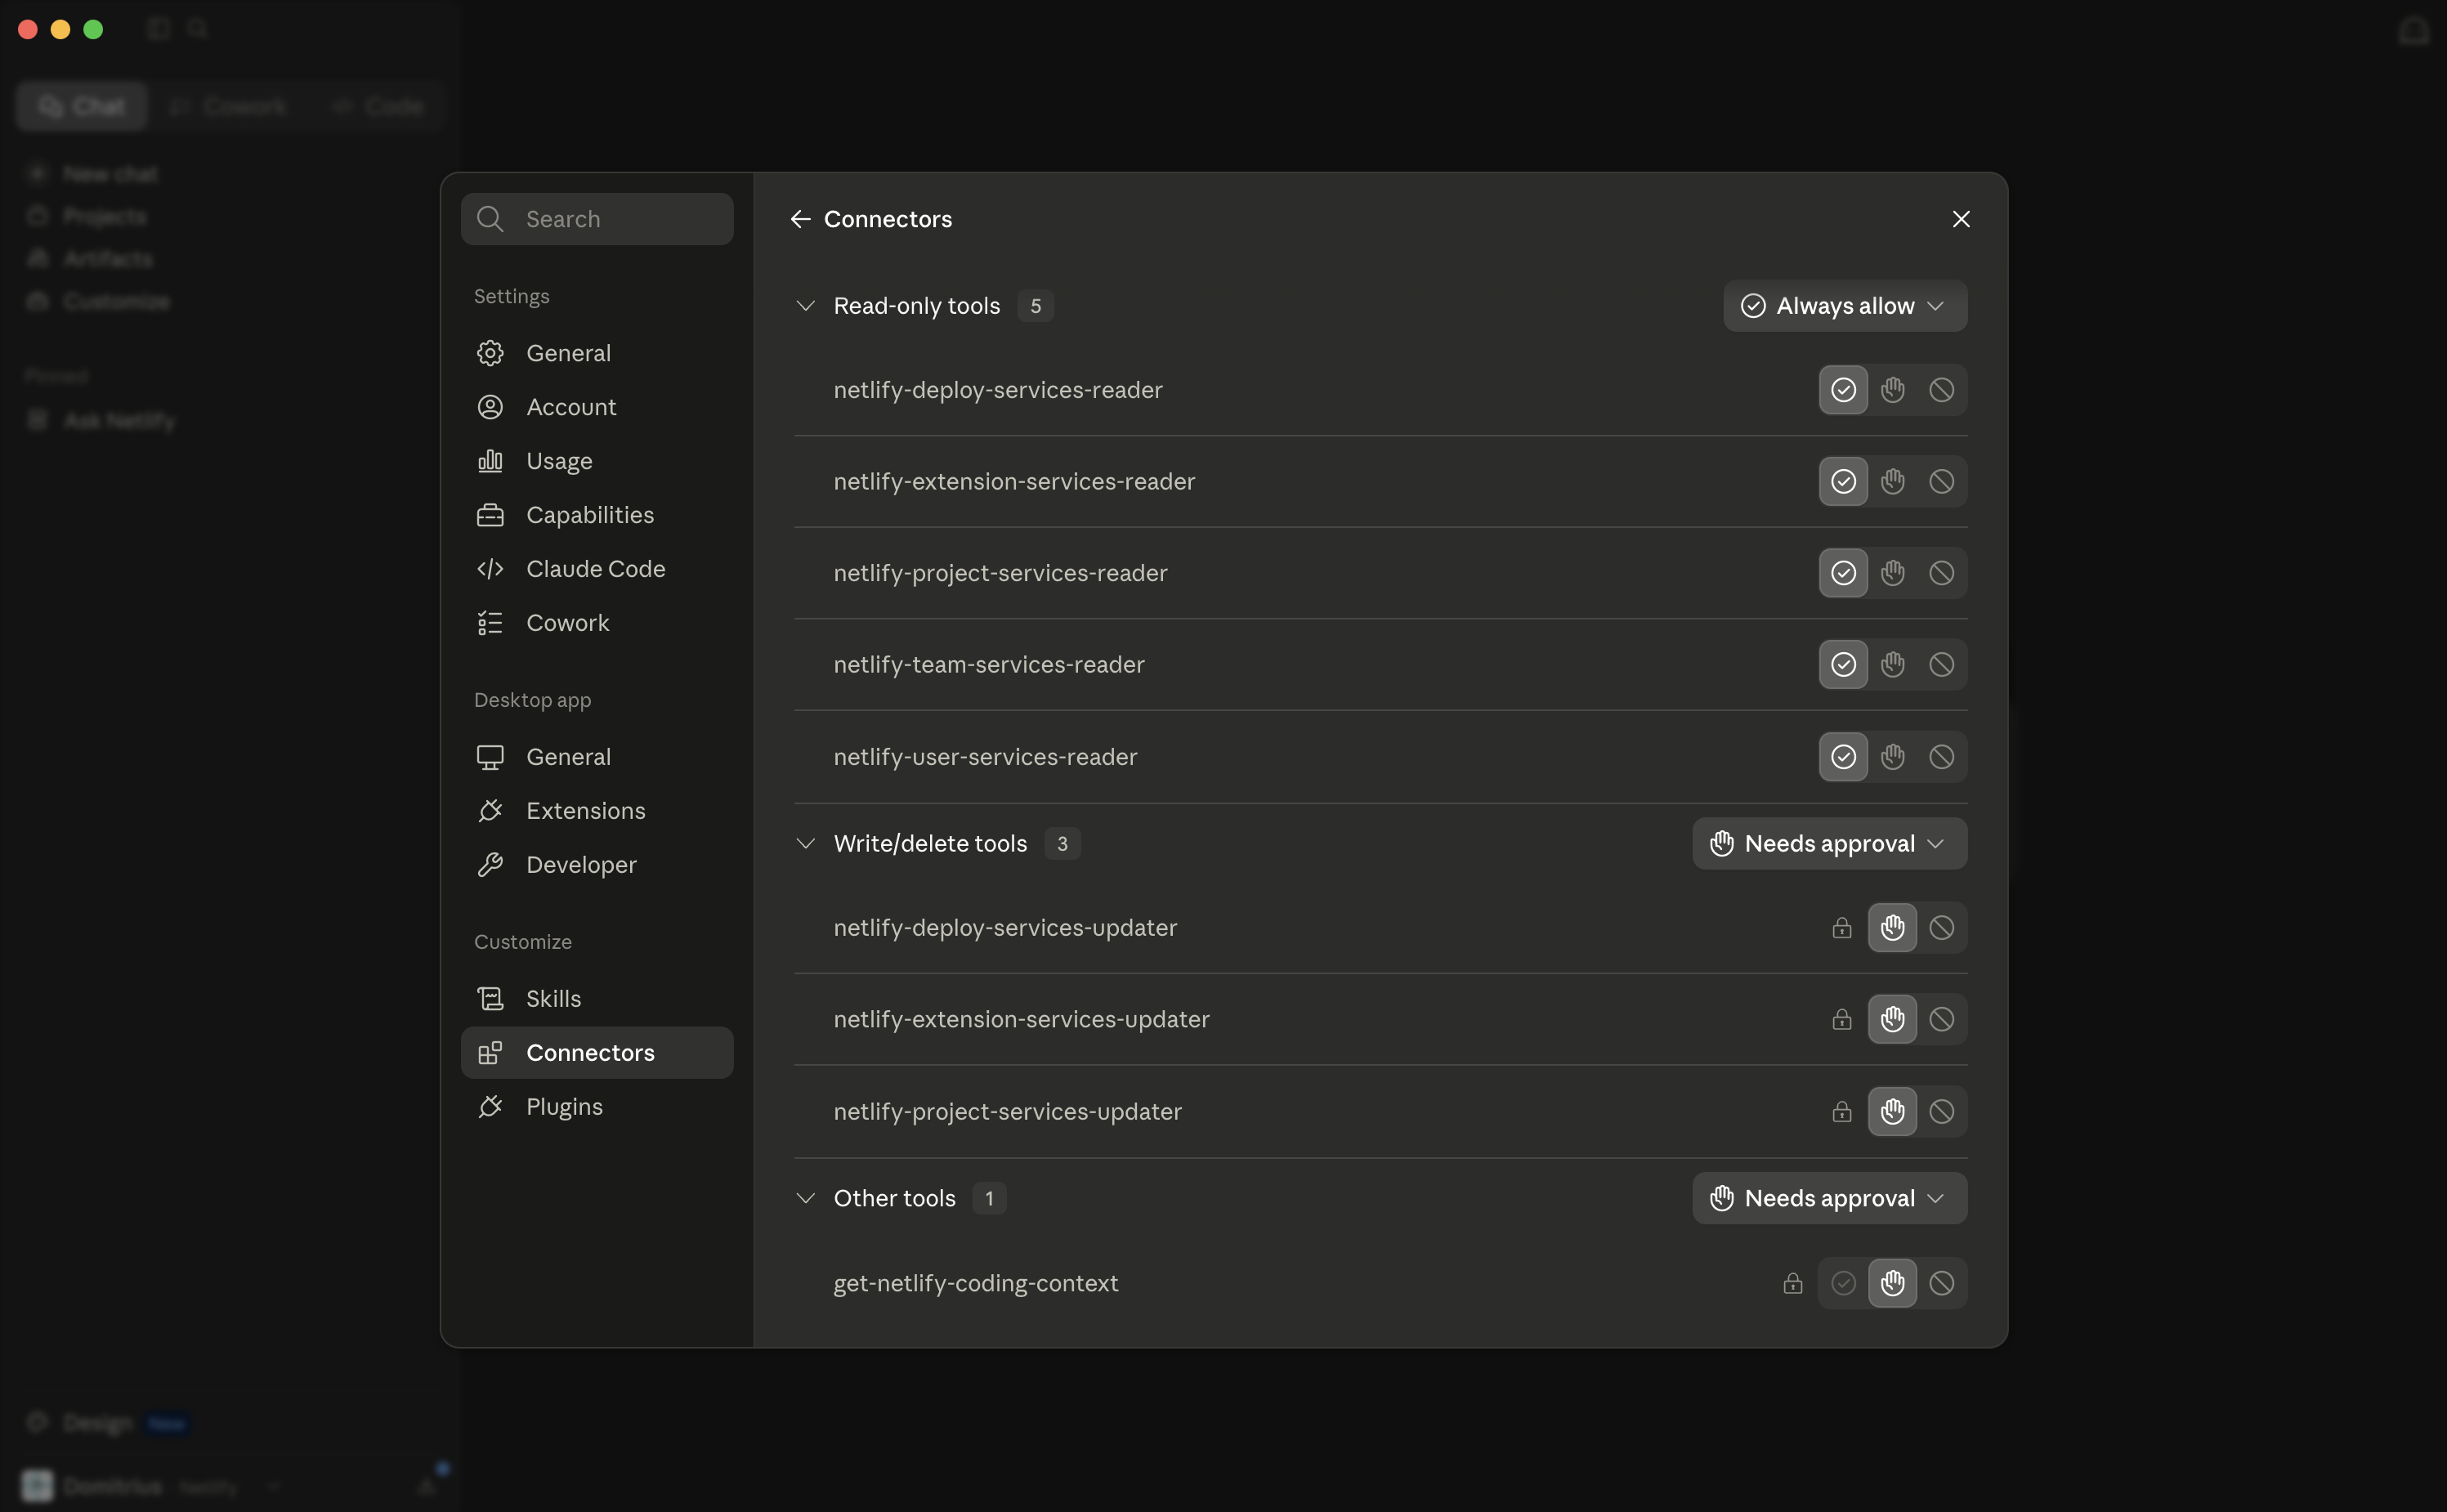
Configure tool permissions
Section titled “Configure tool permissions”After you connect Netlify, configure tool permissions for the Netlify connector. For more context on connector permissions, check out Claude's docs on restricting actions within connected services.
We recommend the following settings so that Claude Desktop can always read Netlify context without extra approval, while requiring users to approve actions that can change Netlify resources. Note that your Claude Admin may also set some of these permissions for you, especially for custom tools like the Netlify Connector.
| Permission level | Recommended setting |
|---|---|
| Read-only tools | Always allow |
| Write/delete tools | Needs approval |
| Other tools | Always allow |
Install agent skills for Netlify
Section titled “Install agent skills for Netlify”To help your agent build with best practices, check out our agent skills for building and deploying on Netlify.
You can share a skill directly with your agent or have all skills installed in your local project files or repository. Some agents also support invoking a specific skill by name in a command, such as Claude Desktop with /<skill-name>.
To install agent skills for Netlify with any agent directly in your Claude desktop's agent chat or terminal window:
npx skills add netlify/context-and-tools --skill '*' --yesLearn more about agent skills for building and deploying on Netlify in our official agent skills repository.
Invoke Netlify skills
Section titled “Invoke Netlify skills”After Claude Desktop has Netlify skills available, type / in the chat composer and select the relevant Netlify skill.
For example, use /netlify-functions when you want Claude Desktop to help build or update Netlify Functions, or /netlify-deploy when you want Claude Desktop to help prepare a deploy.
Use the Netlify connector in Claude Desktop
Section titled “Use the Netlify connector in Claude Desktop”The Netlify Connector helps simplify your prompts so you don't have to mention specific tool calls or invoke skills. The connector works by giving Claude the context it needs to choose which tool is needed based on the prompt. This dynamic tool selection is called deferred tool calling.
Instead, describe the Netlify task you want Claude to complete. When the task needs Netlify access, Claude can load the relevant connector tools and use them for the request.
For example:
| Prompt | What Claude can do |
|---|---|
| "Deploy this project to Netlify." | Load Netlify deploy tools and start a deploy. |
| "What's the status of my latest deploy?" | Load Netlify read tools and fetch deploy status. |
| "Show me my Netlify projects." | Load Netlify project tools and list available projects. |
| "Check my team's Netlify settings." | Load Netlify team tools and fetch team information. |
Next steps
Section titled “Next steps”As a next step, consider deploying your project or building custom experiences with Netlify primitives.
Deploying
Section titled “Deploying”When you're ready to deploy a production version or draft version of your site or app, tell Claude Desktop, which can help you do this. We recommend deciding how you want to deploy first.
| Ways to test deploying | Description | CLI command |
|---|---|---|
| draft deploy | Safe way to test a deploy without deploying to production | netlify deploy |
| production deploy | Deploy to the live production version of your site or app, most often used as the first deploy for a new project and less often once the project is live on Netlify | netlify deploy --prod |
| anonymous deploy | Most often used for temporary projects or for AI agents testing flows, this command can generate a temporary live URL. You have one hour to claim ownership of the deployed project by logging in or creating a Netlify account. After one hour, unclaimed projects are removed. | netlify deploy --allow-anonymous |
Learn more about deploy types and the CLI:
Building with primitives
Section titled “Building with primitives”After confirming you can deploy successfully, consider building custom experiences with Netlify’s agent skills.
You can try some of these prompt ideas based on the capabilities of Netlify’s primitives:
- "Add a new contact page to my site using Netlify Forms with spam protection"
- "Convert this Express endpoint into a Netlify Function"
- "Implement an Edge Function that geolocates users and rewrites to localized content"
- "Check my netlify.toml configuration for issues"
Troubleshooting Claude Desktop setup for Netlify
Section titled “Troubleshooting Claude Desktop setup for Netlify”Get help with some common troubleshooting issues.
Authentication issues
Section titled “Authentication issues”If you're having issues logging in to Netlify, consider whether your company has enabled Netlify SSO and whether you need to use a different work login or personal user ID or email to log in.
For more help authenticating to Netlify, check out our docs on CLI auth.
You can prompt Claude Desktop to help you log in, or use the CLI command netlify login.
If your project doesn't contain sensitive information, you can try running an anonymous deploy using the Netlify CLI to get a test deploy that will expire within an hour unless it is claimed.
Connector issues
Section titled “Connector issues”If Claude Desktop can't access Netlify tools, open Claude Desktop Settings, then select Connectors and confirm the Netlify connector is connected.
If the connector is connected but Claude Desktop asks for approval too often or can't complete an action, check your Netlify connector permissions. We recommend setting read-only tools to Always allow, write/delete tools to Needs approval, and other tools to Always allow.
Deploy issues
Section titled “Deploy issues”You can try running an anonymous deploy to isolate some deploy issues, such as auth issues. We only recommend this if your project doesn't contain sensitive information, since the anonymous deploy generates a temporary URL that expires within an hour unless it's claimed.
Netlify CLI issues
Section titled “Netlify CLI issues”To check that Netlify CLI is installed:
netlify statusTo test that you are connected to the correct Netlify account:
netlify loginTo directly install latest version of the Netlify CLI, run this command in your terminal:
npm install -g netlify-cliThen confirm your setup with netlify --help or just netlify.
Netlify skills don't install or seem outdated
Section titled “Netlify skills don't install or seem outdated”Try installing or referencing Netlify skills directly from the Netlify agent skills repository.
# Install Netlify skillsnpx -y skills add netlify/context-and-tools --skill '*' --yesIf you confirm you have the latest agent skill, you can ask Claude Desktop to use it directly in a session using /<skill-name> or a URL to the skill file in Netlify’s agent skills repository.
Node issues
Section titled “Node issues”For the best experience, we recommend using Node 24 or higher.
In your terminal, run node --version to check your current version.
If you have a Node version manager like nvm, you can run nvm install 24 to install Node 24 and nvm use 24 to use it.
For more agent setup guidance, check out the agent setup overview.
Did you find this doc useful?
Your feedback helps us improve our docs.