Control who can access each project on your team so that you can support internal tools, different collaboration workflows, and review needs.
Overview
Section titled “Overview”Team Owners can customize granular project access for Netlify members on your team.
This allows you to control which projects a member can access and what role they have on each project.
Example
Section titled “Example”For example, as a Team Owner, you can give Marty on the Marketing team the Internal Builder role as a default role on the team for existing and future Netlify projects. This allows Marty to update landing pages with their favorite AI agent using Agent Runners for a Marketing site and have those changes reviewed by people in the Developer role in pull/merge requests.
If Marty decides to build a custom internal tool, Marty can create a new project and Netlify automatically gives Marty a Developer role for the project they created. The Netlify team is only billed for one member seat but Marty can have different roles across projects on the same team.
Supported roles
Section titled “Supported roles”Only certain roles can have granular project access.
| Role | Granular project access | Notes |
|---|---|---|
| Developer | ✓ | Owners can customize which projects Developers can access |
| Publisher | ✓ | Owners can customize which projects Publishers can access |
| Internal Builder | ✓ | Owners can customize which projects Internal Builders can access |
| Reviewer | ✓ | Owners can customize which projects Reviewers can access |
| Owner | Owners always have access to all projects within the team | |
| Billing Admin | Billing Admins can only access the billing dashboard | |
| Git Contributor | Git Contributors have no access to the Netlify platform beyond triggering deploys |
To learn more about the permissions of each role, check out Roles and permissions.
If a team member is provisioned by your organization’s Directory Sync, then keep these guidelines in mind.
Change a member’s project access
Section titled “Change a member’s project access”When inviting a member to your team, you can set their project access.
As an Owner, to change a member’s project access:
- Go to your Netlify Team dashboard.
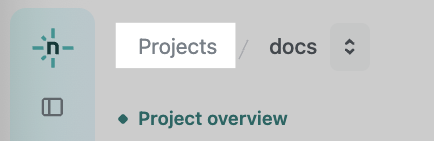
- From your project dashboard, in the top left, choose Projects next to your project name.
- From your project dashboard, in the top left, choose Projects next to your project name.
-
Go to Members in the left navigation.
-
From the Team members list, find the member and select .
-
Update the member’s project access and confirm your changes.
These changes will take effect immediately.
Check a member’s role on a project
Section titled “Check a member’s role on a project”As an Owner, to find out which members can access a particular project:
- Go to Projects, select your project, and visit Project configuration Project members.
Check a member’s roles on a team
Section titled “Check a member’s roles on a team”From your team dashboard, you can find details about a member’s project access and roles across your Netlify team’s projects.
As an Owner, to check members’ roles in a team:
- Go to your Netlify Team dashboard.
- From your project dashboard, in the top left, choose Projects next to your project name.
- From your project dashboard, in the top left, choose Projects next to your project name.
-
Go to Members in the left navigation.
-
Next to the member you want more permission details for, select Options, then View details.
You’ll find details about which projects this person has access to and their roles on those projects.
If you have specific questions about a member’s roles or project access, you can check their access on a specific project or reach out to Netlify Support.
Did you find this doc useful?
Your feedback helps us improve our docs.